How to Use a Foam Roller Correctly (Science-Backed Guide)
⚠️ Disclaimer: The information in this article is for general educational purposes only and does not constitute medical, nutritional, or professional fitness advice. Individual results may vary. Always consult a qualified healthcare professional or certified fitness trainer before starting any new exercise program, changing your diet, or making decisions about injury treatment or recovery. If you experience pain, discomfort, or any unusual symptoms during exercise, stop immediately and seek professional guidance.

The Science Behind Foam Rolling
Understanding why foam rolling works — and equally importantly, why it does not work in the ways it is often claimed to — enables the technique decisions that distinguish effective rolling from ineffective rolling.
I used foam rolling as a random thing I did occasionally until I understood the mechanism — after that I treated it as a deliberate tool with specific applications.
What Foam Rolling Actually Does to Tissue
Foam rolling produces its effects through several distinct physiological mechanisms that operate simultaneously during a rolling session, and understanding each mechanism helps calibrate the technique decisions — pressure, speed, duration — that maximize the relevant effects. The primary mechanical mechanism is viscoelastic deformation: when sustained compressive force is applied to muscle tissue, the viscoelastic properties of the tissue allow it to gradually deform under the load — a property called “stress relaxation” — reducing the passive resistance the tissue offers to elongation and temporarily improving its extensibility. This viscoelastic mechanism requires sustained pressure (20 to 30 seconds minimum at a given location) to allow the time-dependent deformation to occur, explaining why rapid rolling back and forth across a muscle produces minimal tissue change compared to sustained-pressure techniques. The second primary mechanism is neurological: sustained pressure on a muscle activates the Golgi tendon organs embedded in the musculotendinous junction, which send inhibitory signals to the muscle’s motor neurons — reducing the muscle’s resting activation level through the autogenic inhibition reflex. This neurological relaxation occurs at lower pressure levels than mechanical deformation requires, explaining why even moderate foam rolling pressure produces immediate tension reduction that exceeds what the mechanical deformation alone would predict. A third mechanism — direct improvement in local circulation through the mechanical pumping of blood and lymph that tissue compression produces — contributes to both immediate recovery benefits and the longer-term tissue health improvements that consistent rolling supports.
What Foam Rolling Does NOT Do
Several widely repeated claims about foam rolling’s mechanisms are not supported by the current research — and understanding these misconceptions prevents the misapplication of foam rolling to contexts where it cannot produce the claimed benefit. The most important misconception: foam rolling does not break up “fascia adhesions” or “scar tissue” in the sense that the popular explanation describes. The forces required to mechanically alter fascial tissue structure are far beyond what body weight rolling against a foam cylinder can produce — research on fascial mechanics shows that the compressive forces available through self-myofascial release are insufficient to produce permanent structural changes in the dense collagenous fascial layers. The changes that foam rolling produces are primarily neurological and circulatory rather than structural — explaining why the benefits are real but also why they are relatively transient without repeated application. The second important misconception: foam rolling does not “flush lactic acid” from muscles. Lactate — the metabolic byproduct of anaerobic glycolysis — is cleared from muscle tissue within 60 to 90 minutes after exercise cessation through normal metabolic processes, regardless of whether foam rolling is performed. The soreness that persists for 24 to 72 hours after training (DOMS) is not caused by lactic acid accumulation but by the inflammatory response to exercise-induced muscle damage — a distinction that changes how foam rolling’s DOMS-reducing effects should be understood (it modulates the inflammatory response rather than removing a biochemical irritant). Rolling the IT band does not “lengthen” it — the IT band is a dense tendinous structure whose mechanical properties do not allow the lengthening that foam rolling pressure can produce. The effective intervention for IT band-related pain targets the TFL and gluteus maximus muscles attached to the IT band’s proximal end, as described in the section on lower extremity rolling.
The Research on Foam Rolling and Outcomes
The scientific evidence for foam rolling’s specific outcomes provides the realistic expectations framework that prevents both dismissing the tool (the effects are real and meaningful) and overestimating it (the effects are moderate rather than transformative). For range of motion improvement: meta-analyses of foam rolling research show consistent, statistically significant improvements in joint range of motion following foam rolling sessions — an average increase of 4 to 8 degrees across commonly assessed joints in studies using standardized rolling protocols. The range of motion improvements are acute (lasting approximately 30 to 90 minutes after a single rolling session) rather than permanent, and consistent daily rolling is required to produce the cumulative improvements in chronic tightness that sustained practice provides. For DOMS reduction: meta-analyses show that foam rolling performed post-exercise reduces DOMS severity ratings by approximately 20 to 40 percent compared to no intervention across multiple studies and muscle groups — a meaningful but not complete reduction that makes training more comfortable in the days following intense sessions. For performance: foam rolling before training (pre-exercise rolling) improves sprint speed, jump height, and agility performance metrics modestly (1 to 3 percent improvements) compared to static stretching that reduces these metrics, while post-exercise rolling does not measurably improve subsequent session performance directly but may do so indirectly by reducing the soreness that impairs training quality in the next session. The overall evidence supports foam rolling as a genuinely beneficial recovery tool with meaningful but moderate effects — effects that are maximized by the technique decisions this guide describes.
Types of Foam Rollers and Their Differences
The foam roller market offers a range of products varying in density, texture, diameter, and length — and the differences between them affect the rolling experience and outcomes in practical ways. Density is the most important variable: soft foam rollers (typically white, low-density EVA foam) compress significantly under body weight, distributing pressure broadly and producing lower peak tissue stress — appropriate for beginners, individuals with high tissue sensitivity, and acute recovery rolling where pain avoidance is a priority. Firm foam rollers (typically black or dark-colored, high-density EVA or EPP foam) maintain their shape under body weight and deliver consistent, targeted pressure — appropriate for experienced rollers, athletes with low tissue sensitivity, and targeted work on dense muscle groups. Grid-textured rollers (featuring raised ridges and channels on the surface) concentrate pressure at the ridged contact points while the channels allow blood flow in the non-contacted areas — producing a more varied pressure experience that some practitioners find more effective for specific trigger point work. Vibrating foam rollers (with motorized internal vibration) add vibratory stimulus to the standard compressive mechanism, with preliminary research suggesting that vibration may enhance the neurological relaxation effects beyond what compression alone produces — though the magnitude of the additional benefit over standard rollers is modest in most studies. For most recreational athletes, a high-density smooth or grid roller provides the optimal combination of effective pressure delivery and durability — the expensive vibrating models provide marginal additional benefit over significantly higher-quality standard rollers at a fraction of the cost.
Pre-Rolling vs. Post-Rolling: Timing Effects
The timing of foam rolling — whether performed before or after training, or as a standalone session — affects which of the rolling mechanisms are most relevant and which technique approach is most appropriate. Pre-exercise rolling (performed as part of the warm-up, 5 to 10 minutes before training) targets the range of motion improvement and neuromuscular activation preparation that dynamic warm-up benefits require — the acute range of motion increases from rolling provide the joint mobility that subsequent movement-based warm-up can explore, and the reduction in passive tissue tension creates the movement freedom that warm-up activities need to be effective. Pre-exercise rolling should use moderate pressure and moderate duration (20 to 30 seconds per area) — the goal is tissue preparation, not deep tissue work that creates the local fatigue and discomfort that heavy rolling produces. Post-exercise rolling (performed within 30 to 60 minutes of completing training) targets the DOMS reduction and recovery acceleration that constitute the most important evidence-based rolling benefits — here, deeper pressure and longer hold times (30 to 60 seconds per area) can be applied because training is complete and the tissue stress that deep rolling produces is not a concern for the current session. Standalone rolling sessions (performed on recovery days, separate from any training) provide the most complete opportunity for thorough, unhurried tissue work across all major muscle groups without time pressure — ideal for addressing the accumulated tension that training has produced and for the thoracic and hip mobility work that time-constrained training day rolling cannot adequately address.
The relationship between foam rolling frequency and cumulative tissue quality improvement follows a dose-response pattern that reward consistent practice over infrequent intensive sessions. Research on stretch frequency and connective tissue adaptation shows that daily brief sessions (5 to 10 minutes) produce greater cumulative range of motion improvement over 4 to 8 weeks than equivalent total time invested in 2 to 3 weekly longer sessions — because the tissue’s viscoelastic state is maintained near its post-rolling extensibility throughout the week rather than returning to its tightest state between infrequent sessions. This frequency advantage means that athletes who roll daily for 10 minutes accumulate meaningfully more tissue quality improvement than those who roll twice weekly for 30 minutes, despite investing less total time. The practical implication for building a foam rolling habit: prioritize daily consistency over session length — a 10-minute daily rolling practice is more valuable than a 30-minute weekly one, and the habit architecture principles described in the lifestyle section of this guide series (habit stacking, consistent trigger, minimum viable session) apply directly to establishing the daily rolling practice that produces cumulative results rather than the intermittent practice that produces only temporary relief.
| Mechanism | How It Works | Optimal Technique |
|---|---|---|
| Viscoelastic deformation | Tissue gradually yields under sustained load | Sustained pressure 20–30+ sec per area |
| Autogenic inhibition | GTO activation reduces muscle resting tone | Moderate pressure, slow movement |
| Circulatory enhancement | Mechanical pumping of blood and lymph | Consistent pressure across full muscle length |
| Pain gate modulation | Pressure signals inhibit pain processing | Any pressure above pain threshold activates |
Research published in the Journal of Athletic Training found that foam rolling for 60 to 120 seconds per muscle group significantly increases range of motion, reduces perceived muscle soreness, and improves blood lactate clearance following intense training — with benefits observed both before training as a warm-up tool and after training as a recovery modality.

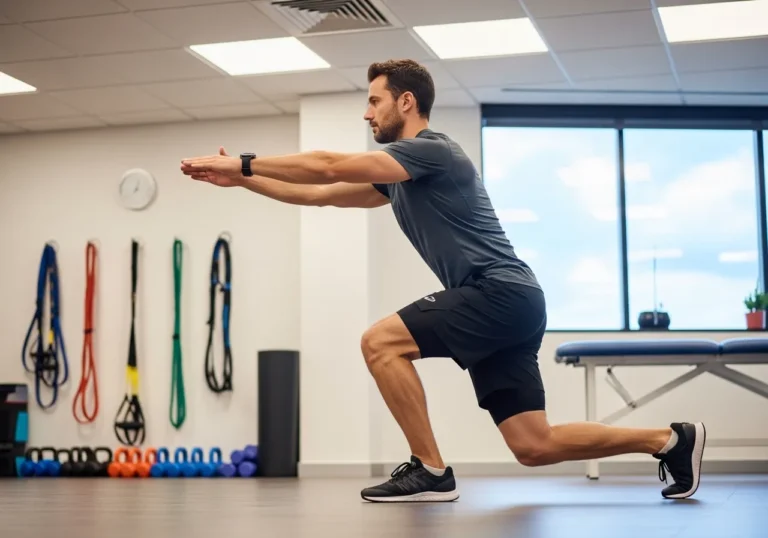
The Correct Foam Rolling Technique
The technique principles that apply across all muscle groups determine whether rolling produces its full therapeutic benefit or merely provides the sensation of doing something useful without the underlying tissue change.
Rolling too fast was my biggest mistake for the first year I owned a foam roller — slowing down to 1 inch per second and pausing on tender spots changed the entire effect.
The Correct Pressure: Finding Your Window
The most common foam rolling mistake is applying either too little pressure (insufficient to activate the autogenic inhibition and viscoelastic mechanisms) or too much pressure (producing the protective guarding that prevents the tissue release the rolling is attempting to achieve). Finding the correct pressure window is the foundational skill of effective foam rolling — and the research supports a surprisingly specific guidance on where that window lies. The target pressure sensation is 4 to 7 on a 10-point discomfort scale — the range often described as “hurts so good” or “productive discomfort.” Below a 4 (mild pressure that feels like a pleasant massage with no tissue tension sensation), the mechanical and neurological mechanisms are insufficiently activated to produce meaningful tissue change. Above a 7 (sharp pain, strongly aversive sensation, involuntary muscle guarding), the protective muscle contraction that the nervous system initiates in response to excessive pressure actually opposes the autogenic inhibition that effective rolling requires — the muscle tenses against the pressure rather than releasing under it, producing a rolling experience that feels intense but produces minimal tissue change. Within the 4 to 7 range, the tissue will initially resist the pressure and then gradually yield — the release sensation occurring over 20 to 40 seconds that indicates the autogenic inhibition and viscoelastic deformation are occurring as intended. Modulating body weight (more weight through the rolled limb increases pressure; offloading by supporting weight on the opposite limb or the hands reduces pressure) allows precise pressure calibration within this therapeutic window regardless of the roller’s density.
Rolling Speed: Slow Is Effective, Fast Is Not
Rolling speed is the variable that most immediately distinguishes effective from ineffective foam rolling technique — and the research evidence on this variable is unambiguous: slow, controlled movement (approximately 1 to 2 inches per second, covering a 10-centimeter length in approximately 5 to 10 seconds) produces significantly greater range of motion and DOMS-reduction outcomes than the fast, rhythmic rolling that most gym-goers instinctively perform. The mechanism explanation: the viscoelastic deformation mechanism described in section 1-1 requires time — the tissue must be under sustained load for the time-dependent deformation to accumulate. Rapid rolling moves the pressure point before the tissue has time to respond viscoelastically, eliminating the primary mechanical mechanism while still providing the less effective circulatory stimulation that rapid rolling’s movement produces. The practical technique: begin at the distal end of the muscle (the end closer to the knee or ankle for lower extremity muscles), apply the target pressure, and move proximally (toward the hip or torso) at the described slow rate — covering the full muscle length in a single slow pass, then returning to the start and repeating 2 to 3 times. Pausing for 20 to 30 seconds at locations of increased tenderness (the “trigger point hold” technique) further enhances the release at those specific areas of accumulated tension.
Trigger Point Holds: When to Stop and Sustain
The trigger point hold — stopping on a point of localized increased tenderness and sustaining pressure at that location for 20 to 30 seconds — is the most targeted and often the most effective rolling technique for addressing the specific areas of accumulated muscle tension that contribute most to soreness and mobility restriction. Trigger points — hyperirritable spots within muscle tissue that are locally tender to compression and that may refer discomfort to adjacent areas — are identified during foam rolling by their characteristic sharp tenderness when the roller contacts them, against a background of more diffuse muscle tension that the surrounding tissue produces. The correct trigger point hold technique: when the roller contacts a particularly tender spot during the slow rolling movement, stop at that location and sustain the pressure for 20 to 30 seconds while breathing slowly and consciously relaxing the surrounding tissue. The sensation will typically reduce from its initial sharp intensity to a more tolerable, diffuse tension sensation within 15 to 25 seconds as the autogenic inhibition response reduces the trigger point’s neurological activity. After this release, continue rolling proximally to the next area, address any additional trigger points encountered, and perform a final slow pass across the full muscle length. Trigger point holds should be used selectively — targeting the 2 to 3 most tender locations in each muscle group rather than pausing at every minor tenderness variation — to keep the total session time to 20 to 30 minutes across all muscle groups.
Breathing During Foam Rolling
Conscious breathing during foam rolling — specifically the slow, diaphragmatic breathing pattern that activates the parasympathetic nervous system — enhances the neurological relaxation mechanism that autogenic inhibition provides by creating the systemic relaxation environment that amplifies the local inhibitory signals the rolling generates. The mechanism: slow exhalation activates the vagus nerve’s parasympathetic pathway, reducing sympathetic nervous system tone and the corresponding muscular activity that sympathetic activation maintains. When rolling produces the 4 to 7 range discomfort that effective rolling requires, the natural instinct is to tense against the pressure and hold the breath — a sympathetic activation response that opposes the autogenic inhibition the rolling is attempting to produce. Consciously overriding this tensing response through slow, deliberate breathing — inhaling for 4 counts, exhaling for 6 to 8 counts — uses respiratory mechanics to facilitate the tissue release that the rolling position has created. The most effective breathing cue during trigger point holds: with each exhalation, consciously attempt to “breathe into” the point of pressure — visualizing the breath directing relaxation to the specific location — while allowing the roller to sink slightly deeper into the tissue as the exhalation reduces muscle tone. This combined rolling-breathing technique consistently produces more complete tissue release than rolling without breath awareness, and is the approach used by most physical therapists and massage therapists when applying manual pressure for the same autogenic inhibition effects.
Duration and Session Structure
The optimal rolling session duration — long enough to produce meaningful tissue change across the target muscle groups but short enough to be consistently executable within a training or recovery schedule — is a practical question that the research on dose-response effects informs without fully resolving. Current research shows that 60 to 120 seconds of foam rolling per muscle group produces significantly greater range of motion improvements than 30 seconds, but that extending beyond 120 seconds per muscle group produces diminishing returns in most studies. A complete lower body rolling session (quadriceps, hamstrings, glutes, calves, hip flexors, IT band region) therefore requires approximately 10 to 20 minutes for thorough coverage at these durations — a time investment that is realistic for dedicated recovery sessions or post-training cool-down but challenging as a pre-workout routine where time is more limited. The recommended session structure for a complete recovery rolling session: begin with the area of greatest restriction or soreness (which benefits most from the unhurried, deliberate technique that session-opening freshness allows); progress through each major muscle group with 60 to 90 seconds of total rolling time per area; pause for trigger point holds as described above; and conclude with a final light-pressure pass across each rolled area to restore normal circulation and sensation after the deep work. A rolling session following this structure across all major lower extremity and back muscle groups requires 20 to 30 minutes — an investment that produces the recovery benefits the evidence supports when executed with the technique quality this section describes.
The concept of “melt” — a term used by manual therapists to describe the sensation of tissue gradually yielding under sustained pressure — is the experiential landmark that indicates effective foam rolling technique is producing the viscoelastic deformation and autogenic inhibition that result in genuine tissue change. When rolling technique is correct — pressure in the 4 to 7 range, slow movement, trigger point holds with conscious breathing — the sensation at a tender location transitions over 20 to 40 seconds from sharp, aversive pressure to a softer, more diffuse tension that then gradually reduces further. This progression from sharp to diffuse to releasing represents the autogenic inhibition sequence: initial pressure activating the GTO inhibitory reflex, followed by progressive reduction in motor unit firing as the reflex is sustained, followed by the tissue release as resting tension normalizes to below pre-rolling levels. Learning to recognize the “melt” sensation and to continue holding at a specific location until it occurs — rather than moving on when the initial sharpness signals discomfort — is the experiential skill that distinguishes practitioners who produce lasting tissue change from those who merely stimulate the tissue without achieving the neurological release that effective rolling requires. Patience at tender spots is the single most important behavioral change most foam rollers can make to improve their results immediately.
The rolling direction — proximal to distal (toward the extremities) versus distal to proximal (toward the torso) — produces subtly different circulatory effects but equivalent neurological and mechanical effects, and the research does not support strong preference for either direction in the autogenic inhibition mechanism. The traditional advice to roll “toward the heart” (distal to proximal) for lymphatic and venous drainage benefits is physiologically rational — lymphatic and venous flow both run proximally, and rolling in this direction assists their clearance — though the mechanical effect on muscle tissue tension is equivalent in either direction. For recovery-focused rolling where circulation enhancement is a secondary goal, rolling distal to proximal (ankle to hip for the legs, wrist to shoulder for the arms) adds the circulatory benefit without compromising the mechanical and neurological effects that are the rolling’s primary mechanisms. For pre-workout rolling where activation rather than drainage is the goal, rolling proximal to distal (hip to ankle) covers the tissue in the direction that prepares it for the distal-to-proximal force transmission of most athletic movements — a minor difference that experienced rollers may notice but that beginners need not prioritize over the more impactful variables of pressure, speed, and duration.
| Technique Variable | Optimal Approach | Common Mistake |
|---|---|---|
| Pressure | 4–7/10 discomfort (productive tension) | Too light (no effect) or too heavy (guarding) |
| Speed | Slow (1–2 in/sec), deliberate movement | Fast rhythmic rolling back and forth |
| Trigger points | Stop and hold 20–30 sec at tender spots | Rolling through all tender spots without pausing |
| Breathing | Slow diaphragmatic breathing, exhale into pressure | Holding breath or tensing against pressure |
| Duration | 60–120 sec per muscle group | 10–15 sec per area (insufficient time) |
Research published in the Physical Therapy journal found that the McGill Big Three exercises — curl-up, side plank, and bird dog — specifically target the deep spinal stabilizers most responsible for lower back support, with a 6-week program producing significant reductions in both pain intensity and functional disability in people with chronic non-specific lower back pain.

Upper Body Foam Rolling: Technique for Each Muscle Group
Upper body foam rolling addresses the specific tension accumulation patterns that pressing, pulling, and carrying movements produce — with each muscle group requiring a distinct positioning approach.
My thoracic spine had been stiff for so long I assumed it was just how I was built; two weeks of consistent upper back rolling produced mobility I hadn’t had in years.
Thoracic Spine and Upper Back
Thoracic spine foam rolling — mobilizing the thoracic vertebrae into extension over the roller — is one of the most impactful rolling practices for desk workers and overhead athletes, addressing the thoracic kyphosis (rounded upper back) that prolonged sitting and anterior-dominant training both produce. The technique: sit on the floor with the foam roller placed horizontally across the upper back, just below the shoulder blades. Cross the arms over the chest (or place hands behind the head, elbows forward) to minimize shoulder blade interference with the roller’s contact on the thoracic vertebrae. Support the head with the hands if using the head-behind technique. From this position, gently extend the thoracic spine backward over the roller — allowing the thoracic extension that the roller provides as a fulcrum point. Hold the extension for 5 to 10 seconds at each vertebral level, then shift the roller approximately one vertebra’s width (2 to 3 centimeters) toward the head and repeat. Work from the lower thoracic (at the shoulder blade tips, approximately T7-T8) to the upper thoracic (approximately T2-T3 at the top of the shoulder blades) — never extending below T12 into the lumbar spine, where extension over a roller compresses the lumbar facet joints rather than mobilizing the restricted thoracic segments that are the actual target. The sensation during thoracic extension rolling should be a stretching feeling in the upper back — not the sharp, localized pain that lumbar facet compression produces if the roller is positioned too low. For individuals with significant thoracic restriction, audible (and often palpable) thoracic segment releases during the extension mobilization are common and normal — the release reflects the restoration of normal joint play at restricted thoracic segments, not a pathological event.
Latissimus Dorsi and Teres Major
The latissimus dorsi — the large flat muscle of the back that extends from the lower spine to the upper arm — is frequently tight in individuals who perform high volumes of pull-up, row, and lat pulldown training, producing the shoulder internal rotation and overhead reach restriction that lat tightness creates. Foam rolling the lat requires a side-lying position that accesses the muscle’s depth more effectively than any seated or prone approach. Technique: lie on one side with the arm extended overhead, placing the foam roller under the armpit and the lateral side of the upper back — the contact area is between the arm and the back, targeting the lat’s axillary (armpit) portion. Using the lower leg for support (slightly bent knee on the floor), apply body weight into the roller and perform slow movements from the axillary region distally along the lateral chest wall to approximately the level of the lower ribs, covering the lat’s length. The lat is a broad, thin muscle whose tension is not always identified as a specific “knot” but rather as a diffuse restriction across its length — apply slow, consistent pressure along the entire muscle length rather than exclusively targeting discrete trigger points. Teres major — the smaller muscle just below the axilla (armpit) that works synergistically with the lat — is accessed in the same position by rolling specifically in the armpit region rather than along the lateral chest wall, addressing the often-overlooked companion to lat tightness that contributing shoulder restriction involves.
Pectorals and Anterior Shoulder
Pectoral tightness — common in individuals who perform high-volume bench pressing and pushing exercises without adequate horizontal rowing balance — creates the rounded shoulder posture and anterior shoulder pain that anterior-dominant training programs consistently produce. Foam rolling the pectoral muscles requires a prone (face-down) or side-lying position that places the roller against the chest or front-of-shoulder area. Technique: lie face-down with the foam roller placed diagonally under one side of the chest, between the shoulder and the sternum — the roller position should be at approximately 45 degrees to the body rather than parallel or perpendicular. Extend the arm of the rolled side forward (overhead position) to thin the pectoral tissue and improve roller access to the muscle belly. Apply body weight onto the roller and perform slow movements across the muscle — from the sternal attachment at the medial chest outward to the shoulder region. The pectoral major has three portions (clavicular head, sternocostal head, and abdominal head) at slightly different angles — covering the full area from just below the clavicle to the lower chest margin ensures complete coverage. An alternative approach for individuals who find the prone position uncomfortable: use a lacrosse ball against a wall (placing the ball between the pectoral and the wall, then leaning into it with controlled pressure) provides the same tissue access in a more controllable position where body weight can be easily adjusted by changing the degree of leaning.
Upper Trapezius and Neck
Upper trapezius tightness — the characteristic shoulder and neck tension that stress, computer work, and overhead pressing accumulate — is one of the most universally experienced muscle tension presentations, and foam rolling combined with lacrosse ball work provides an accessible self-treatment approach. Standard foam roller access to the upper trapezius is limited by the roller’s diameter — the curvature of the roller prevents direct access to the upper trap’s specific location between the neck and shoulder. The most effective approach for upper trapezius uses a lacrosse ball or tennis ball rather than the foam roller: placing the ball on a firm surface (floor or against a wall), positioning the upper trapezius against the ball, and applying sustained pressure while performing slow head rotations that move the muscle across the ball contact point. The floor technique: lie supine (face up) with the ball placed under the upper trap, approximately 2 to 3 centimeters lateral to the spine at the level of C7 to T1 (the base of the neck); allow full body weight onto the ball and perform slow side-to-side head rotations to create movement across the ball. The direct pressure of 6 to 8 kilograms of head weight against the lacrosse ball provides sufficient force to activate the autogenic inhibition mechanism without requiring the additional body weight that larger muscle groups need. The neck itself — the cervical musculature — should be addressed with the lacrosse ball technique only, never with foam roller rolling, as the cervical spine is not a structure designed for the compressive and rotational forces that foam rolling would impose on it.
Forearms and Wrists for Pressing-Dominant Athletes
Forearm tightness — in both the flexor (palm-side) and extensor (back-of-hand side) compartments — accumulates significantly in individuals performing high volumes of barbell and dumbbell pressing, grip-intensive pulling movements, and any activity involving sustained wrist flexion or extension under load. The forearm muscles are accessible and responsive to foam rolling in ways that many athletes overlook in favor of exclusively targeting the larger proximal muscle groups. Technique for forearm flexors: sit in a chair with the forearm placed on the foam roller, palm up, with the roller resting on the table or floor surface — pressing the forearm into the roller while slowly rotating the wrist through pronation and supination moves the muscle across the roller contact point, addressing the length of the flexor compartment. Technique for forearm extensors: repeat with the forearm palm-down, using the same slow roller coverage from the wrist to just below the elbow. The small diameter of the forearms makes a smaller rolling tool — a lacrosse ball or a barbell (the bar itself, not the loaded weight) — more effective than a standard foam roller for reaching the specific forearm muscle bellies that the roller’s curvature passes over. Regular forearm rolling (2 to 3 minutes per forearm, twice weekly) prevents the grip fatigue and wrist pain that accumulated forearm tension produces in heavy training programs, maintaining the tissue health that sustained pressing and gripping demands require.
The role of muscle activation during foam rolling — actively contracting the muscle being rolled versus keeping it completely relaxed — is a nuanced technique consideration that produces different effects depending on which mechanism the rolling is attempting to activate. For autogenic inhibition (the neurological relaxation mechanism), the muscle should be as relaxed as possible — active contraction opposes the GTO inhibitory signal by raising motor unit firing above the level that the GTO’s inhibitory output can overcome. For circulation enhancement, brief intermittent contractions (contract for 2 to 3 seconds, relax for 5 to 10 seconds) while the muscle is under roller pressure produce the “muscle pump” action that drives blood and lymph through the tissue more effectively than sustained passive pressure alone. The practical application: during the sustained trigger point hold, maintain complete muscle relaxation and focus on the breathing described in section 2-4; during the slow rolling passes between trigger points, brief gentle contractions and relaxations of the muscle can be incorporated to enhance circulation without compromising the trigger point work that sustained pressure provides. This combination — relaxed holds at tender points, gentle contract-relax during movement passes — produces the optimal balance of neurological and circulatory rolling mechanisms within a single rolling session.
| Muscle Group | Position | Key Cue | Duration |
|---|---|---|---|
| Thoracic spine | Seated, roller horizontal across upper back | Extend over roller level by level, T7→T2 | 5–10 sec per level |
| Latissimus dorsi | Side-lying, roller under armpit | Roll from axilla to lower ribs slowly | 60–90 sec per side |
| Pectorals | Prone, roller diagonal under chest | Arm extended overhead, full sternal-to-shoulder coverage | 60–90 sec per side |
| Upper trapezius | Supine, lacrosse ball under upper trap | Head rotations across ball contact | 30–60 sec per side |
| Forearms | Seated, forearm on roller/ball | Both flexor and extensor sides | 60–90 sec per arm |
A systematic review in Sports Medicine confirmed that consistent foam rolling practice over 4 to 8 weeks improves tissue extensibility and movement quality in trained individuals, with the greatest benefits observed in the quadriceps, IT band, thoracic spine, and plantar fascia — the areas most commonly restricted by repetitive training patterns.
According to the American College of Sports Medicine, regular low-to-moderate intensity aerobic exercise — particularly walking — is among the most evidence-supported treatments for chronic lower back pain, reducing pain intensity, improving functional capacity, and lowering the risk of future episodes more reliably than bed rest or passive treatments.

Lower Body Foam Rolling: Technique for Each Muscle Group
The lower body contains the largest, most commonly trained, and most chronically tight muscle groups — making lower body foam rolling the most impactful portion of any rolling routine for gym-active adults.
The IT band work felt brutal at first — genuinely painful — but the reduction in knee tightness after long runs made it non-negotiable in my recovery stack.
Quadriceps and Hip Flexors
The quadriceps — the four-headed muscle group at the front of the thigh — is one of the most important foam rolling targets for anyone performing significant squatting, cycling, running, or stair-climbing, and its rolling technique requires careful attention to the distinction between the different heads to ensure complete coverage. Technique: begin in a prone position (face-down), with the foam roller placed under one or both thighs at the level of the mid-thigh. Support the upper body on the forearms (plank-like position) and perform slow rolling movements from just above the knee to just below the hip crease — covering the entire quadriceps length. To isolate the individual heads: the rectus femoris (central quadriceps, which crosses both the hip and the knee) is best targeted directly from the prone position; the vastus lateralis (outer quad) is accessed by slightly rotating the thigh inward (internally rotating the hip) to bring the outer quad surface in contact with the roller; the vastus medialis (inner quad, the VMO) is accessed by rotating outward (externally rotating the hip) to bring the inner quad surface against the roller. The hip flexors — particularly the iliopsoas, which lies deep to the anterior hip — are challenging to access with a standard foam roller because the surrounding structures (femoral nerve, femoral vessels) require careful positioning to avoid compression. The TFL (tensor fascia latae) at the outer hip is more accessible: in the side-lying position with the roller at the outer hip, just anterior (forward) of the hip bone, slow rolling from the iliac crest to the upper thigh targets the TFL and the proximal attachment of the IT band where tension is most amenable to manual release.
Hamstrings
The hamstrings — the three-headed posterior thigh muscle group (biceps femoris, semitendinosus, semimembranosus) responsible for knee flexion and hip extension — are chronically shortened in individuals who spend significant time seated and who perform hip-dominant training without adequate hamstring flexibility maintenance. Foam rolling the hamstrings is complicated by the difficulty of applying adequate pressure: in the seated rolling position (sitting on the roller with the hands supporting on the floor behind), the hamstring sits on top of the roller and body weight is partially supported by the arms — limiting the pressure available to the tissue. The most effective hamstring rolling technique addresses this limitation through positioning modifications. Elevated rolling: place the roller on a bench, box, or sturdy elevated surface, and position the hamstring against the elevated roller from a standing or semi-standing position — the increased distance between the roller and the floor allows the hamstring to be loaded from above while the leg’s weight applies direct pressure, producing higher hamstring contact pressure than floor-based rolling allows. Alternatively: in the standard seated position on the roller, crossing one ankle over the opposite knee (figure-4 position) allows one leg to be fully supported while the full body weight loads the opposite hamstring against the roller — dramatically increasing the effective pressure available. Roll slowly from just above the back of the knee to the gluteal crease (where the hamstring meets the glute), pausing at the frequent trigger points that the proximal hamstring near the ischial tuberosity contains.
Glutes and Piriformis
The gluteal complex — the three gluteal muscles (maximus, medius, minimus) plus the deep hip rotators including the piriformis — is one of the most important rolling targets for both lower back pain management and lower extremity performance, and requires both the foam roller for the larger gluteal mass and a smaller ball for the deep piriformis access that the roller’s curvature cannot achieve. Glute maximus technique: sit on one side of the roller, with the same-side ankle crossed over the opposite knee (figure-4 position) to shift weight to the glute — this position simultaneously stretches the external rotators and allows the full body weight to load the glute against the roller. Roll slowly from the ischial tuberosity (sit bone) to the posterior aspect of the greater trochanter (outer hip), covering the full gluteal mass, pausing at the dense tender spots that the posterior hip frequently contains. Piriformis technique: the piriformis lies deep within the gluteal mass and requires the concentrated pressure of a lacrosse ball or small firm ball rather than the foam roller to access it effectively. In the same figure-4 seated position, place the ball under the outer buttock region (approximately 5 to 7 centimeters lateral to the tailbone and slightly below the iliac crest) — this position directly loads the piriformis against the ball. Allow full body weight onto the ball and perform slow hip flexion and extension movements that roll the piriformis across the ball contact point, pausing at the characteristically intense trigger points that the piriformis frequently contains. Sustained pressure on an active piriformis trigger point (30 to 45 seconds) can produce the referred pain sensation down the posterior thigh that mimics sciatic nerve irritation — a normal response to piriformis trigger point pressure that indicates the trigger point has been accurately located.
IT Band Region: Rolling It Correctly
IT band rolling is among the most commonly performed and most commonly misapplied foam rolling practices — because the IT band itself, as described in section 1-2, cannot be lengthened or significantly altered by rolling, making direct IT band pressure an uncomfortable but ineffective approach that misses the actual targets that produce relief from IT band-related lateral thigh and knee pain. The correct approach: target the TFL (tensor fascia latae) at the outer hip and the gluteus maximus at the posterior hip, rather than the IT band mid-thigh region. TFL rolling: side-lying position with the roller just below the iliac crest on the outer hip — the TFL occupies the region between the iliac crest and the greater trochanter, approximately 10 to 15 centimeters in length. Apply body weight and roll slowly over this short region, pausing at tender spots that are common in the TFL of individuals with IT band tightness. If direct IT band pressure provides symptomatic relief (many individuals do experience temporary relief despite the absence of structural change), applying moderate pressure along the lateral thigh with the roller angled slightly forward of perpendicular to the thigh — targeting the vastus lateralis muscle that lies just anterior to the IT band — accesses the muscular tissue that the angled approach contacts while avoiding the purely compressive loading on the IT band that direct lateral thigh rolling applies.
Calves and Achilles Region
The calf complex — gastrocnemius (the prominent two-headed superficial calf muscle) and soleus (the deeper, flatter calf muscle beneath the gastrocnemius) — accumulates significant tension in runners, jumping athletes, and anyone who performs standing calf raises or high-heel footwear, producing the ankle dorsiflexion restriction that contributes to squatting mechanics problems as described in the previous guide. Calf rolling technique: sit on the floor with the foam roller under the calf, hands supporting behind for body weight control. For the gastrocnemius: position the roller at the mid-calf, legs extended, and roll from just above the heel to just below the back of the knee with slow, deliberate strokes — performing ankle flexion and extension (pointing and flexing the foot) while rolling to create relative muscle-over-roller movement that provides deeper access to the muscular tissue than static rolling achieves. For the soleus (which lies beneath the gastrocnemius and requires the gastrocnemius to be relaxed to access): bend the knee of the rolled leg to approximately 90 degrees — this shortens and relaxes the gastrocnemius, allowing the roller to contact the deeper soleus more effectively than straight-leg rolling allows. The Achilles tendon itself — the thick tendon connecting the calf muscles to the heel — should not be rolled directly; tendons do not respond beneficially to compression, and direct Achilles tendon rolling risks aggravating or damaging the already-stressed tendon tissue. Roll to within 5 to 7 centimeters above the heel and redirect to the calf muscle belly above.
Tibialis Anterior and Shins
The tibialis anterior — the prominent muscle on the outer shin that dorsiflexes and inverts the ankle — is neglected in most rolling routines despite being one of the most chronically stressed muscles in runners, cyclists, and anyone who performs high-volume walking or hiking on uneven terrain. Tibialis anterior tightness contributes to the shin splints presentation and to the ankle dorsiflexion restriction that squatting mechanics depend on. Rolling technique: begin in a quadruped (hands and knees) position, with the foam roller positioned under one shin on the outer (tibial) side. Apply body weight by leaning forward and lowering the shin onto the roller, then perform slow rolling movements from just below the knee to just above the ankle — covering the tibialis anterior’s full length. The shin bone itself (tibia) lies on the medial side of the shin and should not be rolled (bone compression produces bruising and pain without tissue benefit); maintaining the roller on the outer (lateral) side of the shin ensures the tibialis anterior muscle belly, not the bone, receives the rolling pressure. For individuals with lower volume of shin tissue, a lacrosse ball provides more concentrated access to the tibialis anterior’s trigger points than the foam roller’s broader contact area. A brief rolling session targeting both the calves and the tibialis anterior (the antagonist pair that controls ankle movement) before and after running sessions significantly reduces the shin and calf tension accumulation that high-mileage running consistently produces.
| Muscle Group | Position | Key Technique | Duration |
|---|---|---|---|
| Quadriceps | Prone, roller under thigh | Rotate hip to cover all 4 heads | 60–90 sec per leg |
| Hamstrings | Seated; cross ankle for extra weight | Roll proximal ham near sit bone | 60–90 sec per leg |
| Glutes | Seated, figure-4; lacrosse ball for piriformis | Full body weight on one glute | 60–90 sec per side |
| IT band region | Side-lying; target TFL at outer hip | Roll TFL (below iliac crest), not mid-thigh | 45–60 sec per side |
| Calves | Seated, roller under calf; bent knee for soleus | Ankle pumping while rolling; avoid Achilles | 60–90 sec per leg |
| Tibialis anterior | Quadruped, roller under outer shin | Outer shin only, not bone | 45–60 sec per leg |

Foam Rolling for Specific Goals
Beyond the general rolling protocols, adapting the approach for specific training goals — mobility improvement, DOMS management, pre-competition preparation, and injury prevention — produces better outcomes than applying the same generic protocol regardless of the context.
Using the foam roller immediately pre-workout for activation felt different from using it post-workout for recovery — and timing it correctly made both applications work better.
Foam Rolling for Mobility Improvement
When the primary goal is improving joint range of motion — not just temporary pre-workout mobility but lasting improvements in chronic tightness — the foam rolling protocol must be paired with static or dynamic stretching to convert the temporary tissue compliance that rolling produces into lasting length change. The mechanism: foam rolling reduces passive muscle tension through the autogenic inhibition and viscoelastic mechanisms described in section one — creating a window of increased tissue extensibility that lasts approximately 30 to 90 minutes after rolling. Static stretching performed within this window — while the tissue is in its most receptive state — encounters less passive resistance than pre-rolling stretching and therefore achieves greater elongation at equivalent stretch intensity. Research directly comparing foam rolling alone, static stretching alone, and the combined foam rolling plus stretching sequence consistently shows that the combined approach produces the greatest acute range of motion improvements and the most durable chronic flexibility gains with consistent daily practice. The recommended sequence for mobility-focused rolling: roll the target muscle for 60 to 90 seconds (triggering tissue compliance); immediately follow with a static stretch of the same muscle held for 30 to 60 seconds; repeat the combination 2 to 3 times. This roll-then-stretch sequence produces cumulative mobility improvements with consistent daily practice that rolling or stretching alone achieves more slowly — making it the recommended approach for individuals whose primary rolling goal is addressing significant chronic tightness.
Foam Rolling for DOMS Management
Post-exercise DOMS management is the most strongly research-supported application of foam rolling — and the protocol for this specific goal differs from the general rolling approach in ways that optimize the DOMS-reduction mechanism. The optimal DOMS management rolling protocol: perform a complete rolling session of all trained muscle groups within 30 to 60 minutes of completing the training session, while the tissue is still warm and tissue extensibility is at its training-enhanced peak; use moderate pressure (5 to 6 out of 10) rather than the deep pressure that mobility-focused rolling uses, because the exercise-damaged tissue is more sensitive to pressure in the immediate post-training period and excessive pressure can increase rather than reduce inflammatory response in acutely damaged tissue; and emphasize full-length slow passes across the entire muscle belly rather than exclusive trigger point hold work, which is more appropriate for chronic tension management than for acute post-exercise tissue care. A second rolling session 12 to 24 hours post-training — when DOMS is beginning to peak — addresses the inflammatory accumulation of the early DOMS phase and consistently produces subjective DOMS reduction ratings 30 to 40 percent lower than no intervention in research studies. The 24-hour rolling session can use moderately deeper pressure than the immediate post-training session, as the acute tissue damage has begun the inflammatory-phase repair and the tissue is less acutely sensitive to compressive loading.
Pre-Workout Activation Rolling
Pre-workout foam rolling serves a different purpose than recovery rolling — preparing the tissue for movement rather than recovering from it — and the protocol should reflect this distinction. The pre-workout rolling goal is to reduce the passive tension in the muscles that will be required to move through full range of motion during the session, activating the autogenic inhibition mechanism that reduces resting muscle tone without the deep tissue work that creates the local fatigue and discomfort that impairs training. The pre-workout protocol: 15 to 20 seconds per area (shorter than recovery rolling), moderate pressure (4 to 5 out of 10), focused on the major muscle groups that will be primary movers in the session — 5 to 8 minutes total for a complete lower body or upper body pre-session rolling circuit. Pre-workout rolling should be immediately followed by dynamic warm-up movements that take the newly mobilized tissue through the movement ranges that the session will demand — the rolling reduces passive tissue resistance, and the subsequent dynamic warm-up recruits the musculature into the movement patterns where the improved extensibility can be expressed. This rolling-to-dynamic-warm-up sequence represents the most effective combination for session preparation currently supported by the evidence — producing greater initial range of motion than either approach alone and setting up the neuromuscular recruitment that effective training requires.
Foam Rolling for Injury Prevention
Injury prevention through foam rolling operates through two primary mechanisms: maintaining the tissue extensibility that allows movement quality to be sustained through high training volumes without the technique compensations that tightening tissue eventually forces; and identifying the developing tension accumulation and trigger point formation that, if unaddressed, progresses to pain and injury. The preventive rolling approach: perform a systematic full-body rolling assessment weekly — rolling each major muscle group at moderate pressure and noting the locations of new or increasing tenderness compared to the previous week’s baseline. Newly tender areas identified in this weekly assessment represent the developing tissue stress that, if addressed promptly with focused rolling and stretching, can be managed before it reaches the threshold that produces pain and limits training. Athletes who use this assessment-and-intervention approach consistently — identifying the weekly changes in tissue tension and addressing them within the weekly maintenance rolling session — demonstrate dramatically lower incidences of the training-related muscle tightness injuries (hamstring strains, calf tears, IT band flare-ups) that build gradually from the progressive tissue stress accumulation that weekly monitoring reliably detects in the weeks before symptoms appear.
Common Foam Rolling Mistakes That Limit Results
The most consequential mistakes that reduce foam rolling’s effectiveness deserve consolidation and review to ensure consistent technique quality. Rolling too fast (the most prevalent mistake): the entire mechanical mechanism of rolling requires sustained pressure, and rapid back-and-forth movement eliminates this entirely — switch to the 1 to 2 inch per second rate described in section two immediately and notice the difference in tissue response. Rolling the wrong structures: the IT band mid-thigh, the Achilles tendon, directly over bony prominences, and the cervical spine are structures that do not benefit from foam roller compression and that can be irritated or injured by it — redirect to the adjacent muscular structures and the rolling techniques described in sections three and four. Using inadequate density rollers: soft foam rollers that compress under body weight do not apply sufficient pressure to activate the autogenic inhibition mechanism — replace with a firm, high-density roller that maintains its shape under full body weight loading. Skipping the breathing: rolling without the conscious breathing described in section 2-4 allows sympathetic nervous system activation to oppose the tissue release — consciously using slow exhalation during trigger point holds dramatically improves the release quality. And inconsistent practice: the cumulative mobility improvements and tissue health maintenance that foam rolling provides require consistent daily or near-daily practice — occasional rolling sessions produce temporary effects that do not accumulate into the lasting tissue quality improvement that consistent practice delivers.
The specificity of foam rolling to training type represents an important principle for athletes whose training is specialized. Endurance athletes — runners, cyclists, triathletes — accumulate primary tension in the calves, hamstrings, hip flexors, and thoracic spine from the sustained repetitive loading and the forward-flexed position that endurance sports produce; their rolling routine should disproportionately emphasize these areas daily. Strength athletes — powerlifters, Olympic weightlifters — accumulate primary tension in the thoracic spine (from heavy bar positioning), quadriceps and hip flexors (from squatting), and upper back and lat complex (from pulling movements); their rolling routine should prioritize these structures in proportion to their training emphasis. Combat sports and team sport athletes accumulate asymmetric tension patterns from the rotational demands of their sport — and their rolling routine should include both sides of the most used rotation muscles (the obliques, hip rotators, and thoracic rotators that asymmetric sports develop) with deliberate attention to the asymmetry that the dominant side’s overuse produces. Identifying the specific tightness pattern that your training produces — through the regular assessment rolling described in section 5-4 — allows the precision targeting that produces better outcomes than the generic full-body rolling routine that treats all athletes’ needs identically despite their fundamentally different training loads and tissue stress patterns.
The relationship between foam rolling and performance enhancement — specifically, whether rolling before training improves performance outcomes beyond the warm-up effects — has been examined in the research with consistent findings that challenge the simple “more rolling equals better performance” assumption. Research comparing pre-exercise foam rolling to no warm-up consistently shows improvements in sprint speed, jump height, and agility performance. However, research comparing pre-exercise foam rolling to equivalent time spent in active dynamic warm-up (dynamic stretching, movement preparation exercises) shows comparable or slightly inferior performance outcomes for the rolling condition — suggesting that foam rolling’s pre-workout value is as a preparatory tool that improves subsequent active warm-up quality rather than as a performance enhancer that competes with dynamic movement preparation. The optimal pre-workout sequence incorporates both: brief foam rolling (5 to 8 minutes) to reduce passive tissue tension that limits movement range, immediately followed by dynamic warm-up (5 to 10 minutes) that takes the tissue through the movement patterns the session will demand — producing the combined tissue preparation and neuromuscular activation that neither approach achieves as effectively alone.
| Goal | Timing | Pressure | Duration Per Muscle |
|---|---|---|---|
| Mobility improvement | Any time; follow with static stretch | 6–7/10 | 60–90 sec + 30–60 sec stretch |
| DOMS management | Within 60 min post-training + 24h later | 5–6/10 | 60–90 sec (full passes) |
| Pre-workout activation | 5–10 min before training | 4–5/10 | 15–20 sec (brief passes) |
| Injury prevention | Weekly full assessment + daily maintenance | 5–6/10 | 60 sec (assessment focus) |

Building a Complete Foam Rolling Routine
A systematic daily foam rolling routine — rather than ad hoc rolling when soreness prompts it — produces the cumulative tissue quality benefits that make foam rolling a genuine performance and recovery tool rather than an occasional comfort measure.
Building a 10-minute foam rolling sequence I did every evening took about two weeks to feel automatic, and it’s been one of the most consistently beneficial habits I’ve built.
The 10-Minute Daily Maintenance Routine
A 10-minute daily maintenance rolling routine — targeting the chronically tightest muscle groups with efficient, high-quality technique — produces the ongoing tissue quality maintenance that prevents the progressive tightness accumulation that infrequent rolling cannot address. The 10-minute routine is structured around the muscle groups that most consistently develop tension in gym-active adults: thoracic spine extension mobilization (2 minutes — 5 to 6 vertebral levels, 15 to 20 seconds each); glutes and piriformis using lacrosse ball (2 minutes — 1 minute per side, addressing the posterior hip complex that generates so much of the lower back and lower extremity dysfunction described in this guide series); quadriceps and hip flexors (2 minutes — 1 minute per leg); calves (2 minutes — 1 minute per leg, both gastrocnemius and soleus); and either IT band region (TFL) or upper trapezius depending on the day’s training session focus (2 minutes — both sides). This 10-minute sequence covers the highest-priority tissue groups in the time available for a daily practice that training schedules can accommodate — and produces the cumulative tissue quality improvements that weekly full-body sessions supplementing this daily maintenance routine build upon. The daily consistency requirement is the key differentiator between effective and ineffective foam rolling practice: tissue tightness accumulates daily, and daily rolling maintains the equilibrium that prevents that accumulation from reaching the threshold that produces pain and movement restriction.
The 20-Minute Post-Workout Recovery Routine
The post-workout recovery rolling routine covers all muscle groups trained in the session at the recovery-focused protocol specifications — providing the DOMS reduction and tissue maintenance that the post-training window most effectively supports. After a lower body session, the complete lower body rolling sequence — quadriceps (both legs, including hip flexors and TFL), hamstrings (both legs), glutes and piriformis, calves (both legs, gastrocnemius and soleus), and tibialis anterior — requires approximately 20 minutes at the 60 to 90 second per area duration. After an upper body session, the upper body sequence — thoracic spine mobilization, latissimus dorsi (both sides), pectorals (both sides), upper trapezius (lacrosse ball, both sides), and forearms (both arms) — requires a similar 20 minutes. After full-body sessions, prioritizing the trained muscle groups most susceptible to DOMS — typically the quadriceps and posterior chain for lower body, the chest and lats for upper body — within a compressed 15-minute session that covers these priorities without attempting comprehensive coverage ensures that the most important tissue groups receive post-training attention when time is limited. The post-workout routine differs from the daily maintenance routine in pressure (moderate rather than deep), duration (60 to 90 seconds per area rather than trigger-point-focused holds), and sequence (trained muscle groups first, untrained groups only if time allows).
The 30-Minute Recovery Day Full-Body Routine
Recovery day rolling — performed on non-training days as a dedicated tissue maintenance and mobility session — provides the most comprehensive rolling coverage and the deepest tissue work that training day time constraints cannot accommodate. The recovery day routine operates at the mobility-focused protocol: deeper pressure (6 to 7 out of 10), longer holds (trigger point holds at 30 to 45 seconds per tender location), and the roll-then-stretch combination described in section 5-1 for the muscle groups with the greatest mobility restriction. Beginning with a 5-minute lower body mobility assessment — rolling each lower extremity muscle group briefly and noting the current tension and tenderness distribution — informs the subsequent 25-minute focused session: spending more time on the areas identified as most tense in the assessment and less time on areas that have improved from previous sessions. The recovery day full-body routine is the appropriate context for the thorough, unhurried technique — the full trigger point hold sequences, the deliberate breathing practice, the immediate post-rolling stretching — that training day time constraints prevent. Monthly, the recovery day session can include a comparative tension assessment against previous months’ baseline — tracking the cumulative tissue quality improvements that consistent rolling and stretching produce across the weeks, providing the objective progress feedback that motivates continued practice.
Tracking Progress and Adapting the Routine
Tracking foam rolling progress — monitoring changes in tissue tension, range of motion, and DOMS severity over weeks and months — provides the feedback that confirms the routine’s effectiveness and identifies when adaptations are needed. A simple tracking approach: after each rolling session, note in a training log the three muscle groups with the greatest tenderness and the subjective tension level in each (1 to 10 scale); and perform monthly range of motion assessments for the joints targeted by the rolling program (knee-to-wall ankle test, hip external rotation assessment, shoulder internal and external rotation). Improvements in both tenderness (less tenderness at previously tender points) and range of motion confirm that the rolling routine is producing its intended cumulative effects — providing the tangible evidence that sustains the daily practice through the weeks when no dramatic change is perceptible in a single session. When tenderness at specific locations is not improving despite consistent rolling — persisting at high levels over multiple weeks — this indicates either technique error (insufficient pressure, inadequate hold duration) that adjustment can address, or a structural issue (trigger point referral from a distant source, underlying joint pathology, nerve-related sensitivity) that professional assessment would more effectively identify and address than continued independent rolling management.
Combining Foam Rolling with Other Recovery Modalities
Foam rolling produces its greatest benefits when combined with complementary recovery modalities in a systematic protocol that addresses the physiological recovery dimensions that rolling alone cannot fully cover. The optimal combination for tissue recovery: foam rolling (addressing passive tissue tension and local circulation) combined with static stretching (converting rolling-induced tissue compliance into lasting length change) and strengthening exercises (providing the active stability that prevents the compensatory tightness patterns that weakness produces). For session recovery: foam rolling combined with 10 to 15 minutes of low-intensity cardiovascular activity (the active recovery described in the previous guide) provides both the direct tissue treatment that rolling delivers and the systemic circulation enhancement that active recovery produces — together addressing both the local tissue tension and the systemic metabolic waste clearance that optimal recovery requires. For sleep optimization: performing a 10 to 15 minute foam rolling and stretching session in the 30 to 60 minutes before sleep — focusing on the parasympathetic-activating breath-focused rolling technique described in section 2-4 — combines the tissue recovery benefits of rolling with the nervous system down-regulation that pre-sleep relaxation practices provide, improving both tissue recovery quality and sleep quality simultaneously in the high-value pre-sleep window. These combined protocols represent the systematic recovery approach that converts individual tools — each with moderate standalone evidence — into a comprehensive recovery system with synergistic effects that the individual components cannot achieve independently.
| Routine | Duration | When | Primary Focus |
|---|---|---|---|
| Daily maintenance | 10 min | Any time, daily | Top 5 tight muscle groups |
| Post-workout recovery | 20 min | Within 60 min of training | All trained muscle groups |
| Recovery day full-body | 30 min | Non-training days | Deep tissue + mobility work |
| Pre-workout activation | 5–8 min | Before training session | Primary movers for session |
Frequently Asked Questions
Foam rolling generates a lot of confusion because the instructions are rarely specific enough — these are the questions that always come up.
How often should I foam roll?
Daily foam rolling produces the best cumulative results — the 10-minute daily maintenance routine described in section 6-1 maintains the tissue quality between sessions that prevents progressive tightness accumulation. If daily rolling is not feasible, a minimum of 3 to 4 sessions per week maintains most of the tissue quality benefits, though with slower cumulative improvement in chronic tightness areas. Once per week rolling produces temporary relief without the consistent tissue change that frequent practice delivers.
Should foam rolling hurt?
Foam rolling should produce productive discomfort — the 4 to 7 out of 10 sensation described in section 2-1 — but should not produce sharp pain (8 to 10 out of 10) that causes involuntary muscle tensing. If rolling produces sharp, intense pain or worsening symptoms, reduce pressure immediately by offloading body weight and reassess whether the area being rolled is appropriate for compression (avoid bony prominences, joints, and previously injured areas without professional guidance). The “hurts so good” sensation is correct; the “this is genuinely painful” sensation is not.
How long should I foam roll each muscle?
The evidence supports 60 to 90 seconds per muscle group for recovery rolling, and 60 to 120 seconds for mobility-focused rolling, as the minimum effective duration for producing meaningful tissue change. Within this duration, focus the time on the 2 to 3 most tender locations with trigger point holds of 20 to 30 seconds each, rather than distributing time uniformly across the full muscle length. Pre-workout rolling is shorter — 15 to 20 seconds per area — because the goal is activation preparation rather than deep tissue change.
Can I foam roll every day?
Yes — daily foam rolling at appropriate pressure is safe for the vast majority of people and is the recommended frequency for cumulative tissue quality improvement. The structures that should not be rolled daily are the acute injury sites (where tissue healing is actively occurring and mechanical disruption is counterproductive) and the bony and tendinous structures described in this guide as inappropriate rolling targets. Healthy muscle tissue benefits from daily rolling at appropriate pressure without the overuse concern that applies to loading-based training.
Is foam rolling before or after workout better?
Both, for different purposes. Pre-workout rolling (5 to 8 minutes, moderate pressure) prepares tissue for movement by reducing passive tension and improving joint range of motion — producing better warm-up movement quality when immediately followed by dynamic warm-up. Post-workout rolling (15 to 20 minutes, moderate pressure) reduces DOMS and accelerates tissue recovery — producing the next-day recovery benefits that training performance depends on. If time allows only one rolling session per training day, post-workout rolling provides the greatest total benefit because its recovery effects compound across training weeks, while pre-workout rolling’s acute effects are limited to the current session’s movement quality.