How to Do Deadlifts Safely as a Beginner

1. Why Deadlifts Are Worth Learning — and Why Beginners Get Them Wrong
The deadlift is simultaneously the most rewarding and most feared exercise in the gym for beginners — the lift that builds more total body strength per minute of training than virtually any other movement, and the lift that generates more anxiety, bad advice, and avoidance behavior than any comparable exercise. The fear is understandable: the deadlift looks heavy, the stakes of poor technique seem high (back injury is the boogeyman that haunts every beginner’s first approach to the barbell), and the gym mythology around deadlifts is dense with contradictions (“keep your back straight,” “push the floor away,” “drive with your hips,” “don’t let your hips shoot up”). I spent six months avoiding the deadlift because I was convinced that my lower back would give out the moment I loaded a bar — and those six months cost me the strength, muscle, and confidence that consistent deadlift training would have produced. This article is the beginner deadlift guide I wished existed before those lost months: complete, technically accurate, and honest about both the genuine power of the movement and the genuine safety requirements for performing it correctly.
What Makes the Deadlift Different From Every Other Exercise
The deadlift is the only barbell exercise that trains the entire posterior chain — the complex of muscles running from the upper back down through the glutes, hamstrings, and calves — in a single integrated movement. No other exercise produces the same combination of back, hip, and leg strength stimulus that the deadlift provides simultaneously. The primary muscles trained: erector spinae (the paired columns of muscle running alongside the spine — the critical spinal support musculature that back pain prevention and athletic performance both depend on); gluteus maximus (the largest and most powerful muscle in the body — the primary hip extension driver that sprinting, jumping, and all lower body power activities require); hamstrings (two-joint muscles crossing both the hip and knee — trained in their hip extension function during the deadlift, the function that most athletic activities demand); latissimus dorsi (the broad back muscles that stabilize the shoulder during the deadlift and protect the spine from flexion under load); trapezius (upper, middle, and lower — stabilizing the scapula and upper back throughout the lift); and core musculature (rectus abdominis, transverse abdominis, and obliques — maintaining intra-abdominal pressure that protects the spine under the compressive load of the deadlift). The secondary muscles contributing to the deadlift: quadriceps (extending the knee during the first phase of the lift), forearm flexors and grip musculature (supporting the bar throughout the lift), and upper back muscles (maintaining the thoracic extension that prevents the rounded upper back that novices default to). This extraordinary breadth of muscle involvement explains the deadlift’s reputation as the most efficient strength-building exercise available — a properly performed set of 5 deadlifts trains more muscle mass than a typical 4-exercise upper body routine of similar duration. From the Journal of Strength and Conditioning Research on deadlift biomechanics, the deadlift produces peak compressive forces on the lumbar spine that are high in absolute terms but well within the structural tolerance of healthy spinal tissue when the neutral spine position is maintained — the safety of the deadlift for healthy beginners is well-established in the research literature, despite the persistent gym mythology that it is uniquely dangerous.
The Real Risk of Deadlifts — and the Bigger Risk of Avoiding Them
The risk of deadlift injury for beginners who learn proper technique and progress loads gradually is genuinely low — lower than the injury risk of many recreational sports that the same individuals participate in without hesitation. The injuries that do occur in deadlift training are almost universally attributable to one of three preventable errors: technique breakdown under excessive load (rounding the lower back under weights the lifter is not yet prepared to handle); load progression that outpaces technique development (increasing weight before the movement pattern is reliably executed at current loads); and inadequate warm-up before maximal or near-maximal efforts. The bigger risk, less discussed in gym culture, is the consequence of avoiding the deadlift entirely — the chronic weakness of the posterior chain musculature that deadlift avoidance produces. Back pain, the most common musculoskeletal complaint in the developed world, is significantly associated with weakness of the erector spinae, glutes, and hamstrings that the deadlift specifically develops. Research comparing sedentary individuals with strength-trained individuals consistently finds that the strength-trained group has lower rates of back pain, lower rates of lower back injury, and greater functional capacity across all physical demands of daily and recreational life. The deadlift, learned correctly and progressed systematically, is not the cause of back pain — it is one of the most effective available treatments and preventions. The beginner who avoids the deadlift out of back injury fear is choosing the higher-risk option: a life of posterior chain weakness that makes back injury more likely, more severe, and more disabling when it does eventually occur from the unavoidable physical demands of daily life.
Setting Realistic Beginner Expectations
Beginners consistently underestimate how quickly deadlift strength develops with consistent practice — and this underestimation is one of the forces that drives premature load increases that compromise technique before it is reliably established. Realistic beginner deadlift progression: in the first 4–8 weeks, most beginners can increase their working weight by 2.5–5kg per session (linear progression — adding weight every training session) before the rate of progress slows to weekly increases. A beginner who starts with 60kg in week 1 and adds 5kg per week reaches 100kg in week 8 — a significant strength achievement that required only 8 weeks of consistent, correctly progressed training. This rate of progress is genuinely achievable for most beginners — the nervous system adaptations that drive early strength gains are rapid and dramatic, and the deadlift benefits from this neurological adaptation more than almost any other exercise because of the high motor unit recruitment it demands. The correct response to this rapid progress is not to accelerate it (adding more weight than the 5kg session increase) but to maintain the rate and focus on technique quality at each increment — the lifter who reaches 100kg with perfect technique is in a far better position than the lifter who reaches 120kg with the rounded lower back and compensated hip position that rushed progression produces.
Equipment and Environment for Beginner Deadlift Success
The equipment requirements for beginning deadlift training are minimal — a standard 20kg Olympic barbell and weight plates are sufficient for all beginner and most intermediate deadlift training. The gym equipment considerations for beginners: a barbell with good knurling (the textured grip pattern that prevents bar slippage — more critical for deadlifts than any other exercise) reduces grip fatigue and prevents the compensatory technique changes that grip failure produces; rubber-coated or bumper plates allow the bar to be set at the correct height (approximately mid-shin for most lifters) without requiring elevated platform or specialty equipment; and a stable, non-slip floor (rubber gym matting is ideal — smooth tile or polished concrete creates the foot slippage risk that unstable stance produces under heavy load). The footwear recommendation that most beginners ignore: flat, thin-soled shoes (or bare feet where permitted) provide significantly better stability for deadlifting than cushioned running shoes. The heel elevation of cushioned running shoes shifts weight forward and onto the toes, making it mechanically difficult to maintain the hip position that correct deadlift technique requires — specifically, it prevents the shin from remaining vertical at the start position, forcing the hips to drop lower and the torso to become more upright than the optimal deadlift position. Flat-soled shoes (Converse, specific powerlifting shoes like the Adidas Powerlift, or bare feet) provide the ground contact and heel stability that the conventional deadlift hip position requires. This equipment detail — often overlooked in beginner guidance — is responsible for a meaningful proportion of the technique errors that running-shoe-wearing beginners consistently display.
The deadlift rewards patience, technical discipline, and systematic progression with the kind of whole-body strength that no other single exercise provides — making the investment in learning it correctly from the beginning the highest-return decision a beginner strength trainer can make. Trust the process, respect the technique requirements, and allow the progressive overload to drive the remarkable strength gains that consistent, correctly executed deadlift training reliably produces across every training career that applies these principles with patience and consistency. The principles in this article represent the accumulated wisdom of sports science research and coaching practice — apply them, and the deadlift will become not just an exercise in your program, but a cornerstone of your athletic identity and physical capability for life.

2. Deadlift Setup and Technique: Step-by-Step for Beginners
The deadlift setup — the bar position, foot placement, grip, hip hinge, and spine position established before the bar leaves the floor — determines 80% of the quality of the subsequent lift. Beginners who rush the setup in their eagerness to pull the bar produce the compensations and technique errors that impair both performance and safety. Invest 15–20 seconds in a deliberate, consistent setup on every single repetition — this habit, established from the first training session, produces the automatic setup quality that experienced lifters display.
Bar Position and Foot Placement
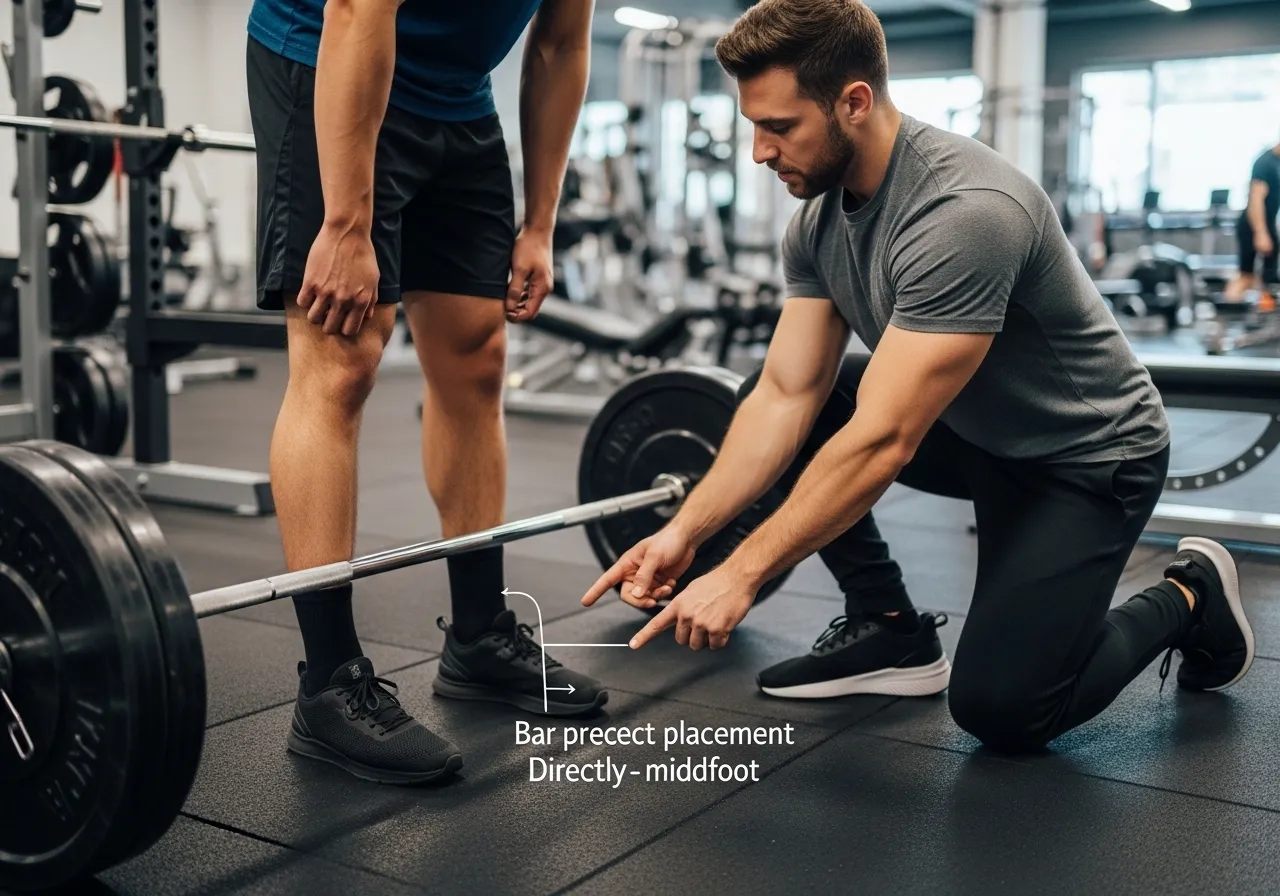
Step 1 — Bar position: approach the barbell and position it approximately 2–3cm from your shins (roughly the width of two fingers). This is closer to the body than most beginners expect — the intuitive approach is to stand further back, but the 2–3cm shin-to-bar distance is the starting position that allows the bar to travel in the vertical path that efficient deadlift mechanics require. If the bar starts too far forward (more than 5cm from the shins), the lifter must pull the bar back toward the body during the lift — adding horizontal movement to what should be a purely vertical bar path, dramatically increasing the lower back moment arm and the injury risk it produces. Step 2 — Foot placement: position your feet approximately hip-width apart (not shoulder-width — hip-width is narrower than most beginners assume). Your toes should point straight ahead or turned out 10–20 degrees — whichever feels more natural for your hip anatomy. The toes-out position is particularly useful for lifters with limited hip flexion range of motion, as it externally rotates the hip joint and increases the space for the torso to move between the thighs. Both foot placement options are correct — the optimal position for each individual depends on hip anatomy, and 4–6 weeks of experimentation with minor adjustments will reveal the stance that allows deepest hip hinge with most comfortable hip position.
The Hip Hinge and Starting Position
Step 3 — Hip hinge to the bar: with feet positioned correctly and the bar 2–3cm from your shins, hinge at the hips (push your hips backward, maintaining a slight knee bend) and reach down to grip the bar. Do not squat down to the bar — the deadlift is a hip-dominant movement, not a squat, and approaching the bar in a squat position produces the incorrect starting position (hips too low, torso too upright) that beginners commonly display. Step 4 — Grip: grip the bar with your hands just outside your legs, using a double overhand grip (both palms facing your body — the starting grip for all beginners). Grip width: your arms should hang straight down from your shoulders — gripping wider requires the arms to angle outward, reducing pulling efficiency; gripping narrower than shoulder width risks the arms contacting the inner thighs during the pull. Grip tightness: squeeze the bar as hard as possible — the maximal grip activation improves neural drive and stabilization throughout the entire kinetic chain, not just at the hands. Step 5 — Shin position: once gripping the bar, pull your shins forward until they gently contact the bar. This shin-to-bar contact establishes the correct bar position over the mid-foot — the mechanical fulcrum that efficient deadlift mechanics require. Step 6 — Hip height: with shins touching the bar and grip established, raise your hips until you feel tension develop through your hamstrings. This is your individual starting hip height — not a fixed angle prescribed by external measurement, but the position where your hamstrings are loaded in a stretch that allows them to contribute maximally to the initial pull. Most beginners either set their hips too low (turning the deadlift into a squat) or too high (turning it into a stiff-leg deadlift) — the hamstring tension check finds the individual optimal position.
Spine Position and the Lat Engagement Cue
Step 7 — Spine position: with hips set at the correct height, establish a neutral spine position — not perfectly flat (which is actually spinal extension, not neutral) and not rounded (which increases disc and ligament loading). Neutral spine follows the natural curves of the spine: slight inward curve at the lumbar (lower back), slight outward curve at the thoracic (upper back), and neutral cervical position. The cue that most reliably produces neutral lumbar spine for beginners: “push your chest out and your belly button toward the floor simultaneously.” This cueing produces the slight anterior pelvic tilt and lumbar extension that neutral spine requires, and is more effective than “arch your back” (which often produces excessive hyperextension) or “keep your back flat” (which often produces lumbar flexion). Step 8 — Lat engagement (the most important setup cue that beginners universally neglect): before pulling, engage your latissimus dorsi by mentally trying to “put your shoulder blades in your back pockets” or “bend the bar around your legs.” This lat engagement serves two critical functions: it creates thoracic extension and rigidity that prevents the upper back rounding that is the most common beginner deadlift fault; and it pulls the bar into the body, ensuring the vertical bar path that efficient mechanics require rather than the forward arc that disengaged lats allow. From NSCA resistance training guidelines for beginners, lat engagement during the deadlift setup is the single technique cue most associated with improved lumbar spine position and reduced injury risk in novice lifters. Step 9 — Take a deep breath, brace your core (create maximum intra-abdominal pressure by breathing into your belly and bracing as if you are about to be punched), and initiate the pull.
The Pull: Mechanics from Floor to Lockout
The pull phase — from bar leave-off to lockout — should feel like pushing the floor away from you rather than pulling the bar up. This mental cue shifts the focus to leg drive (pushing the floor down with your feet) rather than back extension (pulling the torso upright), producing the integrated leg-and-back power that efficient deadlifting requires rather than the back-dominant pull that beginners default to. The bar path: the bar should travel in a perfectly vertical line from the floor to lockout, staying in contact with or extremely close to the shins and thighs throughout. Any horizontal movement of the bar (forward arc or backward arc) indicates a setup or technique error that increases the load on the lower back and reduces pulling efficiency. The hips and shoulders should rise at the same rate during the initial pull — hips rising faster than shoulders (hips shooting up) indicates that the lifter is beginning the pull by extending the hips before the legs have driven the bar off the floor, converting the intended deadlift into a stiff-leg deadlift that places disproportionate lower back demand on the movement. The lockout: at the top position, stand fully upright with hips extended (not hyperextended — do not lean back at the top), knees locked, and shoulders pulled back. Hold for 1 second to confirm stable lockout before initiating the descent. The descent: lower the bar in the reverse of the pull — hinge the hips back first (not bending the knees first, which forces the bar to swing around the knees), maintaining bar-to-body contact until the bar passes the knees, then bend the knees to lower the bar to the floor. Set the bar down with control — do not drop it unless using bumper plates on a platform designed for drops.
Self-Assessment: Using Video to Identify Technique Errors
Video analysis of the deadlift — filming from the side (to assess bar path, back position, and hip-shoulder timing) and from behind at 45 degrees (to assess knee tracking and foot position) — is the most valuable learning tool available to the self-coached beginner and far more reliable than mirror-based feedback during the lift itself. The mirror in front of the bar creates the forward head position that mirror-watching produces during the pull, disrupting the neutral cervical spine that correct technique requires. Film instead: set up a phone on a low tripod or water bottle to the side of the lifting position, film 3–5 warmup sets at moderate weight, and review the footage looking for the four primary technique indicators: bar path (should be perfectly vertical — any forward arc from the floor indicates the bar started too far from the shins; any forward arc from mid-shin indicates the hips rose too fast); hip-shoulder timing (both should rise at the same rate through the first third of the pull); back position (lower back should maintain slight inward curve from setup through lockout — any rounding at the bottom indicates hip setting too low or insufficient lat engagement); and lockout position (fully upright, not hyperextended backward). Filming and reviewing technique every 2–3 sessions in the first 12 weeks of deadlift training accelerates technical development substantially — the visual feedback that video provides reveals technique errors that proprioception during the lift cannot detect, and the improvement is visible and motivating across successive weekly comparisons.
The deadlift, approached with this level of technical precision and progressive patience, is the most transformative strength exercise a beginner can learn — and the investment in learning it correctly from day one is the decision that separates the lifters who train productively for decades from those who cycle through injury, frustration, and abandonment that incorrect technique inevitably produces.
3. Common Beginner Deadlift Mistakes and How to Fix Them
Every beginner makes the same predictable technique errors in the deadlift — not because they are careless, but because the correct positions are counterintuitive and the default compensations feel more natural than the mechanically correct alternatives. Identifying and correcting these errors in the first 4–8 weeks of training prevents them from becoming ingrained habits that are progressively harder to change as loads increase.
Mistake 1: Rounding the Lower Back
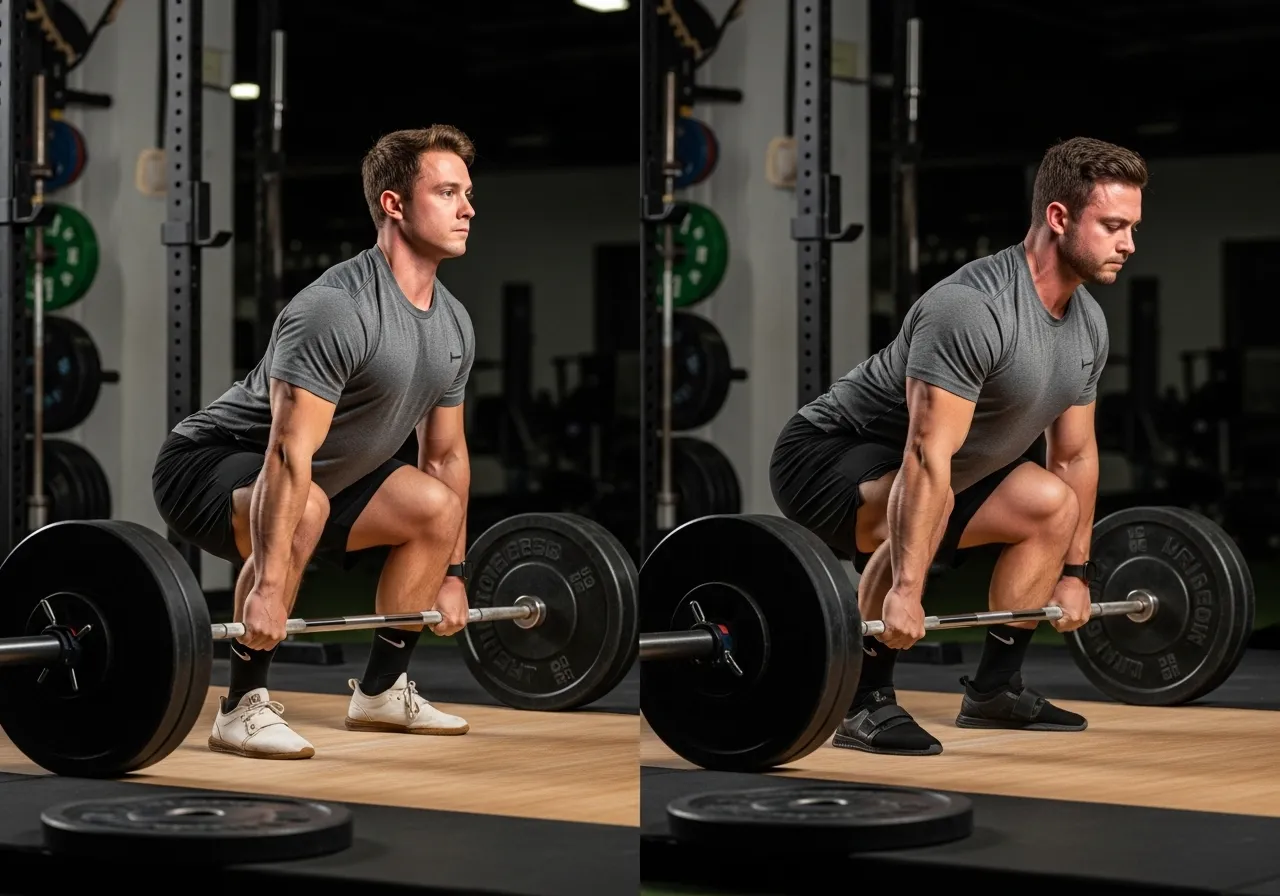
Lower back rounding — the loss of lumbar lordosis (the natural inward curve) that produces a “cat back” position at the bottom of the deadlift — is the most dangerous and most common beginner deadlift error. The rounded lower back significantly increases disc and ligament loading at the lumbar spine under compressive and shear forces, and is the primary mechanism of the deadlift-related back injuries that give the exercise its undeserved reputation for danger. The causes: insufficient hamstring flexibility (preventing the hip hinge that allows the torso to incline forward without the lower back compensating); insufficient lat engagement (allowing the upper body to collapse forward and pulling the lower back into flexion); bar starting too far from the shins (forcing the lifter to reach forward for the bar, which anteriorly tilts the pelvis and rounds the lumbar); and load too heavy for current technical capacity (the lower back rounds under loads that exceed the lifter’s ability to maintain neutral spine). The fixes: hip flexor and hamstring stretching before each session (Romanian deadlifts with bodyweight as warm-up, hip hinge practice against a wall); active lat engagement cue before every pull (“bend the bar around your legs”); bar placement verified at 2–3cm from shins before every setup; and immediate load reduction (5–10kg) when lower back rounding is detected in video review — the rounded back problem that increases at higher loads requires returning to the load where neutral spine is reliable before progressing again.
Mistake 2: Hips Shooting Up at Lift-Off
The “hips shooting” error — the hips rising faster than the shoulders at lift-off, converting the deadlift into a stiff-leg deadlift — is the second most common beginner fault and the one that most directly causes lower back overload. When the hips rise before the bar leaves the floor, the legs contribute minimal force to the initial pull, leaving the lower back to extend the torso from a deep flexed position under the full load of the bar — exactly the movement that lower back injury research identifies as highest-risk. The cause: incorrect hip starting height (set too low, the hips rise immediately to find the correct pull height before any bar movement occurs); insufficient leg drive awareness (beginners often think of the deadlift as a pulling movement — correcting this to a pushing-the-floor movement cue addresses the leg drive deficit that causes hips to shoot); and “squat thinking” that sets the hips low as if preparing for a squat rather than the hip-dominant hinge that the deadlift requires. The fix: the wall hip hinge drill (stand 15cm from a wall, push your hips back until they touch the wall without the knees bending excessively — this teaches the hip hinge pattern that the deadlift requires); and the hamstring tension check in setup (raise the hips from the low position until hamstring tension develops — this is the correct hip starting height that prevents the hip-shooting compensation).
Mistake 3: Upper Back Rounding
Upper back (thoracic) rounding — the “good morning” position where the thoracic spine flexes and the chest drops toward the floor during the pull — is distinct from lower back rounding and is extremely common in beginners with poor thoracic mobility and weak upper back musculature. Upper back rounding reduces pulling efficiency (the bar swings forward as the chest drops) and overloads the lumbar spine with the additional shear force that a flexed thoracic position produces. The causes: weak middle and upper trapezius and rhomboid muscles that cannot maintain scapular retraction under load; poor thoracic extension mobility from desk-based lifestyle; and insufficient lat engagement that allows the upper back to collapse. The fixes: face pulls, band pull-aparts, and prone Y-T-W exercises as accessory work to strengthen the upper back stabilizers; thoracic extension mobility work (foam roller thoracic extension, cat-cow, thoracic rotation) before each deadlift session; and the “proud chest” cue before every pull (lifting the sternum toward the ceiling before initiating the pull establishes the thoracic extension that prevents upper back rounding through the lift). From PubMed research on deadlift biomechanics and safety, upper back rounding increases lumbar spine loading significantly — addressing it is both a performance and injury prevention priority.
Mistakes 4–6: Bar Drift, Hyperextension at Lockout, and Breath Timing
Bar drift forward — the bar moving away from the body during the pull rather than maintaining body contact — dramatically increases the lower back moment arm and the spinal loading it produces. The fix: chalk on the shins (if permitted) or compression socks provide tactile feedback that the bar is maintaining contact; the mental cue of “drag the bar up your shins” focuses attention on the contact maintenance that prevents drift. The locked-out hyperextension — leaning back aggressively at the top of the lift — is often performed as a “demonstration” of lockout completion, but actually places the lumbar spine into excessive extension under load, a high-risk position. The correct lockout is upright — hips extended, glutes contracted, standing tall without any backward lean. The fix: end the lift when vertical — if you are leaning backward, you have gone past lockout into the hyperextension error. Breath timing errors — exhaling during the pull or not bracing before lift-off — significantly reduce intra-abdominal pressure and the spinal support it provides. The fix: take a full belly breath and brace maximally before the bar leaves the floor; hold the breath through the sticking point (usually just below the knee); exhale only at lockout after the bar is stable. This Valsalva maneuver produces the intra-abdominal pressure that is the primary protective mechanism for the lumbar spine under heavy load — and its consistent application on every repetition is the single most important breathing technique for deadlift safety.
The Technique Check Routine: Every Session
Establishing a pre-session technique review habit — reviewing the previous session’s video for the 2–3 most significant errors and selecting 1–2 technique cues to focus on in the upcoming session — converts the ongoing technique development process from vague intention into specific, actionable practice. The technique focus hierarchy for beginners: Week 1–2, focus exclusively on bar position and foot placement (getting the setup fundamentals consistent before adding technique complexity); Week 3–4, add lat engagement and neutral spine focus; Week 5–6, add hip-shoulder timing and bar path review; Week 7–8, add lockout position and breath timing assessment. This sequential introduction of technique focus points prevents the cognitive overload that trying to correct every error simultaneously produces — the beginner who attempts to focus on 6 technique points simultaneously focuses effectively on none of them. One or two clear cues per session, applied consistently across all working sets, produces faster technical improvement than the scattered multi-cue approach that most beginners and many coaches apply.
Correct the mistakes early, build the habit right, and the deadlift will serve you for life.
4. Deadlift Variations for Beginners: Which to Start With
The conventional deadlift is the standard starting point for most beginners — but several variations offer specific advantages for certain body types, mobility limitations, and training goals that make them superior starting choices for specific individuals. Understanding the variations allows the intelligent selection of the most appropriate starting point.
Conventional Deadlift: The Standard Starting Point
The conventional deadlift — hip-width stance, hands outside the legs, bar over the mid-foot — is the appropriate starting point for most beginners because it requires the least sport-specific technique adaptation, allows the most natural hip hinge movement for the majority of body types, and is the variation with the most available coaching resources and technique literature. The conventional deadlift is optimal for: athletes with proportionate limb lengths (neither very long legs nor very short arms); athletes with adequate hip flexion range of motion; and athletes who will primarily train for general strength and fitness rather than competitive powerlifting. The primary limitation: athletes with very long torsos relative to their arm length may find the conventional deadlift requires extreme forward torso lean that places disproportionate lower back demand on the movement — for these individuals, the sumo deadlift or trap bar deadlift may be a more appropriate starting variation.
Romanian Deadlift: The Beginner Technique Teacher
The Romanian deadlift (RDL) — starting from the standing position, hinging the hips back to lower the bar to mid-shin height while maintaining straight legs (slight knee bend, not locked), then driving the hips forward to return to standing — is the best technique development exercise for beginner conventional deadlifters. The RDL teaches the hip hinge pattern that the conventional deadlift requires without the complexity of the starting position setup — beginning from standing, the lifter has no setup to rush, no bar height to manage, and no floor position to achieve before initiating the movement. Three sets of 10–12 RDLs with an empty bar or light weight (20–40kg) as the warm-up before conventional deadlift work teaches the hip hinge pattern through high-repetition reinforcement that accelerates conventional deadlift technique development. The RDL also specifically strengthens the hamstrings and glutes in the hip extension pattern that conventional deadlift performance depends on — providing both technique practice and targeted accessory development simultaneously.
Trap Bar Deadlift: The Beginner-Friendly Alternative
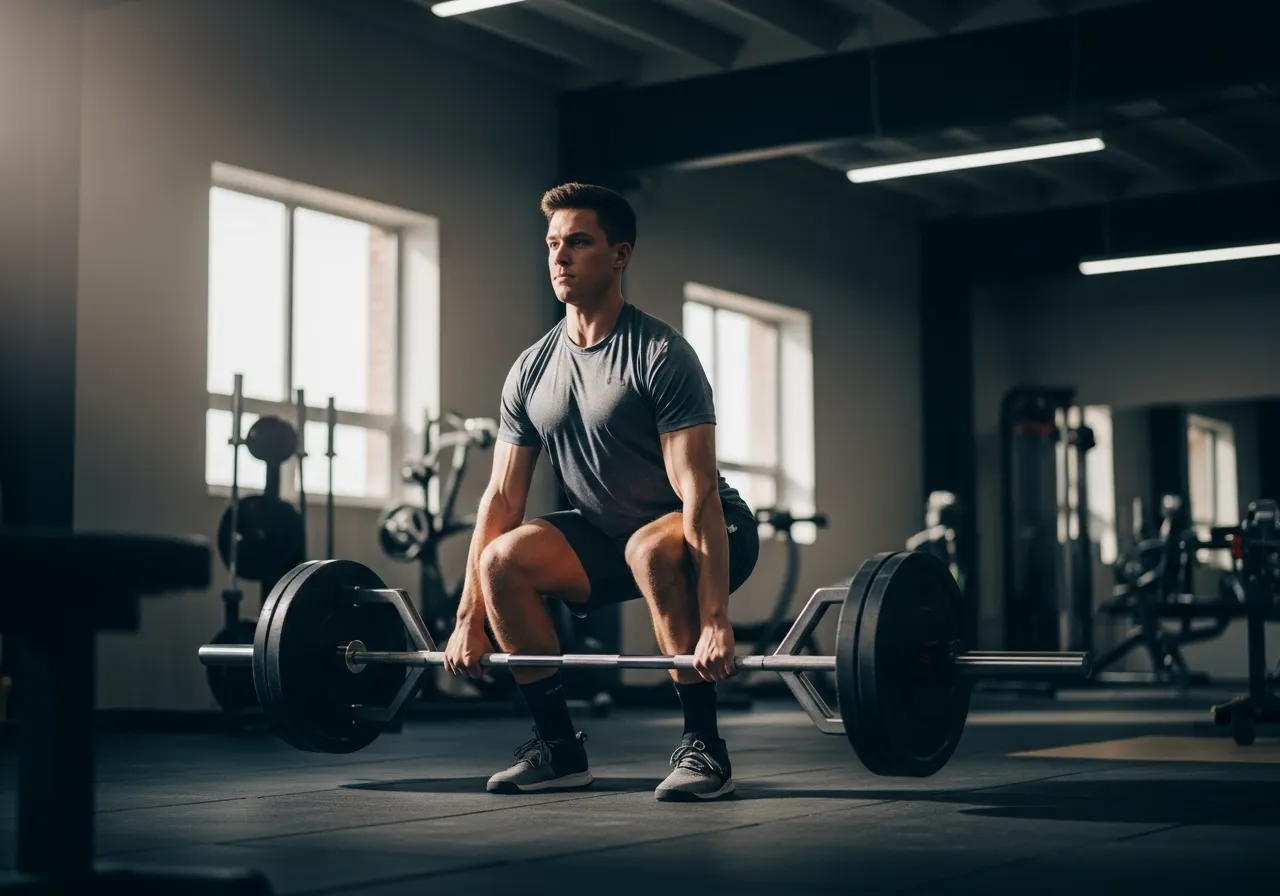
The trap bar (hexagonal bar) deadlift — performed with the lifter standing inside the bar, gripping the handles at the sides of the body — is biomechanically more similar to a squat than to a conventional deadlift, with the center of mass closer to the body, reduced lower back moment arm, and more upright torso position. For beginners with limited hamstring flexibility, history of lower back pain, or the specific goal of developing leg strength rather than posterior chain strength, the trap bar deadlift provides the loading benefits of the conventional deadlift with reduced technical demands and lower back loading. Research from ACSM strength training guidelines identifies the trap bar deadlift as producing equivalent quadricep and glute activation to the conventional deadlift with significantly lower lumbar spine loading — making it the recommended starting variation for beginners with lower back concerns or those whose gym does not have a qualified coach to supervise conventional deadlift technique development. The limitation: the trap bar deadlift does not develop the same hip hinge pattern and posterior chain emphasis that the conventional deadlift produces — athletes who eventually want to perform the conventional deadlift will need to develop conventional technique separately, though the strength base from trap bar training provides an excellent foundation.
Sumo Deadlift: For Specific Body Types
The sumo deadlift — wide stance with toes pointed out 45–60 degrees and hands gripping the bar between the legs — reduces the bar-to-hip distance compared to conventional, allowing a more upright torso and reducing the lower back moment arm for athletes with specific body proportions. The sumo is biomechanically advantageous for: athletes with very long torsos relative to arm length (the sumo stance shortens the effective pulling distance); athletes with wide hips and good hip external rotation range (who can achieve the wide stance without groin or hip discomfort); and competitive powerlifters who have identified the sumo as their stronger pulling style. For most beginners, the sumo’s technical complexity (the hip external rotation and groin mobility demands are higher than conventional) and the more restricted coaching resources make the conventional a better starting point — returning to sumo after 3–6 months of conventional training if body type assessment suggests sumo may be advantageous.
Deadlift Grip Width and Stance Fine-Tuning
Beyond the initial stance and grip selection, fine-tuning the specific measurements — grip width within the general range, stance width within the hip-width guideline, and toe angle within the 0–20 degree range — to the individual’s specific anatomy is the adjustment that converts a generally correct deadlift into the individually optimized technique that each lifter’s unique proportions support. The process: over 4–8 weeks, make small adjustments to one variable at a time (grip width, then stance width, then toe angle) and compare the results in video review and subjective feel. The correctly dialed-in stance and grip produces: bar path that is naturally vertical without conscious effort to correct drift; hip position at the bottom that feels loaded and powerful rather than cramped or hyperextended; and a pull that feels like a coordinated full-body effort rather than a predominantly lower back or predominantly leg movement. Small adjustments of 2–3cm in stance width or 5-degree changes in toe angle can produce significant changes in the feel and mechanics of the lift — the optimal configuration for each individual is found through systematic experimentation rather than applying a single prescribed measurement. The athlete who invests this fine-tuning period in the first 2–3 months of training develops the individually optimized technique that remains stable and efficient as loads increase across the training career, rather than the generically correct but individually suboptimal position that many lifters maintain indefinitely because they never conducted the fine-tuning that their specific anatomy requires.
Deadlift Sticking Points: Identifying and Addressing Weakness
The sticking point — the position in the deadlift where the bar decelerates or stops moving on near-maximal efforts — reveals the specific strength limitation that programming should address. The most common beginner sticking points: the bar off the floor (the initial pull from the floor to mid-shin) indicates insufficient leg drive and posterior chain strength at the bottom position — addressed with deficit deadlifts (standing on a 2–5cm platform that increases the range of motion and bottom position demand) and pause deadlifts (pausing for 2–3 seconds just off the floor to eliminate the elastic energy contribution and strengthen the static pull from the floor); the knee level sticking point (bar stalling as it passes the knees) indicates insufficient hamstring strength through the mid-range — addressed with Romanian deadlifts loaded to the point of challenge and conventional deadlift volume at 80–85% of maximum to build strength through the sticking point range; and the lockout sticking point (bar stalling at the thigh level, with hips failing to extend to complete lockout) indicates weak glutes and hip extensors — addressed with hip thrusts, good mornings, and upper portion rack pulls (deadlifting from a rack set at knee height, emphasizing the upper portion pull). Identifying the sticking point from video review and matching it to the appropriate accessory exercise converts the plateau-producing weakness into a targeted training priority that systematically resolved across 4–8 weeks of focused accessory work.
Every great deadlifter started exactly where you are now — with an empty bar and the willingness to learn. Begin today.
5. Programming Deadlifts as a Beginner: Sets, Reps, and Progression
Deadlift programming for beginners is governed by the principle of linear progression — the ability to add weight to the bar at every session that the beginner’s rapidly developing nervous system adaptation allows. The programming frameworks in this section are designed specifically for the linear progression phase (approximately the first 3–6 months of consistent training) before the more sophisticated periodization that intermediate training requires.
Starting Weight and Initial Session Structure
The most common beginner programming error is starting too heavy — selecting a starting weight based on what “looks respectable” rather than what allows correct technique across all working sets. The correct starting weight for the first deadlift session: the weight at which you can perform 5 sets of 5 repetitions with perfect technique, reaching approximately a rating of perceived exertion (RPE) of 7/10 on the final set (moderately challenging — not grinding). For most adult beginners, this is 40–70% of body weight — considerably lighter than the beginner’s ego desires but exactly correct for the neuromuscular learning that the first weeks of training prioritize. Specific starting weight guidance: if you can perform 5×5 with 60kg without any technique breakdown, that is your starting point regardless of how light it feels subjectively — the neuromuscular adaptation that the first 4 weeks produce will rapidly reveal the challenge of the starting weight as loads increase at each session. The initial session structure: 10-minute warm-up including hip hinge drill and RDL with empty bar; 3–5 warm-up sets with 50–70% of working weight (these are technique practice sets — perform them with the same focus as working sets); 3–5 working sets of 5 repetitions with the starting working weight. Total deadlift session time: 25–35 minutes. Total weekly deadlift sessions for beginners: 2–3 (with at least one rest day between sessions — the 48-hour minimum for posterior chain recovery that prevents accumulated fatigue from impairing technique in subsequent sessions).
Load Progression: The 5kg Session Increase
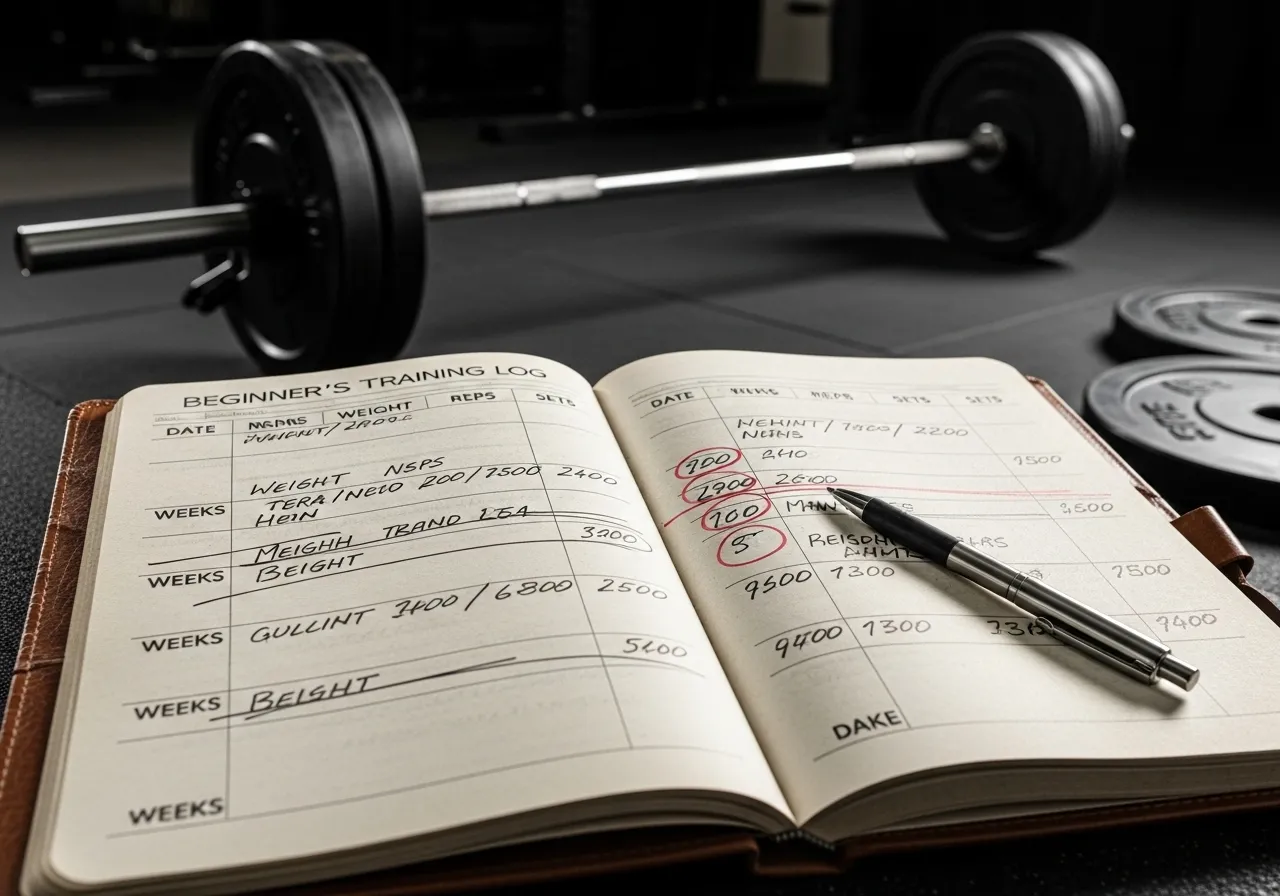
The linear progression protocol for beginner deadlifts: add 5kg to the working weight at every training session (or 2.5kg if 5kg jumps feel too aggressive for the individual’s rate of technique development). This rate of progression — 5kg per session, 2–3 sessions per week — produces 10–15kg of weekly strength increase during the linear progression phase, which is genuinely achievable for most beginners due to the neural adaptations of early training. The progression rule: only increase weight if the previous session’s all sets were completed with correct technique — if technique broke down on any set at the current weight, repeat the same weight in the next session with technical correction focus before advancing. The first technical plateau: most beginners encounter their first true strength plateau (where the weight does not move from a given position regardless of effort) at approximately 80–100% of body weight for men and 60–80% for women — the point where neural adaptations have been largely realized and genuine muscle and tendon strength becomes the limiting factor. At this point, switching from session-to-session progression to week-to-week progression (adding 5kg per week rather than per session) extends the linear progression phase for several additional weeks before requiring the more sophisticated programming of intermediate training.
Accessory Exercises for Deadlift Development
Accessory exercises — supplementary movements that address the specific strength and technique limitations of the deadlift — accelerate beginner deadlift development when programmed alongside the primary deadlift work. The highest-priority beginner deadlift accessories: Romanian deadlifts (2–3 sets of 8–12 at 40–50% of conventional working weight — hamstring and glute strengthening in the hip extension pattern); barbell rows (3 sets of 8–10 — upper back strength that prevents the thoracic rounding that is the second most common beginner error); face pulls (3 sets of 15–20 with a light cable or band — rear deltoid and external rotator strengthening that maintains scapular retraction under load); and single-leg exercises (Bulgarian split squats or single-leg Romanian deadlifts, 2 sets of 10–12 per leg — addressing the hip stability imbalances that bilateral deadlift loading can mask). The total accessory volume for beginners: 4–6 exercises, 2–3 sets each, performed after the primary deadlift work in the same session or in a separate training session. Keeping accessory volume conservative in the first 8 weeks allows the primary deadlift stimulus to drive the bulk of adaptation without the competing fatigue that excessive accessory work generates.
Deadlift in a Full Beginner Program Context
The deadlift should be programmed as the primary lower body posterior chain exercise in a full-body or lower-body focused training program — not as an isolated exercise performed in addition to a full program of squats, leg press, and machine exercises that already fully fatigue the posterior chain. From British Journal of Sports Medicine research on resistance exercise programming, the most common beginner programming error that leads to overtraining and technique breakdown is performing the deadlift after an already-fatiguing leg session — the fatigue-induced technique degradation under load that partially exhausted muscles produce is the context for most beginner deadlift injuries. Program the deadlift as the first or second exercise in the session — after warm-up but before accessory or isolation work — when the nervous system and posterior chain muscles are freshest and technique quality is highest. A simple beginner full-body program that integrates deadlifts appropriately: Monday (squat, deadlift, bench press, row — lower volume); Wednesday (deadlift, overhead press, row, accessory); Friday (squat, deadlift, bench press, accessory). This 3-day-per-week full-body structure with deadlift in every session provides the high-frequency practice that technique development requires while keeping per-session volume conservative enough that quality remains high across all sets.
Managing Fatigue and Deload Weeks in Beginner Deadlift Programs
The linear progression of beginner deadlift training accumulates both the specific posterior chain fatigue from the increasing loads and the systemic nervous system fatigue from the high neuromuscular demand of heavy pulling. As loads approach intermediate levels (100%+ of body weight), the recovery between sessions becomes less complete — manifesting as technique degradation in later sets, reduced motivation, and the subjective “heaviness” that accumulated fatigue produces. The beginner deload week: after every 4–6 weeks of consistent linear progression, reduce the deadlift working weight to 60–70% of the pre-deload weight and perform 2–3 sets of 5 with technical refinement focus. The deload week feels disturbingly easy — this subjective lightness is the correct deload experience. The systemic fatigue that has accumulated dissipates during the reduced-load week, and the session after the deload consistently produces the best performance and most stable technique of the entire training block. The beginner who skips deload weeks because they feel unnecessary consistently encounters the forced rest from injury or illness that the deload would have prevented — the body’s fatigue accumulation eventually demands recovery whether it is planned or imposed by injury. Plan the deload and perform it, even when it feels premature — the performance and technique improvements in the post-deload sessions will confirm that it was necessary even when it did not feel so.
Long-Term Deadlift Development: Beyond the Beginner Phase
The beginner phase of deadlift training — the 3–6 months of linear progression from first session to the point where session-to-session progress reliably stalls — is the foundation on which all subsequent deadlift development builds. The athlete who exits the beginner phase with: a deadlift of 120–150% of body weight (a common endpoint of successful beginner linear progression); reliable technique across all sets at working weight; established warm-up and programming habits; and the injury-free training history that correct technique and progression produced — is prepared for the intermediate programming that progressive periodization provides. The intermediate phase introduces more sophisticated programming (weekly rather than session-to-session progression, periodized volume and intensity variation, competition preparation if desired) but continues to rely on the technical foundation that the beginner phase establishes. Every hour invested in technique development during the beginner phase returns compounding dividends across every subsequent year of training — the beginner who rushes past technique to focus on weight is sacrificing the long-term performance ceiling that correct technique alone allows the progressive overload to reach. The deadlift, mastered through the patient, systematic approach described in this article, becomes one of the most rewarding athletic skills in the lifter’s repertoire — the movement that most clearly demonstrates total body strength, teaches the body control that all athletic movements benefit from, and produces the physical confidence that the ability to safely lift large objects from the ground provides in every dimension of athletic and daily life.
Train smart, progress consistently, and pull with confidence.

6. Deadlift Safety, Injury Prevention, and FAQs
The deadlift’s safety record for athletes who learn proper technique and progress loads systematically is excellent — the injury rates in well-coached deadlift populations are lower than in many recreational sports. The injury prevention practices in this section maintain that safety record across the beginner’s entire training career.
Warm-Up Protocol for Safe Deadlift Training
The deadlift warm-up serves two functions: general preparation (elevating core temperature, lubricating joints, activating the nervous system) and specific preparation (practicing the movement pattern and progressively loading the posterior chain to prepare for working sets). The 10-minute deadlift warm-up protocol: 3 minutes of light cardiovascular activity (rowing, cycling, or brisk walking) to elevate core temperature; 2 minutes of hip flexor and hamstring mobility (hip hinge against a wall, standing hamstring stretch, 90-90 hip mobility); 2 minutes of thoracic extension mobility (foam roller thoracic extension, cat-cow, arm circles); and 3 minutes of specific warm-up sets with the barbell (empty bar × 10 Romanian deadlifts for hip hinge reinforcement; 40% working weight × 5 for movement pattern rehearsal; 60% × 3; 80% × 1–2 before first working set). The progressive loading of the warm-up sets is critical — jumping from an empty bar directly to working weight deprives the nervous system and connective tissue of the progressive activation that reduces acute injury risk under working loads. Skipping the warm-up — the beginner’s most common safety protocol violation — is the most significant controllable risk factor for acute deadlift injury and is the context for a disproportionate share of the strains and back pain episodes that give the deadlift its undeserved dangerous reputation.
Using a Belt: When and Whether Beginners Should
The lifting belt — worn around the waist to provide external support for the bracing mechanism that protects the lumbar spine — is a legitimate training tool for intermediate and advanced lifters performing near-maximal loads. For beginners, the belt question is simpler: avoid using one for the first 3–6 months of training. The reasoning: the primary training benefit of the belt is the increased intra-abdominal pressure that it facilitates, allowing heavier loads with maintained spinal protection. But the intra-abdominal pressure generation that the belt facilitates can and should be developed without the belt first — the beginner who relies on a belt from the beginning develops the bracing capacity that the belt provides, rather than developing the independent bracing strength that belt-free training builds. The belt should be introduced when the beginner is approaching loads where the belt’s intra-abdominal pressure augmentation provides genuine safety benefit (generally above 100% of body weight for most individuals) and where the belt-free bracing has been well-established as a consistent technique element. Before that point, training belt-free develops the core bracing competence that a belt-dependent beginner never fully acquires.
Grip Variations and When to Use Them
The double overhand grip — both palms facing the lifter — is the recommended starting grip for all beginners. As loads increase beyond the beginner’s grip strength capacity (typically around 100–120% of body weight for most individuals), two grip alternatives become relevant: the mixed grip (one palm facing toward the lifter, one facing away — doubles grip security by preventing bar rotation but produces rotational torques on the spine and asymmetric bicep loading that creates small injury risks); and the hook grip (thumbs wrapped around the bar and then covered by the fingers — the powerlifting competition grip that is as secure as the mixed grip without the asymmetric loading, but produces intense thumb discomfort during adaptation that most athletes find very unpleasant for several weeks). Chalk (magnesium carbonate) — when permitted by the gym — dramatically improves double overhand grip security without the disadvantages of the mixed or hook grip, and is the preferred grip enhancement for most recreational beginners. Begin chalk use before switching to mixed grip — many beginners find that chalk alone resolves the grip limitation that was driving them toward the mixed grip, allowing double overhand training to continue at heavier loads.
Frequently Asked Questions About Beginner Deadlifts
Will deadlifts hurt my lower back? Performed with correct technique and appropriate load progression, deadlifts strengthen the lower back rather than damaging it. The lower back pain that some beginners experience is almost always attributable to technique errors (primarily lower back rounding) or excessive load increase — both preventable with the guidance in this article. How often should beginners deadlift? 2–3 times per week is optimal for beginners — frequent enough for the technique practice repetitions that early learning requires, infrequent enough for the 48+ hours of posterior chain recovery that prevents fatigue-induced technique breakdown. Should I feel sore the day after deadlifting? Moderate lower body muscle soreness (DOMS) in the hamstrings, glutes, and upper back in the first 2–4 weeks of deadlift training is normal and expected — this is the inflammatory response to the novel eccentric loading the muscles are adapting to. Sharp joint pain, lower back pain, or pain that worsens with subsequent sessions is not normal soreness and warrants load reduction and technique review. What should I do if my lower back hurts during deadlifting? Stop immediately. Assess the pain type using the framework from this article — generalized muscle fatigue is acceptable to train through at reduced intensity; sharp, localized back pain is a signal to stop, reduce load significantly, and review technique before resuming. Persistent back pain beyond 48–72 hours warrants medical evaluation. Is the deadlift suitable for older beginners? Yes — with appropriate starting loads, progressive progression, and possibly the trap bar variation for those with lower back history. Research consistently finds deadlift training beneficial for adults across all age groups, with particular benefits for bone density and functional strength in older adults that make it one of the most valuable exercises for healthy aging.
The deadlift journey from nervous first session to confident, loaded pulls represents one of the most satisfying progressions in all of strength training — the movement that demands the most technically in the beginning returns the most comprehensively in performance, physique, and physical confidence as mastery develops. Begin today, begin light, begin with technique as the non-negotiable priority, and the deadlift will be the foundation of a strength training practice that serves your health, performance, and physical capacity for decades. The bar is on the floor. The setup is described above. The only remaining step is to approach the bar, follow the protocol, and begin the beginner’s most important strength training journey.