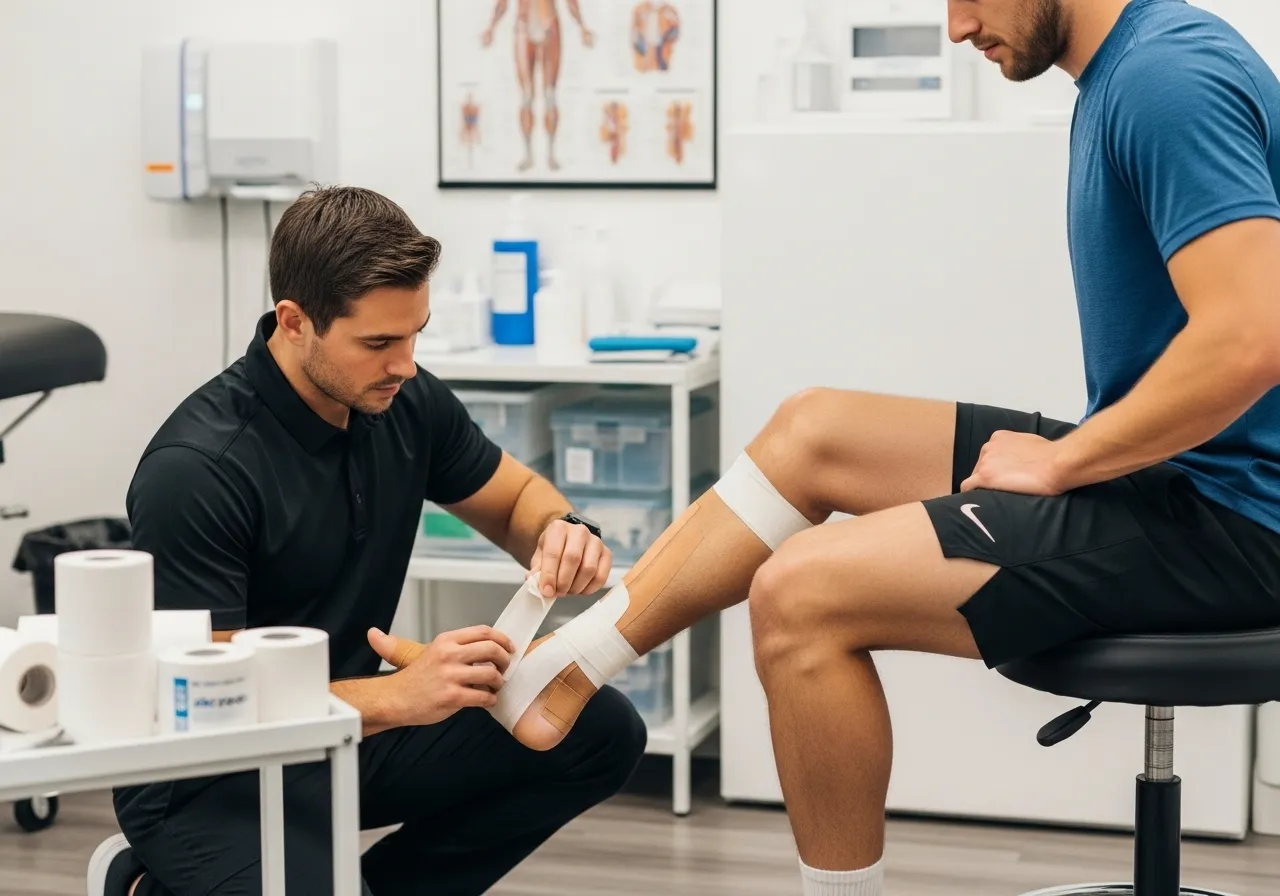
How to Tape a Sprained Ankle (Step-by-Step Guide)
⚠️ Disclaimer: The information in this article is for general educational purposes only and does not constitute medical, nutritional, or professional fitness advice. Individual results may vary. Always consult a qualified healthcare professional or certified fitness trainer before starting any new exercise program, changing your diet, or making decisions about injury treatment or recovery. If you experience pain, discomfort, or any unusual symptoms during exercise, stop immediately and seek professional guidance.

Understanding Ankle Sprains: Anatomy, Grades, and When to Tape
Ankle sprains are the most common sports injury across virtually every athletic discipline — accounting for approximately 25% of all sports injuries and affecting an estimated 25,000 Americans daily. Despite their prevalence, ankle sprains are frequently undertreated (dismissed as “just a sprain”) or overtreated (unnecessarily immobilized when early functional management would produce better outcomes), and the correct first-line treatment — including whether and how to tape — depends on accurate understanding of the injury’s anatomy and severity. I sprained my ankle severely in my second year of competitive soccer and received the opposite of optimal management — immobilization and rest for three weeks when functional rehabilitation with appropriate taping support beginning within 72 hours would have returned me to play 10 days faster while producing better long-term joint stability.
Ankle Anatomy: The Structures at Risk
The ankle joint — the articulation between the tibia, fibula, and talus — is stabilized by three primary ligamentous complexes that determine both the mechanism and the severity of ankle sprains. The lateral ligament complex (most commonly injured) consists of three ligaments: the anterior talofibular ligament (ATFL) — the first ligament injured in inversion sprains and the most commonly damaged ankle ligament overall; the calcaneofibular ligament (CFL) — injured in more severe inversion sprains, providing both hindfoot and subtalar joint stability; and the posterior talofibular ligament (PTFL) — injured only in the most severe ankle sprains and complete dislocations. The medial ligament complex (deltoid ligament) — a strong, broad ligament on the inner ankle surface that resists eversion injury — is much less commonly injured than lateral ligaments because the fibula acts as a mechanical block to excessive eversion. The syndesmotic ligaments — connecting the distal tibia and fibula — are injured in “high ankle sprains” that are less common but more serious and slower-healing than lateral ankle sprains. Understanding which ligaments are injured and to what degree determines the appropriate management approach, taping technique, and expected recovery timeline for any specific ankle sprain.
Ankle Sprain Grades: Classification and Clinical Implications
Ankle sprains are classified into three grades based on the severity of ligamentous injury, with each grade having distinct clinical presentations, treatment requirements, and expected recovery timelines. Grade I (mild): stretching of the ligament fibers without macroscopic tearing — mild swelling, minimal tenderness, little or no functional loss, no joint instability. Most athletes can bear weight immediately and return to modified training within 1–3 days with appropriate taping support. Grade II (moderate): partial tearing of the ligament with moderate swelling, significant tenderness, measurable joint instability on clinical testing, and meaningful functional limitation — most athletes require 2–6 weeks for full recovery. Grade II sprains respond well to functional rehabilitation with taping or bracing support rather than prolonged immobilization. Grade III (severe): complete ligament rupture with significant swelling, marked instability, severe pain, and substantial functional loss — typically requires 4–8 weeks for initial healing and 3–6 months for full return to sport. Research from the British Journal of Sports Medicine on ankle sprain management guidelines recommends functional rehabilitation with support (taping or bracing) over immobilization for Grade II and most Grade III sprains, with surgical intervention reserved for Grade III sprains with persistent instability after comprehensive rehabilitation.
When to Tape vs. When to Seek Medical Care
The Ottawa Ankle Rules — a validated clinical decision tool developed to guide the decision between taping/functional management and radiographic assessment — provide the specific criteria that determine when ankle injury requires medical evaluation before taping is appropriate. Seek medical evaluation (X-ray to rule out fracture) if any of the following are present: bony tenderness at the posterior edge or tip of either malleolus (medial or lateral bony prominence), bony tenderness at the base of the fifth metatarsal (the bony bump on the outside of the midfoot), inability to bear weight for 4 steps immediately after the injury and at the time of assessment, or significant deformity suggesting dislocation. If none of these criteria are present, the Ottawa Ankle Rules have high sensitivity (96–99%) for ruling out fracture — meaning that the absence of these findings essentially excludes clinically significant fracture and confirms that functional management with appropriate taping is the correct first-line treatment. When in doubt about injury severity, particularly for high-grade instability, swelling that is severe and rapidly progressive, or any injury mechanism that involved unusual force (high-speed collision, direct impact on the ankle), professional medical assessment provides the imaging and clinical examination that clarifies appropriate management.
The PEACE and LOVE Framework: Modern Acute Ankle Management
The traditional RICE framework (Rest, Ice, Compression, Elevation) for acute ankle sprain management has been updated by sports medicine research to the more comprehensive PEACE and LOVE protocol that better reflects current evidence on optimal acute and subacute injury management. In the first 1–3 days (PEACE): Protect (unload and restrict movement to prevent aggravation, but avoid immobilization that impairs healing); Elevate (the injured ankle above heart level to reduce edema through hydrostatic pressure reduction); Avoid anti-inflammatory modalities in the first 48–72 hours (both ice for extended durations and NSAIDs may impair the initial inflammatory phase that initiates tissue repair — brief ice application for pain management is appropriate, but the goal is pain relief, not anti-inflammatory effect during the critical early healing window); Compress (elastic compression bandage reduces edema and provides proprioceptive support); Educate (understand the expected timeline and the functional management approach that produces better outcomes than passive rest). After the first 1–3 days (LOVE): Load (gradually reintroduce ankle loading through weight bearing and controlled movement, guided by pain response); Optimism (positive expectations about recovery speed and quality improve outcomes); Vascularization (aerobic activity that does not stress the ankle maintains overall conditioning during the recovery period); Exercise (specific rehabilitation exercises restore strength, range of motion, and proprioception — the variables that determine long-term ankle stability).
Is Taping Right for Your Situation?
Ankle taping is appropriate for three primary situations: providing protective support during the return to activity after acute ankle sprain (functional support that allows loading while protecting healing ligamentous tissue from reinjury); prophylactic support for athletes with a history of ankle sprains who participate in high-risk activities (field sports, basketball, volleyball, trail running); and symptomatic support for athletes with chronic ankle instability awaiting completion of rehabilitation. Ankle taping is not a substitute for rehabilitation — the neuromuscular, proprioceptive, and strength deficits that follow ankle sprains require specific rehabilitation exercises to resolve, and taping that allows return to activity without rehabilitation allows recurrence of sprain at high rates. Research from the Journal of Athletic Training on ankle taping and sprain prevention confirms that prophylactic ankle taping reduces lateral ankle sprain incidence by 50–70% in high-risk sports populations — but also finds that the proprioceptive benefit of taping (improving ankle position sense through skin mechanoreceptor stimulation) diminishes after 20–30 minutes of activity as the tape loosens, supporting the importance of neuromuscular rehabilitation as the primary long-term stability strategy with taping as the support tool rather than the primary intervention.
Mechanism of Injury: Understanding What Happened to Your Ankle
The mechanism of ankle sprain — the specific movement that caused the injury — determines which ligaments are most likely injured and therefore which taping techniques provide the appropriate protective support. Inversion sprain (rolling the ankle inward with the foot plantarflexed): the most common ankle sprain mechanism, accounting for approximately 85% of all ankle sprains — the ATFL is injured first, followed by the CFL in more severe sprains. The characteristic “stepping on the side of someone’s foot” or “rolling off a curb” mechanism. The specific taping techniques for inversion sprains support the lateral ankle by restricting inversion and plantarflexion, protecting the injured lateral ligamentous structures. Eversion sprain (rolling the ankle outward): far less common, as the deltoid ligament is strong and the fibula blocks excessive eversion — when it does occur, it is typically more severe and associated with fibular fracture that must be ruled out medically before functional management. High ankle sprain (syndesmotic injury from forced external rotation of the foot): typically from a rotational mechanism rather than pure inversion — the “high ankle” location above the typical sprain site, with tenderness along the anterior aspect of the lower leg, distinguishes this injury from standard lateral ankle sprains. High ankle sprains require different taping techniques (that limit external rotation rather than inversion) and typically take significantly longer to recover than lateral sprains.
Assessing Ankle Sprain Severity Before Taping
Before applying tape to an ankle sprain, a brief clinical assessment confirms the injury grade and absence of fracture indicators. Weight-bearing test: can the athlete bear weight on the injured ankle without significant pain? Full weight-bearing within minutes of injury suggests Grade I; partial weight-bearing ability suggests Grade II; complete inability to bear weight raises concern for Grade III or fracture. Swelling assessment: immediate, rapidly progressive swelling (visible within 10–15 minutes) suggests more significant soft tissue injury than delayed-onset swelling that develops over hours. Bony tenderness check (Ottawa Ankle Rules): palpate the posterior border of the lateral malleolus, the posterior border of the medial malleolus, and the base of the fifth metatarsal — tenderness at these specific bony landmarks requires medical evaluation before functional management. Anterior drawer test: gently grasp the heel and attempt to slide the talus forward relative to the tibia — excessive forward movement (compared to the uninjured ankle) indicates ATFL laxity suggesting Grade II or III injury. This brief 5-minute assessment allows confident application of appropriate taping for Grade I and most Grade II sprains while identifying the injuries requiring medical evaluation before functional management begins.
Materials Needed for Ankle Taping
Effective ankle taping requires specific materials that provide the combination of skin protection, secure adhesion, and appropriate support that medical-grade taping delivers. Prewrap (foam underwrap): a thin, foam-based material applied directly to the skin before the athletic tape that protects the skin from the adhesive of the rigid tape — essential for preventing the skin irritation and blistering that direct tape application to the skin produces with repeated application and removal. Standard width: 2.75 inches, applied in overlapping layers from the foot through the ankle. Rigid athletic tape: the primary supportive component — 1.5-inch white athletic tape (Johnson & Johnson Coach or Mueller M-TApe are standard) that provides the firm, inelastic support structure. Elastic tape (Elastikon or Coban): flexible tape used for the heel lock and stirrup components in techniques that require some movement while still providing support — contrasted with the rigid tape that provides firm restriction. Adherent spray (Tuffner or Tensoplast spray): applied to the skin before prewrap to improve tape adhesion on athletes who perspire heavily or in hot, humid conditions — optional but significantly improves tape longevity during activity. Skin lubricant (petroleum jelly or bandage): applied over bony prominences (malleoli) before prewrap to prevent pressure sores from tape compression at these anatomical high-points.
The anatomical understanding of ankle sprain mechanism, severity grading, and appropriate assessment before taping provides the clinical foundation that separates effective protective taping from the incorrectly applied tape that provides false security without genuine structural support for recovering ankle ligaments. The comprehensive ankle sprain management system — accurate injury assessment, appropriate taping technique, evidence-based rehabilitation, and long-term prevention strategies — provides the complete approach that protects ankle health throughout an athletic career. Every component matters: the tape provides immediate support, rehabilitation restores function, and prevention strategies reduce the risk of recurrence that inadequately managed sprains produce at rates as high as 70% in the first year following the initial injury. Apply the knowledge, tape correctly, rehabilitate thoroughly, and return to sport stronger and more stable than before the injury. The ankle is resilient when treated correctly. Win.

How to Tape a Sprained Ankle: Step-by-Step Techniques
The two primary ankle taping techniques — the closed basket weave (the standard athletic training technique for lateral ankle sprain) and the open basket weave (a modified version that accommodates swelling) — provide the lateral ankle support that protects recovering lateral ligaments during activity. These step-by-step instructions follow the technique taught in certified athletic training programs and used by sports medicine professionals across high school, collegiate, and professional athletic settings.
Preparation: Setting Up for Successful Application
Successful ankle taping begins with proper preparation — the skin condition, ankle position, and material readiness before the first strip of tape is applied determine the quality and longevity of the completed taping job. Skin preparation: the skin should be clean, dry, and free of lotion or oil — these substances reduce tape adhesion and cause early loosening. For athletes with very hairy skin, light shaving of the taping area reduces the pain of removal and improves adhesion. Apply adherent spray from 6–8 inches away, allow 30–60 seconds to dry before proceeding. Bony prominence protection: place small pads of foam or petroleum jelly over the medial and lateral malleoli before prewrap application — preventing the pressure sores that rigid tape compression over these prominences produces during activity. Ankle position: position the ankle at 90 degrees of dorsiflexion (right angle between the foot and leg) with the foot in slight eversion — this is the functional taping position that provides maximum protective support for the lateral ankle structures in the movement patterns of most sports. Prewrap application: starting at the metatarsal heads (ball of the foot), apply prewrap in overlapping spirals moving proximally (upward toward the leg), continuing to approximately 4–5 inches above the medial malleolus. Apply with light tension — enough to secure without compression — and ensure complete, overlap-free coverage of the ankle region that will receive rigid tape.
Step 1: Anchor Strips
Anchor strips are the horizontal starting points for the entire taping structure — they must be placed correctly to provide secure attachment points for the subsequent stirrups and heel locks. Apply 3 anchor strips using 1.5-inch white athletic tape: the first strip horizontally around the leg approximately 4 inches above the malleoli, applied without stretch (the rigid tape provides the support without being stretched, unlike elastic tape), and ensuring the strip encircles the leg completely with a 50% overlap. The second and third anchor strips are placed just distal to the first, each overlapping the previous by 50%. These anchor strips must lie completely flat with no wrinkles or ridges — ridges create pressure points that produce skin irritation and potential blistering during activity. The distal anchor (foot anchor): apply one horizontal strip around the foot at the metatarsal heads, which will anchor the distal ends of the stirrups. This strip should not restrict the forefoot flexion required for normal push-off mechanics — test by having the athlete wiggle their toes to confirm no restriction.
Step 2: Stirrups
Stirrups are the vertical strips that provide the primary lateral support of the tape job — they run from the medial side of the leg, under the heel, to the lateral side, creating the U-shaped structure that resists ankle inversion. Apply 3 stirrups using 1.5-inch white athletic tape: begin each stirrup on the medial side of the upper anchor, angling slightly posteriorly as it passes from the anchor strip, continuing down the medial ankle, under the heel pad (ensuring the strip passes directly under the calcaneus for maximum support), and continuing up the lateral ankle to attach on the lateral side of the anchor strip. Each subsequent stirrup is positioned slightly anteriorly to the previous one, with 50% overlap, covering the medial and lateral malleoli with tape on the third stirrup. The direction and angle of stirrups is critical: strips that are too anterior fail to adequately support the posterior talofibular and calcaneofibular ligaments; strips that angle too far posteriorly may restrict push-off mechanics. After applying all three stirrups, the tape should cover both malleoli completely and create a firm lateral support structure when the ankle is inverted to test resistance.
Step 3: Heel Locks
Heel locks provide the calcaneal stabilization that prevents the heel from rolling inward, directly supporting the ankle’s mechanical stability during the impact and direction-change movements of athletic activity. The figure-8 heel lock technique: begin with tape on the anterior ankle, angle across the lateral ankle and down behind the Achilles tendon, sweep under the heel from the lateral to medial side, bring the tape up the medial aspect of the ankle, and complete by crossing anteriorly back to the starting point. This creates a figure-8 pattern around the heel and ankle that locks the calcaneus in position. Apply two figure-8 heel locks, with the second lock starting on the same anterior ankle position but angled slightly superiorly from the first, providing additional calcaneal stability. The heel lock is frequently applied incorrectly — the most common error is allowing the tape to angle too far proximally on the Achilles tendon region, which restricts plantarflexion mechanics that are required for normal running and jumping. Ensure the heel lock sweep passes under the calcaneus at the most inferior portion of the heel rather than across the Achilles tendon.
Step 4: Closing Strips and Finishing
Closing strips are the horizontal strips that bind the stirrups and heel locks together into a unified support structure and cover any exposed prewrap or skin. Starting at the distal foot anchor, apply horizontal closing strips in overlapping layers moving proximally (upward), ensuring 50% overlap between strips, and continuing until reaching the upper anchor strips. These closing strips should encircle the ankle smoothly and completely, covering all exposed tape edges and creating the smooth, wrinkle-free exterior that distributes pressure evenly. The completed tape job should be firm but not restrictive — the athlete should be able to dorsiflex to 90 degrees (confirming no restriction of required dorsiflexion) and the tape should resist inversion testing. After completing the tape job, have the athlete stand and walk — any areas of immediate discomfort, pressure points, or significant restriction of normal mechanics should be addressed by removing and reapplying the problematic strips. A properly applied tape job should feel supportive and comfortable immediately and maintain its support for 20–30 minutes of activity before loosening from perspiration and movement.
The KT Tape and Elastic Therapeutic Taping Alternative
Kinesiology tape (KT Tape, RockTape, Leukotape K) — the colorful elastic tape that has become ubiquitous in athletic settings — provides a different type of ankle support than rigid white athletic tape and is used for different clinical purposes. Kinesiology tape is elastic (stretching 40–60% from its original length) rather than rigid, meaning it does not provide the mechanical restriction of inversion that rigid athletic tape produces. Its primary mechanisms of effect are proprioceptive (improving ankle position sense through skin mechanoreceptor stimulation by the tape’s elastic recoil), lymphatic drainage facilitation (the lifting effect of kinesiology tape on the skin creates space that facilitates lymphatic flow and reduces edema in the acute post-sprain phase), and the facilitation or inhibition of specific muscles through the direction of tape application. The clinical application for acute ankle sprains: kinesiology tape is most useful in the first 48–72 hours post-sprain for edema management (lymphatic drainage technique) and in the rehabilitation phase for proprioceptive support during functional exercises. Rigid athletic tape is the preferred support technique for return to activity and prophylactic support during high-risk athletic movements that produce the inversion stress that elastic tape cannot adequately resist.
Athletic Position During Taping: Why It Matters
The ankle position maintained during tape application determines the functional range of motion the completed tape job allows and the protective limitation it provides. Taping the ankle in excessive plantarflexion (toes pointing down more than 90 degrees) restricts the dorsiflexion required for normal running, stair climbing, and athletic push-off mechanics — producing a tape job that impairs performance while providing excessive restriction that is not biomechanically necessary for ligament protection. Taping the ankle in slight eversion (rolling the foot outward slightly) prestresses the lateral ankle structures in the direction opposite inversion, maximizing the inversion restriction provided by the completed tape job. The practical check for correct position: with the ankle taped, the athlete should be able to dorsiflex to 90 degrees comfortably (stand flat-footed without tape restriction), walk normally without antalgic pattern, and jog without mechanical compensation. Any restriction of dorsiflexion or push-off mechanics indicates the tape position or closing strip placement requires adjustment. For self-taping athletes learning the technique independently, positioning a footstool or box at the correct height to maintain 90 degrees dorsiflexion automatically during application removes the most common positioning error from the self-application process.
Tape Selection: Understanding the Options
Not all athletic tape is equivalent in adhesion quality, rigidity, and durability — understanding the specific characteristics of common tape options allows selection of the most appropriate product for the clinical situation. Johnson & Johnson Coach tape: the standard reference tape used in athletic training education — strong adhesion, consistent rigidity, and reliable performance, available in 1.5-inch width appropriate for ankle taping. Mueller M-Tape: equivalent performance to Coach tape, slightly less expensive, widely available in sports medicine supply channels. Leukotape P: a more rigid, higher-adhesion tape used for specific applications requiring maximum restriction (patellar tracking, shoulder stabilization) — too rigid for routine ankle taping but useful for applications requiring maximum ligamentous support. Hypoallergenic tape options: athletes with adhesive sensitivity require hypoallergenic products (3M Micropore, Tenderskin) that provide reduced adhesion compared to standard athletic tape but avoid the contact dermatitis that standard adhesive produces in sensitive skin. For these athletes, the reduced adhesion requires additional anchoring strips and prewrap to maintain tape job integrity during activity. Budget tape: avoid low-cost, unbranded athletic tape for ankle taping applications — the inferior adhesion and inconsistent rigidity of budget products produces tape jobs that loosen rapidly and provide unreliable support, negating the purpose of the taping intervention.
Taping Technique Variations: Open vs Closed Basket Weave
The closed basket weave technique is the standard for sub-acute taping, but the open basket weave modification is specifically indicated for acute ankle sprains with significant swelling. The key difference: the closed basket weave completely encircles the ankle with closing strips, providing maximum support but also maximum compression that may worsen edema. The open basket weave leaves a gap on the anterior ankle (no closing strips over the front) that allows swelling to expand without increasing compression. As swelling resolves over 3–5 days, transition from open to closed basket weave for stronger support during rehabilitation. The choice between techniques is guided by swelling severity: minimal swelling allows immediate closed basket weave; significant swelling requires the open modification. In application, the open basket weave applies stirrups and heel locks identically to the closed technique, then applies closing strips only posteriorly and laterally — leaving the anterior ankle covered only by prewrap rather than rigid tape.
Tape Removal Without Skin Damage
Correct tape removal prevents the skin tears and folliculitis that repeated aggressive removal produces. Use dedicated tape scissors or bandage cutters to cut along the posterior ankle (not over the Achilles or malleoli). After cutting, peel the tape back at a low angle parallel to the skin — never perpendicular. Apply adhesive remover spray to stubborn adhesive before attempting to remove it from sensitive areas. After removal, clean the skin and inspect for irritation or breakdown. Apply skin-conditioning lotion between taping applications to maintain skin integrity across repeated tape cycles. For athletes receiving tape daily, consider alternating between tape and bracing to allow skin recovery on tape-free days.
The comprehensive ankle sprain management system — accurate injury assessment, appropriate taping technique, evidence-based rehabilitation, and long-term prevention strategies — provides the complete approach that protects ankle health throughout an athletic career. Every component matters: the tape provides immediate support, rehabilitation restores function, and prevention strategies reduce the risk of recurrence that inadequately managed sprains produce at rates as high as 70% in the first year following the initial injury. Proper technique transforms tape from a placebo into genuine structural support. Tape well and train confidently. Tape. Train. Recover.
Pre-Taping Skin Condition Assessment
Before applying athletic tape to any athlete, assessing the skin condition of the taping area prevents the complications that tape application to compromised skin produces. Healthy skin tolerates repeated athletic tape application and removal well — the skin should be intact, without active wounds, rashes, or significant irritation from previous taping. Common skin conditions that require modification before taping: tape blisters from previous applications (allow 24–48 hours of healing before re-taping or switch to brace during recovery); folliculitis (infected hair follicles, appearing as small pustules around hair follicles in the taping area — the occlusive tape environment worsens folliculitis and spreads the infection); eczema or psoriasis in the taping area (require hypoallergenic prewrap and low-adhesive tape alternatives); and hypersensitive or atopic skin that reacts to standard tape adhesives with hives or contact dermatitis (confirmed by a 24-hour patch test of tape adhesive on the inner forearm before full application). Athletes who report that tape “always irritates” their skin are frequently reacting to the zinc oxide or rubber-based adhesive of standard athletic tape rather than to taping itself — switching to acrylic-based adhesive tapes (which have lower allergenic potential) and hypoallergenic prewrap typically resolves the irritation without requiring abandonment of the taping approach.
Taping in Different Environmental Conditions
The environmental conditions during taping application and athletic activity significantly influence tape adhesion, longevity, and support quality — and practical modifications maintain effective taping across diverse conditions. Hot, humid environments: perspiration accelerates tape loosening by migrating beneath the tape-skin interface — applying adherent spray before prewrap, ensuring completely dry skin before tape application, and considering higher-adhesive tape formulations (Leukotape P provides substantially higher adhesion than standard athletic tape) extends the effective life of tape jobs in hot conditions. Cold environments: cold reduces tape adhesive effectiveness and makes the tape brittle and less conformable to ankle anatomy — warming the tape roll before application (carrying it against the body for 15–20 minutes) and warming the skin with a dry towel before taping improves adhesion and conformability in cold conditions. Aquatic environments (swimming, water polo, beach volleyball): standard athletic tape loses adhesion almost immediately when submerged — waterproof elastic tape (Hypafix) or waterproof kinesiology tape provides the best adhesion in wet environments, though at lower support levels than rigid tape. For competitive swimmers with ankle instability, ankle bracing during dry-land training and races combined with rehabilitation provides more practical long-term management than attempting to maintain athletic tape in the pool environment.
Bilateral Ankle Taping: Managing Both Ankles
Athletes who require bilateral (both ankles) taping — either from simultaneous ankle sprains or from bilateral chronic instability — require efficient taping protocols that minimize application time while maintaining support quality on both ankles. The bilateral taping sequence: complete the full taping of the first ankle before beginning the second, maintaining consistent ankle position throughout — attempting to alternate between ankles during application loses position consistency and extends application time without quality benefit. Bilateral tape application by a single athletic trainer typically requires 20–30 minutes total — a significant pre-practice time commitment that many athletic programs manage by training assistant coaches or graduate assistants in basic taping technique for routine bilateral applications. Athletes who require bilateral taping regularly should strongly consider transitioning to bilateral ankle bracing (requiring no skill and taking 3–5 minutes for self-application of both ankles) for practice settings, reserving professional taping for competition when thin profile under footwear justifies the additional time and skill requirement. The bilateral instability situation also warrants investigation of systemic factors that may be contributing to bilateral ankle weakness — hip abductor weakness, poor overall balance, inadequate proprioceptive training, or inappropriate training surface choices that are producing bilateral ankle stress beyond the ligamentous capacity of both ankles.
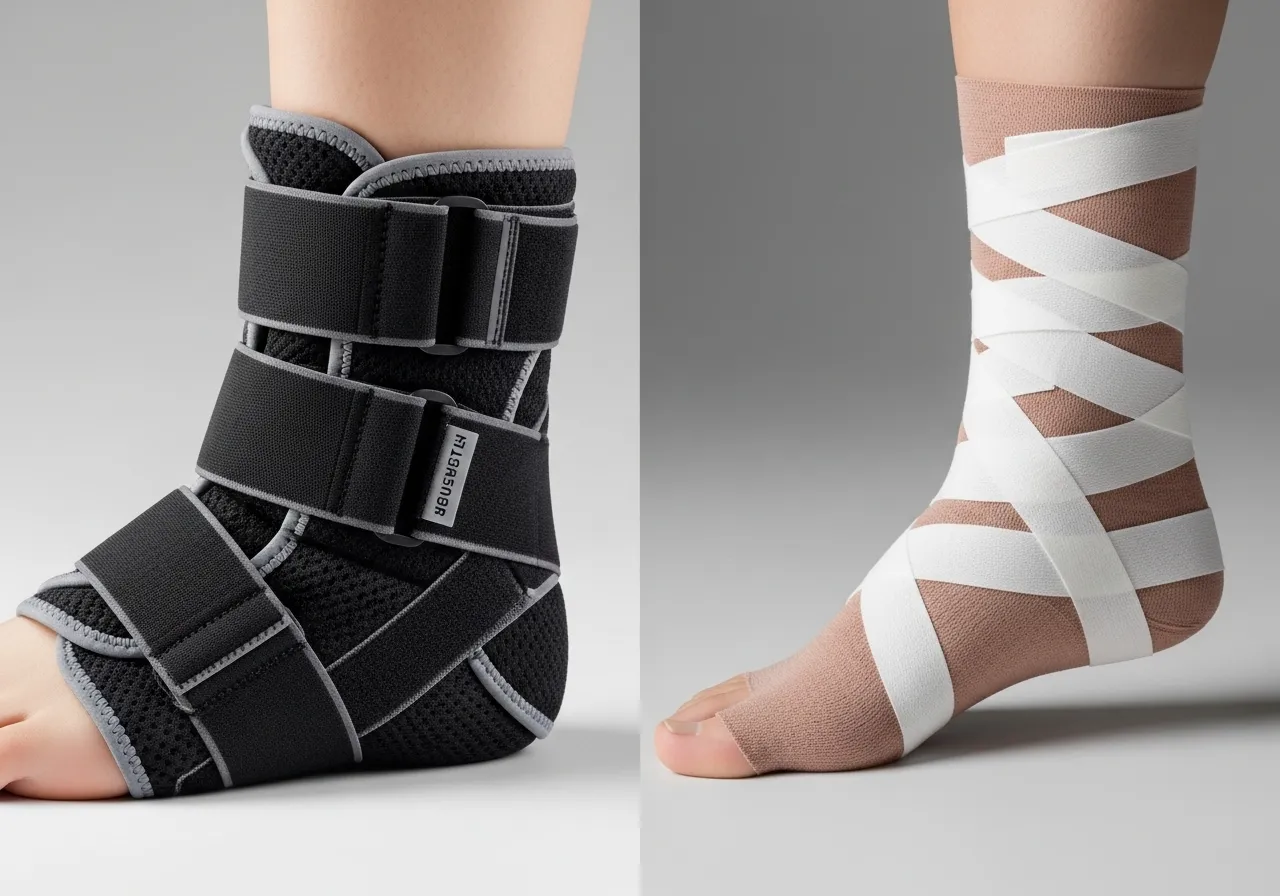
Athletic Taping vs. Bracing: Comparing Ankle Support Methods
The choice between athletic taping and ankle bracing for ankle sprain support is a practical decision that depends on the clinical situation, athlete preference, activity level, and the specific support characteristics each method provides. Understanding the evidence-based comparison allows informed selection of the most appropriate support method for any specific situation.
Rigid Athletic Tape: Advantages and Limitations
Rigid athletic tape provides the highest initial support level of any non-surgical ankle stabilization method — limiting inversion by 50–60% immediately after application in laboratory testing. The primary advantage of taping over bracing: tape conforms to the individual anatomy of any ankle, providing custom-fit support that commercially manufactured braces cannot perfectly replicate, particularly for athletes with unusual ankle anatomy, edema that changes joint dimensions, or injuries requiring specific anatomical support that general-purpose braces do not provide. The primary limitations of athletic tape: support degrades rapidly with activity — research consistently finds that tape restricts ankle inversion by 50% immediately post-application but this restriction decreases to 10–20% after 20–30 minutes of vigorous activity as the tape loosens from perspiration, movement, and heat. This rapid degradation means that tape jobs require replacement every 1–2 hours of intense activity for continuous adequate support — a practical and economic limitation for athletes in extended practice or competition settings. The cost and skill requirement of effective taping is also a limitation — professional application by a certified athletic trainer or physical therapist costs $15–30 per application, and self-application requires specific training to produce consistently effective support.
Ankle Braces: Types, Evidence, and Practical Advantages
Ankle braces provide consistent, maintained support throughout activity without the degradation that tape experiences, making them the preferred support method for many athletes and clinical situations. The major brace categories: lace-up braces (canvas or neoprene braces that lace up the anterior ankle, providing moderate inversion restriction and proprioceptive support — examples include the McDavid 195 and Aircast A60); semi-rigid braces (plastic frame with fabric lining, providing rigid lateral support through stays or shells — the Aircast Air-Stirrup and Active Ankle T2 are the most research-supported examples); and functional braces with rigid lateral components and hinged ankle joints (providing maximum protection while allowing dorsiflexion/plantarflexion through the hinge mechanism). Research from the American Physical Therapy Association guidelines on ankle sprain management finds that semi-rigid ankle braces (particularly the Aircast Air-Stirrup design) reduce ankle sprain recurrence rates by 50–70% in the 12 months following an initial sprain — equivalent to or better than prophylactic taping across extended sporting seasons, at lower ongoing cost. The practical advantages of bracing over taping for most athletes: consistent support throughout activity without degradation, reusability and lower cost per session for extended use, the ability to self-apply correctly without professional assistance, and the convenience of application and removal compared to tape that requires cutting for removal.
When to Choose Tape vs. Brace
The clinical indications for each support method guide the selection decision. Choose athletic tape when: the injury is acute (first 72 hours) and the ankle dimensions are changing due to edema, making brace fit inconsistent; the athlete has very narrow or very wide ankles that commercially available braces fit poorly; the specific injury pattern (syndesmotic sprain, medial ankle sprain) requires a taping configuration not available in standard braces; or the athlete is in competition where the thin profile of tape is preferred over the bulk of a brace inside footwear. Choose ankle brace when: the athlete is in a rehabilitation program requiring frequent application and removal; the injury is sub-acute or chronic and dimensions are stable; cost efficiency across an extended return-to-sport period is important; the athlete will be applying support independently without trained assistance; or the athlete has a history of recurrent ankle sprains requiring long-term prophylactic protection. The evidence supports equivalent functional outcomes between appropriate taping and appropriate bracing for most clinical situations — the practical considerations of cost, skill requirement, activity duration, and athlete preference often determine the appropriate choice more than clinical superiority of one method over the other.
Compression Wrapping as a Complement to Taping
Elastic compression wrapping — applied under and over rigid taping or bracing, or independently for acute phase swelling management — complements the structural support of tape or brace with the edema management that compression provides. The Robert Jones bandage (layers of cotton padding alternating with elastic bandage) is the standard acute phase compression dressing for significant ankle swelling — providing the pressure gradient and immobilization that reduces acute edema formation in the first 24–48 hours. For athletes returning to activity during the sub-acute phase (days 3–14), compression over taping or under an ankle brace reduces the residual edema that impairs range of motion, proprioception, and comfort during activity. The correct application: compression gradient decreasing from distal to proximal (tightest at the forefoot, decreasing toward the calf) ensures that venous and lymphatic return is facilitated rather than blocked by tight proximal wrapping. Check circulation regularly by assessing toe color and sensation — any numbness, tingling, or discoloration indicates excessively tight compression requiring immediate adjustment.
Footwear and Surface Considerations
The footwear worn with ankle tape or a brace significantly influences the functional support provided — a well-taped ankle in appropriate footwear provides more effective protection than the same tape job in inadequate footwear. The high-top shoe’s effect on ankle support has been controversial in the research literature — studies comparing high-top and low-top footwear for ankle sprain prevention find only modest additional protection from high-tops beyond what well-fitted low-tops provide when combined with tape or brace. The footwear characteristics most relevant to ankle stability during taping: lace-up closure (allowing snug fit that supports the tape job from outside), appropriate sole width and stability for the sport’s surface demands, and a heel counter that provides the heel stability that the medial and lateral ankle structures require. Surface type also influences the mechanism and risk of ankle sprain — court surfaces (basketball, volleyball) where rapid direction changes on hard, flat surfaces create specific inversion risks differ from field surfaces (soccer, football) where surface irregularity creates unpredictable loading, and differ from trail running surfaces where rocks and roots create constant inversion challenge. Taping or bracing techniques may be selected or modified based on the primary inversion risk mechanism that the specific sport surface creates.
Ankle Taping for Specific Sports: Modifications by Activity
Different sports create different ankle loading patterns, inversion risk mechanisms, and footwear constraints that influence the appropriate taping approach. Basketball and volleyball (court sports): these sports combine rapid direction changes, frequent jumping and landing, and hard court surfaces that create high ankle inversion risk — the standard closed basket weave technique with full heel locks provides the inversion restriction that these movement patterns require. The flat, hard court surface allows standard tape thickness without the surface irregularity concerns of field sports. Soccer and field sports: the cleated footwear of field sports accommodates the additional tape thickness more readily than tight-fitting court shoes — athletes with narrow feet in standard cleats benefit from sock padding over the tape to prevent shoe pressure points. The irregular field surface and multidirectional movement demands of field sports benefit from the complete basket weave technique rather than simplified approaches. Trail running: the unpredictable surface irregularity of trail running creates constant low-level inversion loading — a modified technique using elastic tape (kinesiology tape) in addition to rigid tape for the entire lower leg may provide greater protection against the repeated minor inversion events of technical trail terrain. Swimming and water sports: tape does not adhere in aquatic environments — athletes with ankle instability in water sports require brace-based support that maintains integrity when wet, or must use waterproof kinesiology tape for proprioceptive support with the understanding that mechanical restriction is not provided in wet conditions.
Pediatric and Adolescent Ankle Taping Considerations
Athletes under 18 years old have anatomical considerations that modify standard ankle taping approaches — the growth plates (physes) in the distal fibula and tibia that are active until mid-to-late adolescence are more vulnerable to injury than the ligaments they adjoin, making accurate clinical assessment particularly important before functional management of apparent ankle sprains in younger athletes. The Salter-Harris fracture (growth plate fracture) at the distal fibula presents with bony tenderness in the location that would typically suggest ATFL sprain in an adult — and is managed very differently (requires orthopedic evaluation and often immobilization) than the ligamentous sprain it can be mistaken for. The Ottawa Ankle Rules apply to adults and patients 18 and older — for younger athletes, a more conservative assessment approach with lower threshold for imaging is appropriate to rule out growth plate injuries before functional management begins. Tape adhesion on children’s skin requires particularly careful prewrap application as pediatric skin is more sensitive and more prone to adhesive irritation than adult skin. For young athletes in high-risk sports who require prophylactic ankle support, lace-up braces are generally preferred over tape for their convenience, reusability, and the avoidance of repeated tape adhesive exposure to sensitive skin.
High Ankle Sprain Taping: Syndesmotic Support
High ankle sprains — injuries to the syndesmotic ligaments connecting the distal tibia and fibula — require a fundamentally different taping approach. The mechanism (external rotation and dorsiflexion) and structure injured require taping that limits external rotation rather than the inversion-limiting technique for lateral sprains. The syndesmotic compression wrap: using 3-inch elastic tape, begin medially above the malleolus, wrap firmly across the anterior ankle and around the lateral lower leg, creating circumferential compression that holds the tibia and fibula together. This compression directly supports the anatomical disruption. High ankle sprains take 6–12 weeks to heal versus 2–6 weeks for lateral sprains — athletes must be counseled about the extended timeline to prevent premature return that risks chronic instability.
Weather and Heat Effects on Tape Performance
Environmental conditions significantly influence tape adhesion and performance. High heat and humidity (summer outdoor sports, indoor hot environments) accelerate tape loosening from perspiration — athletes in these conditions benefit from adherent spray applied to skin before prewrap, lightweight breathable prewrap materials, and acceptance that tape jobs may require replacement at halftime or after the first hour of intense activity. Cold weather taping (winter outdoor sports) presents different challenges: cold reduces tape adhesion strength initially and makes the tape brittle — warming the tape rolls in pockets before application and applying extra anchor strips compensates for cold-reduced adhesion. High-altitude and dry climate conditions reduce perspiration, improving tape adhesion duration compared to hot, humid environments. Understanding these environmental factors allows appropriate expectation-setting and technique modification that maintains tape effectiveness across the varied conditions that athletes encounter.
The comprehensive ankle sprain management system — accurate injury assessment, appropriate taping technique, evidence-based rehabilitation, and long-term prevention strategies — provides the complete approach that protects ankle health throughout an athletic career. Every component matters: the tape provides immediate support, rehabilitation restores function, and prevention strategies reduce the risk of recurrence that inadequately managed sprains produce at rates as high as 70% in the first year following the initial injury. Choose the right support method for your specific situation and stick with it consistently. Support the ankle. Trust the process. Return stronger. Now go.
The Evidence on Ankle Bracing for Different Sports
Different sports present distinct ankle sprain risk profiles based on their movement demands, surface characteristics, and contact patterns — and the evidence for brace effectiveness varies across these contexts. Basketball: the sport with the highest documented ankle sprain incidence — research consistently finds that semi-rigid bracing (Aircast Air-Stirrup design) reduces ankle sprain rates by 60–70% in basketball players with prior sprain history, making prophylactic bracing the standard recommendation for all competitive basketball players with prior ankle injury. The high-top basketball shoe provides additional stability that compounds the brace effect. Soccer: the cleated surface, frequent contact, and multidirectional movement create both high ankle sprain risk and specific constraints on brace profile that fits within soccer cleats — thinner lace-up braces (McDavid 195) provide adequate support within the confined space of soccer cleats. Research shows 40–50% sprain reduction with brace use in soccer. Volleyball: the landing from jumps onto the libero’s position creates the specific inversion-under-load mechanism that ankle sprains occur from in volleyball — blocking position athletes in particular benefit from prophylactic support at the net where jump landing with contact risk is highest. Trail running: ankle brace use during trail running remains more controversial than court sport bracing — the terrain variability requires ankle mobility for reactive foot placement, and some evidence suggests that bracing-induced proprioceptive reduction may impair the reactive ankle stabilization that trail running demands. Many trail runners prefer to address ankle stability through training (strengthening and proprioceptive training) rather than mechanical bracing that may reduce the reactive capability training develops.
Pediatric and Adolescent Ankle Taping Considerations
Youth athletes — from middle school through high school — present specific considerations for ankle taping that differ from adult athletic populations. Physeal (growth plate) injuries: adolescent athletes with open growth plates may sustain physeal fractures that present with similar symptoms to lateral ankle sprains (lateral pain, swelling, tenderness) but require medical evaluation and different management. The Salter-Harris classification of growth plate injuries includes fractures through or involving the distal fibular physis (the most common site) that are frequently misdiagnosed as ankle sprains — any adolescent with ankle injury and tenderness directly over the distal fibula tip (rather than 1–2 cm above) requires X-ray evaluation before functional management. Skin sensitivity: adolescent skin tends to be more sensitive to tape adhesives than adult skin — using hypoallergenic prewrap and limiting the duration between tape removal and re-application reduces the skin irritation that is more common in youth athletes. Instruction and compliance: youth athletes benefit from specific instruction on symptoms that require tape removal (numbness, tingling, skin color changes) and may have lower compliance with appropriate tape application and removal — adult supervision of the taping process and regular check-ins during activity ensure that problems are identified and addressed promptly.
Cost Analysis: Tape vs. Brace Over a Full Athletic Season
The cost comparison between athletic taping and bracing over a full athletic season provides the economic context for the practical support decision that athletes and athletic programs make. Athletic tape cost: a roll of quality athletic tape (Johnson & Johnson Coach, 15-yard roll) costs approximately $4–7 retail — a full ankle taping job requires approximately half a roll, making each professional tape job approximately $2–4 in materials, plus the professional application cost ($10–30 per application by a certified athletic trainer). For an athlete taped before every practice and game over a 20-week season (approximately 60 sessions), tape material costs total $120–240 and professional application costs (at even minimum rate) add $600–1,800 for the season. Brace cost: quality semi-rigid ankle braces (Aircast Air-Stirrup, Active Ankle T2) cost $30–60 retail, last 1–3 seasons with appropriate maintenance, and require no professional application — the total seasonal cost is the brace purchase price distributed across the seasons of use. For any athlete participating in more than 15–20 athletic sessions requiring ankle support, the annual cost of bracing is substantially lower than taping, making bracing the cost-efficient primary support strategy with taping reserved for specific situations where its advantages justify the higher per-session cost.

Ankle Sprain Rehabilitation: Recovery Protocol From Day 1 to Return to Sport
Ankle taping supports the ankle during activity but does not resolve the strength, proprioception, and range of motion deficits that ankle sprains produce and that, when unaddressed, predict recurrent sprains. Comprehensive rehabilitation — the exercise program that addresses these deficits — is the primary determinant of long-term ankle stability and the factor that most differentiates athletes who reinjure versus those who do not.
Phase 1: Acute Phase Management (Days 1–3)
The primary goals of the acute phase are pain and edema management, tissue protection, and early protected weight bearing. Elevation and compression: maintain the injured ankle elevated above heart level as much as possible during the first 48 hours — significantly reducing edema formation that would otherwise impair early rehabilitation. Apply elastic compression bandaging (not rigid tape in the very acute phase when edema is rapidly progressing and compression must accommodate volume changes). Ice application: brief applications of 10–15 minutes ice or ice pack for pain management — the goal is analgesia rather than anti-inflammatory effect, and there is no need for prolonged or repeated application. Early weight bearing: begin partial weight bearing with crutch support on the day of injury if pain permits — the early compressive loading of the ankle through weight bearing stimulates ligament healing by orienting collagen fibers in the direction of mechanical stress that the ligament must support. Research consistently finds that early mobilization and weight bearing produces superior outcomes to immobilization for Grade I and II ankle sprains — faster return to function, better strength recovery, and equivalent or lower recurrence rates.
Phase 2: Subacute Rehabilitation (Days 4–14)
The subacute phase introduces progressive range of motion exercises, proprioceptive training, and functional movement patterns that begin rebuilding the neuromuscular competencies that ankle sprain disrupts. Range of motion exercises: ankle alphabet (tracing the alphabet in the air with the big toe), plantarflexion/dorsiflexion pumps, and controlled inversion/eversion through pain-free range. Begin these exercises in non-weight-bearing positions on day 3–4, progressing to weight-bearing positions as pain and swelling allow. Proprioceptive training: standing balance on the injured ankle (single-leg stance) — beginning with eyes open on a firm surface (30 seconds goal), progressing to eyes closed, then to foam or balance board surfaces as stability improves. Research from the PubMed literature on ankle sprain rehabilitation identifies proprioceptive training as the most critical rehabilitation component for preventing recurrent sprain — the ankle’s position-sensing capability is specifically disrupted by ligament injury, and targeted proprioceptive training is required to restore it. Strengthening: theraband exercises for ankle eversion, dorsiflexion, and plantarflexion (the muscle groups that actively stabilize the ankle and complement ligamentous support) — beginning in supported, non-weight-bearing positions and progressing to functional positions as strength improves.
Phase 3: Functional Rehabilitation (Weeks 2–6)
The functional rehabilitation phase progresses from controlled exercises to sport-specific movement patterns under gradually increasing speed, load, and complexity — rebuilding the complete neuromuscular system that athletic performance requires. Running progression: walking → jogging → running at increasing speeds → direction changes → cutting and pivoting patterns — advancing only when the previous level is pain-free and demonstrates normal mechanics. Plyometric progression: double-leg jumps → single-leg hops → lateral bounds → reactive direction changes — each stage requiring demonstrated stability and pain-free performance before advancement. Sport-specific drills: introduce the specific movement patterns, speeds, and contacts of the athlete’s sport under controlled conditions before returning to full practice participation. The functional rehabilitation phase is where most athletes are undertreated — the reduction of acute symptoms (pain and swelling) at 1–2 weeks is frequently mistaken for complete recovery, leading to premature return to full activity without completing the neuromuscular rehabilitation that prevents recurrence. Research on ankle sprain recurrence rates finds that athletes who complete full functional rehabilitation have 50–70% lower recurrence rates than those who return to sport based on symptom resolution alone.
Phase 4: Return to Sport and Criteria
Return to sport criteria for ankle sprain provide objective benchmarks that confirm rehabilitation completeness rather than relying on symptom resolution or arbitrary time frames. The evidence-based return-to-sport criteria: full weight-bearing without antalgic (pain-avoiding) gait pattern; ankle range of motion within 5–10% of the uninjured side (dorsiflexion, plantarflexion, inversion, eversion); single-leg balance on the injured ankle equal to the uninjured side (both eyes-open and eyes-closed conditions); calf raise strength equal to the uninjured side (single-leg heel raise for 20+ repetitions without compensatory trunk lean); hop tests equal to 90% of the uninjured side (single-leg hop for distance, triple hop, crossover hop); and the ability to perform sport-specific movements (cutting, pivoting, sprinting) without pain, hesitation, or compensation. Meeting these criteria before return to full sport participation ensures that the neuromuscular deficits that predict recurrence have been addressed — rather than exposing a rehabilitation-deficient ankle to the high-speed, multidirectional stress of competitive sport before its stability is fully restored.
Chronic Ankle Instability: When Rehab Is Not Enough
Approximately 30–40% of athletes who experience a lateral ankle sprain develop chronic ankle instability (CAI) — a condition characterized by persistent feelings of “giving way,” recurrent sprains, and functional limitations despite completing standard rehabilitation. CAI results from incomplete recovery of the neuromuscular and mechanical stability that acute sprains disrupt, and requires more aggressive rehabilitation targeting the specific deficits that persist. Peroneals strengthening: the peroneal muscles (peroneus longus and brevis) are the primary dynamic stabilizers of the lateral ankle, and their strength and reaction time deficits in CAI are the primary modifiable factors that targeted rehabilitation addresses. High-intensity, task-specific balance training: beyond the standard single-leg balance progression, athletes with CAI benefit from reactive balance training (responding to unexpected perturbations) and dual-task balance training (maintaining balance while performing a secondary cognitive or manual task) that challenges the specific neuromuscular processing deficits of CAI. For athletes who fail to achieve stability with comprehensive conservative rehabilitation, surgical consultation for lateral ankle reconstruction (Broström-Gould procedure or its modifications) provides the anatomical restoration that rehabilitation cannot achieve for mechanically insufficient ligament tissue.
Nutrition for Ligament Healing: Supporting Recovery from the Inside
The nutritional environment during ankle sprain recovery influences the rate and quality of ligament tissue healing — collagen synthesis, the primary repair mechanism for ligamentous injury, requires specific nutritional substrates that rehabilitation-focused nutrition should optimize. Vitamin C: the rate-limiting nutrient for collagen synthesis, required for the hydroxylation of proline and lysine amino acids that stabilize the collagen triple helix structure — research on vitamin C and collagen synthesis finds that 1,000mg daily (well above the standard RDA of 75–90mg) taken 30–60 minutes before rehabilitation exercises significantly increases collagen synthesis in recovering tendons and ligaments. Protein: adequate total protein intake (1.6–2.0g/kg body weight) ensures availability of the amino acids (particularly proline, glycine, and hydroxyproline) that are the primary building blocks of collagen tissue. Zinc: essential for wound healing and collagen cross-linking — deficiency impairs tissue repair quality and rate; adequate zinc from meat, shellfish, seeds, and nuts or supplementation at 8–11mg/day supports optimal healing. Anti-inflammatory nutrients: omega-3 fatty acids (from fatty fish, flaxseed, or fish oil at 2–3g EPA+DHA daily), turmeric (curcumin 500–1,000mg with black pepper for absorption), and ginger provide anti-inflammatory support that reduces the inflammatory load impeding rehabilitation without the MPS-impairing effects of NSAIDs. The nutritional strategy for ankle sprain recovery is not a passive “eat well” recommendation but a specific, timing-optimized protocol that ensures the building blocks of ligament repair are available at the times when collagen synthesis rates are highest — immediately following rehabilitation exercise sessions.
Proprioception Training: The Most Important Rehabilitation Component
Proprioception — the body’s ability to sense joint position, movement, and loading — is specifically disrupted by ankle sprain through damage to the mechanoreceptors embedded in ligamentous tissue. These Ruffini endings, Pacinian corpuscles, and Golgi tendon organ-like structures provide the afferent input that the central nervous system uses to coordinate the protective muscular responses that prevent ankle instability during dynamic activities. When these receptors are damaged by ligament injury, the ankle’s ability to detect and respond to inversion moments — the millisecond-level automatic responses that prevent falls and sprains during activity — is compromised. Targeted proprioceptive training rebuilds these neural pathways through repeated exposure to balance challenges that the neuromuscular system must adapt to by increasing receptor sensitivity, improving central processing speed, and developing stronger corrective muscle activation patterns. The progression of proprioceptive training for ankle sprain rehabilitation: static balance (single-leg stance, eyes open and eyes closed) → dynamic balance (standing on foam or BOSU, reaching in different directions) → reactive balance (responding to unexpected perturbations or platform tilts) → sport-specific balance (performing sport movements on unstable surfaces). Research on proprioceptive training and ankle sprain recurrence consistently demonstrates 50–60% reductions in recurrence rates in athletes who complete a comprehensive proprioceptive rehabilitation program, compared to those who return to sport after symptom resolution alone without targeted proprioceptive work.
Peroneal Strengthening: The Foundation of Long-Term Ankle Stability
The peroneal muscles — peroneus longus and peroneus brevis on the lateral lower leg — are the primary dynamic stabilizers of the lateral ankle, providing the active resistance to inversion that complements ligamentous passive stabilization. After ankle sprain, peroneal strength and reaction time are specifically impaired, and their rehabilitation is the most important exercise priority for long-term instability prevention. The peroneal strengthening progression: theraband eversion (seated, ankle turned outward against band resistance, 3×15 daily) → standing calf raises with emphasis on the outer edge of the foot (developing the pronation component of peroneal function) → single-leg standing with deliberate activation of the peroneal arch (conscious neuromuscular engagement during balance training) → reactive peroneal activation (balance board with unexpected perturbation requiring rapid eversion response). The research on peroneal muscle training and ankle instability is compelling: athletes with strong, fast-reacting peroneal muscles have dramatically lower ankle sprain rates than those with weak or slow peroneal responses — confirming that active ankle stability through muscle is the primary long-term protection target that no amount of passive taping or bracing can substitute for. Continue peroneal-focused strength training throughout the athletic career for athletes with prior ankle sprain history, not just during the acute rehabilitation period.
The comprehensive ankle sprain management system — accurate injury assessment, appropriate taping technique, evidence-based rehabilitation, and long-term prevention strategies — provides the complete approach that protects ankle health throughout an athletic career. Every component matters: the tape provides immediate support, rehabilitation restores function, and prevention strategies reduce the risk of recurrence that inadequately managed sprains produce at rates as high as 70% in the first year following the initial injury. Rehab fully — never return to sport on symptoms alone. Every rehabilitation session is an investment in long-term joint health. Run.
Periostitis and Overuse Around the Ankle: Distinguishing From Sprains
Not all ankle pain in athletes derives from ligament injury — several overuse conditions present with ankle-region symptoms that may be misidentified as sprain-related, leading to inappropriate taping when the underlying condition requires different management. Peroneal tendinopathy: pain and tenderness along the peroneal tendons (running behind the lateral malleolus) rather than at the ATFL attachment creates the lateral ankle pain pattern that is sometimes confused with lateral ligament sprain — but the treatment differs substantially (graduated loading of the peroneal tendons rather than ligamentous protection). Osteochondral lesions of the talus (OLTs): cartilage and subchondral bone injuries occurring on the talar dome, frequently as a consequence of severe ankle sprains that create compressive forces on the talus during the sprain mechanism. OLTs present as deep ankle pain, joint effusion, and symptoms of mechanical impingement (clicking or locking during movement) that persist beyond the expected healing timeline for the associated sprain. Ankle impingement syndromes (anterior and posterior): soft tissue or bony impingement at the anterior or posterior ankle during end-range dorsiflexion (anterior) or plantarflexion (posterior) creating pain at end-range movement rather than with loading or direction change. These conditions all require accurate diagnosis before appropriate treatment planning — symptoms that persist beyond the expected recovery timeline for the documented injury grade warrant reassessment rather than continued taping of an injury that may not be the actual source of ongoing symptoms.
Neural Mobilization in Ankle Sprain Recovery
The sural and superficial peroneal nerves — which course around the lateral ankle — are frequently irritated during ankle sprain mechanisms and may contribute to the persistent lateral ankle pain and sensitivity that delays recovery when ligamentous healing has otherwise progressed. Neural irritation symptoms: sharp, shooting, or burning pain radiating down the lateral foot or into specific toes (rather than the diffuse aching of ligamentous pain); hypersensitivity to light touch along the lateral foot and ankle; and pain that is provoked more by ankle position than by loading. Neural mobilization exercises (nerve flossing) — where the neural tissue is alternately tensioned and slackened through carefully coordinated limb movements — address the neural component of ankle sprain recovery that ligament-focused rehabilitation does not specifically target. For athletes with persistent lateral ankle pain, electrical hypersensitivity, or burning quality pain beyond the expected ligamentous healing timeline, neural mobilization as an adjunct to standard rehabilitation is appropriate — and referral to a physical therapist for assessment and specific neural mobilization technique guidance ensures safe and effective application of this technique.
Return to Competition Decision-Making
The decision to clear an athlete for return to competition following an ankle sprain requires integration of objective criteria with the specific demands of the competition environment — a decision that appropriately involves the athlete, medical staff, and coaching personnel. Competition-specific considerations that affect the return decision: the duration and intensity of the competitive event (a 90-minute soccer match demands more ankle stability than a 5-minute wrestling period); the specific movement demands of the athlete’s position (a goalkeeper demands different ankle stability than a midfielder); the importance of the competition (the risk-benefit calculation for a playoff game differs from a regular season competition); and the availability of backup athletes if the initial return does not succeed. The athlete’s psychological readiness — their confidence in the ankle’s stability during competition-speed movements — is also a meaningful component of return decision-making, because athletes who return to competition with significant fear of reinjury demonstrate protective movement patterns (avoiding full-speed cutting, hesitating at direction changes) that both impair performance and paradoxically increase injury risk by reducing the reactive stabilization capacity that confident, full-speed movement produces. Objective criteria confirmation plus psychological readiness assessment plus appropriate protective support (tape or brace) plus competition-specific warm-up that confirms readiness under sport-specific conditions provides the comprehensive return-to-competition framework that responsible sports medicine applies.

Preventing Future Ankle Sprains, Common Taping Mistakes, and FAQs
Ankle sprain prevention is more effective than treatment — the neuromuscular training, appropriate footwear, surface management, and prophylactic support strategies that reduce ankle sprain incidence are more time-efficient and less disruptive to athletic performance than recovering from the sprains they prevent. This section provides the evidence-based prevention framework alongside the correction of common taping errors and direct answers to the most frequent questions about ankle sprain management.
Evidence-Based Ankle Sprain Prevention Strategies
The research on ankle sprain prevention identifies several interventions with strong evidence for meaningful risk reduction. Neuromuscular training programs: the most effective ankle sprain prevention intervention available — programs like the FIFA 11+ warm-up protocol and the Prevent Injury and Enhance Performance (PEP) program include balance, proprioception, and neuromuscular control exercises that reduce lateral ankle sprain incidence by 30–50% in high-risk sports populations. These programs require 15–20 minutes of structured warm-up exercises 3 times per week during the training season and produce sprain risk reductions that persist beyond the program period through the neural adaptations that proprioceptive training produces. Balance board training: specific proprioceptive training using wobble boards, BOSU balls, or foam pads improves ankle position sense and reactive peroneal muscle response — the specific neuromuscular qualities that reduce ankle sprain risk in dynamic athletic contexts. Research from the National Athletic Trainers Association’s position statement on ankle sprain prevention recommends balance training as a core component of all sports programs for athletes with a history of ankle sprain. Prophylactic taping or bracing: for athletes with prior ankle sprains (the primary risk factor for future sprains), prophylactic support during high-risk activities reduces recurrence by 50–70% — the most impactful single intervention for athletes who have already experienced a sprain.
Common Ankle Taping Mistakes and Their Corrections
The most common errors in ankle taping undermine the protective support the technique is designed to provide — identifying and correcting these errors is essential for anyone learning or improving their taping technique. Mistake 1 — Insufficient prewrap coverage: leaving areas of direct skin contact with rigid tape produces blistering and skin irritation — ensure complete prewrap coverage of all areas that will contact rigid tape. Mistake 2 — Wrong ankle position: taping the ankle in neutral (90 degrees dorsiflexion) with excessive plantarflexion (toes pointed down) reduces the protective inversion support — maintain 90 degrees dorsiflexion throughout application. Mistake 3 — Stirrups too anterior: stirrups angled too far forward fail to support the posterior lateral structures (CFL, PTFL) — angle stirrups slightly posteriorly from the upper anchor to ensure posterior coverage. Mistake 4 — Heel lock applied over Achilles: heel locks that cross the Achilles tendon region restrict plantarflexion required for running and jumping — the lock should sweep under the calcaneus at the most inferior point of the heel. Mistake 5 — Overlapping tape with wrinkles: ridges and wrinkles in the tape create pressure points that cause skin sores during activity — smooth every strip immediately after application and re-apply any strip that does not lie flat. Mistake 6 — Skipping the foot anchor: anchor strips applied only at the upper leg leave the stirrups unsecured distally, causing the entire structure to slide during activity — always apply a distal foot anchor before stirrups.
Tape Removal: Correct Technique to Prevent Skin Damage
Athletic tape removal requires specific technique to prevent the skin tears and hair removal that aggressive pulling produces — particularly important for athletes who receive frequent tape applications and whose skin integrity is at risk from repeated application and removal cycles. The correct removal technique: use bandage scissors or tape cutters to cut the tape from top to bottom along the posterior aspect of the ankle (avoiding the malleoli and Achilles tendon where the tape is thin and skin is most vulnerable). After cutting, support the skin with one hand while peeling the tape back on itself at a low angle (parallel to the skin surface) rather than pulling away from the skin at a perpendicular angle — the low-angle technique removes the tape adhesive from the skin rather than pulling the skin from the underlying dermis. Apply adhesive remover spray to stubborn adhesive residue before attempting to peel those areas — attempting to remove adhesive without remover on sensitive skin produces the skin tears that cause athletes to avoid frequent tape reapplication. After removal, inspect the skin for irritation, blistering, or early breakdown — if skin is compromised, allow 24–48 hours of tape-free recovery before the next application and consider switching to a brace to allow ongoing skin recovery while maintaining support.
Self-Taping for Athletes: Learning Independent Application
The ability to independently apply effective ankle tape — without requiring a certified athletic trainer for every application — provides athletes with the self-care capability that professional support situations cannot always provide. Learning self-application: the closed basket weave technique can be learned through structured practice over 3–5 sessions of deliberate practice with feedback on strip placement and ankle position. Video resources from certified athletic training education programs provide the visual reference that written descriptions cannot fully convey — observe the technique 3–5 times before attempting independent application. Self-taping position: sit on a training table or elevated surface with the ankle positioned at 90 degrees using a folded towel or foam block under the foot — maintaining the correct position during self-application requires the physical setup that prevents ankle position drift during the application process. Key self-application modifications: begin with a heel lock (the most difficult component) before fatigue develops; use a longer initial anchor at the lower leg (providing more attachment surface for subsequent strips); and work deliberately from distal to proximal (foot to leg) to maintain the proper overlapping sequence. Most athletes who practice self-application consistently develop adequate technique within 2–3 weeks of regular practice.
Frequently Asked Questions About Ankle Taping and Sprains
Can I tape my ankle immediately after a sprain? For Grade I sprains without significant swelling, a functional tape job for return to weight-bearing activity within hours is appropriate. For Grade II and III sprains with significant swelling, initial compression wrapping (not rigid tape) in the first 24–72 hours accommodates swelling changes before transitioning to rigid taping for return to activity. Always rule out fracture using the Ottawa Ankle Rules before taping a sprained ankle. How long should I tape my ankle after a sprain? Continue taping or bracing for return to sport activities until rehabilitation criteria are met — typically 4–12 weeks for Grade II sprains and 8–20 weeks for Grade III. Prophylactic taping or bracing during high-risk activities (sports participation) for an additional 12 months after the initial sprain significantly reduces recurrence risk. Is kinesiology tape or white athletic tape better? They serve different purposes: rigid white athletic tape provides mechanical restriction of inversion for return to activity support; kinesiology tape provides proprioceptive stimulation and edema management but not mechanical restriction. White athletic tape is appropriate for the protective support purpose of post-sprain taping. Can taping prevent all future ankle sprains? Prophylactic taping reduces ankle sprain incidence by 50–70% but does not eliminate sprain risk — athletes with prior sprains who tape or brace have significantly lower recurrence rates but are not completely protected. Combining prophylactic support with neuromuscular training provides better protection than either intervention alone. When should I see a sports medicine doctor for an ankle sprain? Seek evaluation if the Ottawa Ankle Rules criteria are positive (bony tenderness, inability to bear weight), if the ankle has not significantly improved in pain and weight-bearing capacity within 72 hours of a Grade I or II sprain, or if symptoms persist beyond the expected timeline for the injury grade, suggesting occult fracture, osteochondral lesion, or other pathology requiring specific evaluation.
Return to Sport Psychological Readiness
Beyond the physical rehabilitation criteria for return to sport after ankle sprain, the psychological readiness of the athlete — their confidence in the ankle’s stability, their willingness to perform the aggressive cutting and pivoting movements of their sport without protective hesitation — is an equally important determinant of successful return and injury prevention. The kinesiophobia (fear of movement and reinjury) that frequently follows ankle sprain produces the movement compensations — altered landing mechanics, hesitant cutting patterns, avoidance of high-risk maneuvers — that paradoxically increase injury risk by disrupting the coordinated movement patterns that protect the ankle during athletic activity. Graduated exposure — systematically performing increasingly challenging athletic movements under controlled conditions, building confidence as each level is successfully completed without pain or instability — is the evidence-based approach to resolving the psychological component of return to sport hesitancy. The Tampa Scale of Kinesiophobia (TSK-11) provides a validated assessment of fear of movement that identifies athletes whose psychological readiness is limiting their functional recovery beyond their physical rehabilitation status — athletes scoring above the clinical threshold on the TSK-11 benefit from specific psychological support (cognitive behavioral approaches, graded exposure protocols) alongside continued physical rehabilitation. Ankle support (tape or brace) plays a specific role in psychological return-to-sport readiness: the proprioceptive and mechanical support of tape or brace provides the confidence foundation from which graduated exposure can proceed — athletes who feel the physical support of the tape are more willing to perform the high-demand movements that full psychological return to sport requires.
Long-Term Ankle Health: The Osteoarthritis Prevention Perspective
The long-term consequences of inadequately rehabilitated ankle sprains extend beyond recurrent instability to include posttraumatic ankle osteoarthritis — a consequence that the research identifies as surprisingly common following severe ankle sprains and chronic ankle instability. The mechanical joint damage from repeated ankle instability episodes — the articular cartilage loading during instability events, the abnormal joint mechanics from chronic ligamentous laxity, and the inflammatory joint environment from repeated injury — contributes to progressive cartilage degeneration that posttraumatic ankle osteoarthritis represents. Research tracking athletes with prior ankle sprains over 10–20 years finds significantly elevated ankle osteoarthritis rates compared to matched controls without sprain history — a long-term consequence that motivates thorough acute treatment and rehabilitation far beyond the months-long return-to-sport timeline. The preventive interventions that reduce posttraumatic osteoarthritis risk after ankle sprain: comprehensive rehabilitation that fully restores joint mechanics and neuromuscular stability; prophylactic support (taping or bracing) during high-risk activities that reduces the frequency of instability events; body weight management that minimizes the cumulative loading of excess mass on ankle cartilage; and strength maintenance through ongoing peroneal and lower leg strengthening that provides the dynamic protection that passive support alone cannot achieve. Understanding ankle sprain not as an acute nuisance but as a joint injury with long-term consequences motivates the thorough rehabilitation investment that protects joint health across the decades of active life that follow.
Frequently Asked Questions About Ankle Taping
How tight should ankle tape be? The tape should feel firmly supportive without causing numbness, tingling, or skin color change — these signs indicate excessive compression that must be addressed immediately by loosening or removing the tape. A general guideline: you should be able to insert one finger under the tape at the malleolus level. Check circulation by assessing toe sensation and color within 15 minutes of application. Can I exercise with a freshly sprained ankle? Grade I sprains may allow modified activity (non-impact, pain-free movement) within 24–48 hours with appropriate taping support. Grade II and III sprains require the initial PEACE phase (protection and load reduction) before progressive rehabilitation exercise begins. Never exercise through significant ankle pain — pain-free movement in the rehabilitation context means the activity should not reproduce the sharp pain of loading the injured tissue. How do I know if my tape job is providing adequate support? Test by gently loading the ankle in the direction of sprain mechanism (inversion for lateral sprains) with the tape applied — you should feel the tape provide resistance before the ankle reaches the painful range. If the ankle moves freely through its painful range without tape resistance, the stirrups or heel locks are not providing adequate support. Should I tape both ankles if only one is injured? Taping the uninjured ankle prophylactically is generally not necessary unless that ankle has a prior sprain history or the sport has very high ankle sprain risk. Resources are better directed toward comprehensive rehabilitation of the injured ankle and prophylactic support specifically for it. When is surgery the right option for ankle instability? Surgical reconstruction (Broström procedure) is indicated for athletes with confirmed mechanical ankle instability — demonstrated joint laxity on stress radiography or MRI showing complete ligament rupture — who have failed 3–6 months of comprehensive conservative rehabilitation. Functional instability (feeling of giving way) without mechanical laxity generally responds to rehabilitation without surgical intervention.
The comprehensive ankle sprain management system — accurate injury assessment, appropriate taping technique, evidence-based rehabilitation, and long-term prevention strategies — provides the complete approach that protects ankle health throughout an athletic career. Every component matters: the tape provides immediate support, rehabilitation restores function, and prevention strategies reduce the risk of recurrence that inadequately managed sprains produce at rates as high as 70% in the first year following the initial injury. The ankle that receives comprehensive care after a sprain is often stronger and more stable than it was before the injury. Stay active safely.
Advanced Prevention: Hip and Core Stability’s Role in Ankle Sprains
Emerging research in biomechanical analysis of ankle sprain mechanisms identifies hip abductor weakness and core instability as proximal contributors to the distal ankle sprain risk that isolated ankle training does not fully address. The mechanism: weak hip abductors allow excessive femoral adduction and internal rotation during landing from jumps and direction changes — this proximal malalignment produces the knee valgus and increased foot supination that increases lateral ankle sprain risk during the ground contact phase of these movements. Athletes who experience recurrent ankle sprains despite adequate ankle strength and proprioception frequently have the proximal weakness that is redirecting ground reaction forces to create excessive inversion stress at the ankle. The research evidence: studies comparing hip abductor strength in athletes who sustain ankle sprains versus controls find consistently lower hip abductor strength in the injury group — suggesting that hip strengthening is a meaningful ankle sprain prevention intervention for athletes with identified hip weakness. The practical integration: include hip abductor and external rotator strengthening exercises (clamshells, side-lying hip abduction, hip thrust with band resistance, lateral band walks) in ankle sprain prevention programs for athletes with recurrent ankle sprains who have already completed standard ankle-specific rehabilitation. Single-leg squat quality (assessing knee valgus tendency with eyes open) provides a simple clinical screen for the proximal weakness that may be driving ankle sprain risk in athletes who otherwise appear adequately rehabilitated.
Long-Term Ankle Health: Preventing Osteoarthritis
The long-term consequence of repeated ankle sprains — poorly treated sprains in particular — is post-traumatic ankle osteoarthritis (OA), which develops in an estimated 20–40% of individuals with a history of severe ankle sprain or recurrent ankle instability. Post-traumatic ankle OA produces progressive joint pain, stiffness, and functional limitation that significantly impairs athletic performance and quality of life — making prevention of the cascade from acute sprain to chronic instability to OA the most important long-term health rationale for optimal acute sprain management and comprehensive rehabilitation. The mechanisms linking ankle sprain to OA: cartilage damage at the time of the initial sprain (osteochondral lesion), chronic synovial inflammation from recurrent sprains on a structurally unstable ankle, and altered joint biomechanics from chronic instability that produce abnormal cartilage loading patterns. Optimal acute management and comprehensive rehabilitation — by restoring normal joint stability, mechanics, and neuromuscular control — reduces the ongoing joint stress that drives progressive cartilage degeneration after initial sprain. For athletes with established CAI, bracing or taping for all high-risk activities combined with neuromuscular training represents the most effective OA prevention strategy available — and for those with confirmed OA, surgery to restore joint stability (lateral ankle reconstruction) before significant cartilage loss occurs preserves the joint environment that conservative management alone cannot adequately protect.
Summary: Your Ankle Sprain Action Plan
The comprehensive ankle sprain management approach — from acute injury through return to sport and long-term prevention — follows a clear, evidence-based sequence that any athlete can implement with the knowledge in this article. Immediately after sprain: apply the Ottawa Ankle Rules to determine whether fracture evaluation is needed; begin PEACE protocol (protection, elevation, compression); and start weight-bearing as soon as pain permits. Within 72 hours: apply functional support (rigid tape or semi-rigid brace) for weight-bearing and early activity; begin Phase 1 rehabilitation (ankle pumps, elevation, compression); and confirm injury grade through clinical assessment. Weeks 1–6: progress rehabilitation through range of motion, strengthening, and proprioceptive training; maintain tape or brace support for all activity; and advance rehabilitation phases based on objective criteria rather than time or symptom alone. Return to sport: meet specific return-to-sport criteria before full participation; apply prophylactic taping or bracing for all high-risk activities; and continue proprioceptive training as standard warm-up practice. Long-term: maintain neuromuscular training in warm-up protocols; use prophylactic support for high-risk activities for at least 12 months post-sprain; address any recurrent instability with reassessment and intensified rehabilitation before it progresses to chronic instability. This comprehensive approach — combining appropriate acute management, evidence-based rehabilitation, and consistent prevention strategies — produces the long-term ankle stability that allows full athletic participation without the recurrent sprain cycle that suboptimal management perpetuates.