The Best Breathing Techniques for Lifting Heavy Safely
The Physics and Physiology of Breathing Under Load
When I first started training with heavier weights, breathing was the last thing on my mind — I was focused on technique, positioning, and simply moving the weight. Then a coach watched me deadlift 140kg and said, simply, “you’re not breathing.” I was holding my breath reflexively, not deliberately, and the resulting instability at the point of maximum load was clearly visible in the bar drift that my inconsistent bracing was producing. Learning to breathe intentionally and specifically under load transformed not just my safety during heavy lifts but the consistency of my maximal performances. This article covers the complete breathing framework for heavy lifting — the physiological basis, the specific techniques for each major movement, and the common errors that cost both performance and safety.
Intra-Abdominal Pressure: The Spine’s Internal Support System
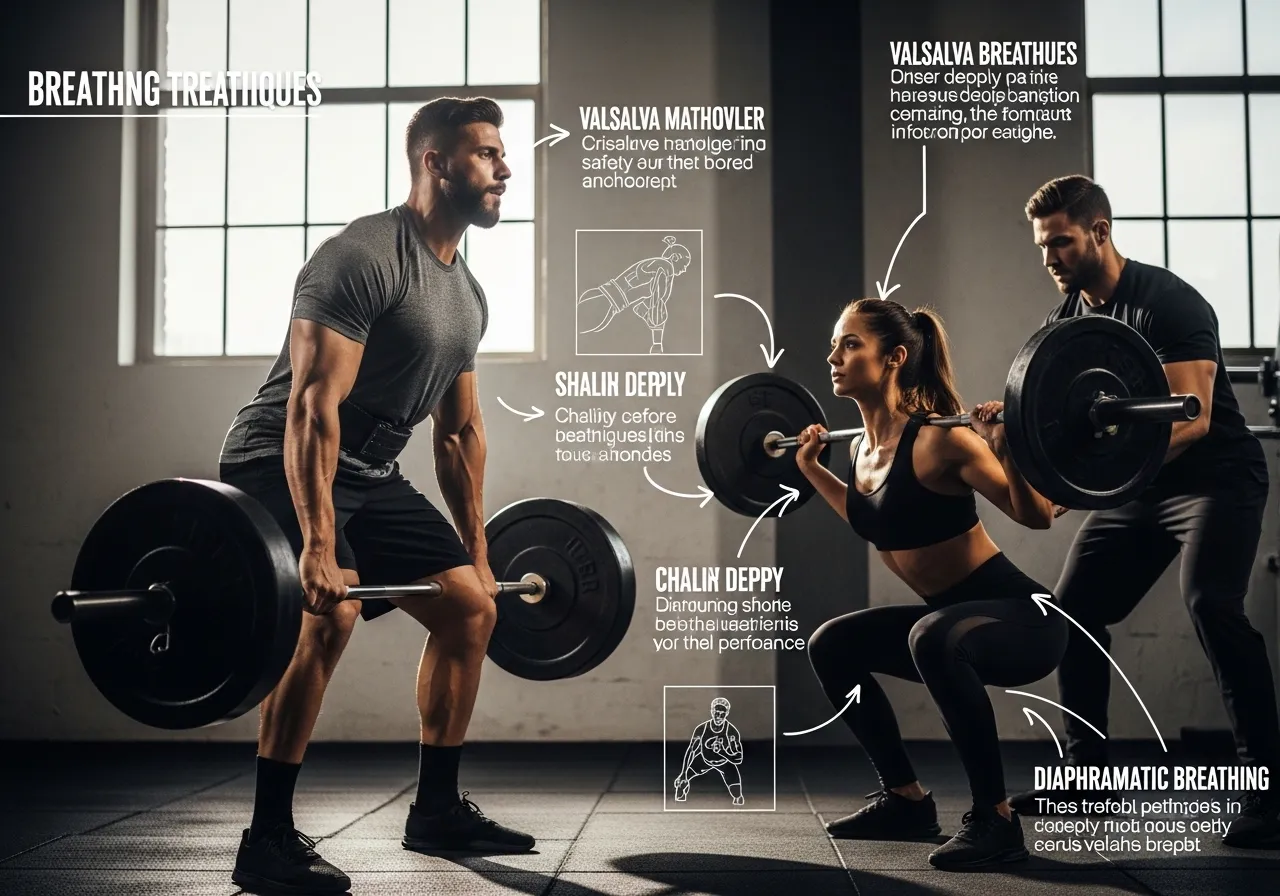
The most important concept in lifting breathing technique is intra-abdominal pressure — the internal hydrostatic pressure that the diaphragm, pelvic floor, transverse abdominis, and posterior core muscles create when they contract simultaneously around the enclosed abdominal cavity. When these muscles co-contract around a full breath held in the abdomen, the compressed fluid of the abdominal contents becomes a rigid pressure vessel that dramatically increases the spine’s load-bearing capacity by reducing the bending moment on the lumbar vertebrae and discs. The biomechanical research on intra-abdominal pressure and spinal loading consistently demonstrates that adequate IAP reduces the compressive forces on the lumbar discs by 20-40% during equivalent external loading compared to the uninstructed breathing pattern that athletes use before IAP optimization — a structural protection magnitude that is directly relevant to the disc and facet joint injury prevention that heavy lifting technique must address. The IAP generation technique that produces this spinal support: a deep inhalation into the abdomen (not the chest — diaphragmatic breathing that causes the belly to expand rather than the ribcage to elevate), followed by a bracing maneuver where all the core muscles contract simultaneously against the held breath to create the 360-degree pressurization of the torso cylinder that the Valsalva maneuver (against closed glottis) or the power-breathing maneuver (against partially open airway) produces. The sensation of correct IAP generation: the torso feels like a pressurized cylinder, the belt (if worn) is pressed against from inside, and the lower back feels supported from within rather than from external muscular contraction alone. From PubMed review on intra-abdominal pressure and spinal stability during resistance exercise, deliberate Valsalva maneuver breathing during heavy resistance exercise consistently reduces lumbar compressive forces and improves spinal stability compared to non-Valsalva conditions — confirming the safety and performance basis for the breath-holding and bracing technique that evidence-based strength coaching prescribes.
The Valsalva Maneuver: Understanding the Most Powerful Lifting Breath
The Valsalva maneuver — a forceful exhalation attempt against a closed glottis, producing the maximum internal pressure that respiratory and core musculature can generate — is the breathing technique associated with maximal single-effort lifts, powerlifting competition, and the highest-load sets that performance lifting involves. The Valsalva produces the highest possible intra-abdominal and intra-thoracic pressure of any breathing strategy, maximizing the spinal stabilization benefit while simultaneously producing the cardiovascular effects that the clinical contraindication discussion requires attention to: the Valsalva temporarily increases blood pressure (systolic elevation of 50-80 mmHg is common during maximal effort Valsalva), reduces venous return to the heart, and produces the “blackout” or near-syncope that maximal-effort Valsalva can cause when combined with the blood pressure drop that follows the release of the maneuver. These cardiovascular effects make the full Valsalva maneuver inappropriate for individuals with hypertension, cardiovascular disease, or a history of stroke — populations for whom the modified breathing techniques described in this article (the power-breathing and stage-breath approaches that do not use full glottis closure) provide adequate IAP without the cardiovascular stress that the true Valsalva produces. For healthy athletes without cardiovascular contraindications performing near-maximal efforts: the brief duration of the Valsalva during a single squat repetition or deadlift pull (typically 3-6 seconds) produces transient blood pressure changes that well-conditioned cardiovascular systems manage without adverse effect — the concern is appropriate for clinical populations but not for the healthy trained athlete performing the heavy compound lifts that the technique is specifically designed to support. The practical distinction between Valsalva and power-breathing: Valsalva uses complete glottis closure; power-breathing uses partial glottis restriction (the “hiss” technique that creates back-pressure against the airway without full closure); both produce meaningful IAP generation that is substantially greater than normal breathing, with Valsalva producing higher pressure but requiring the cardiovascular health qualification that power-breathing does not.
Breathing Cues That Actually Work: The Language of IAP Coaching
The verbal cues that coaches use to communicate correct breathing technique to athletes vary enormously in their effectiveness — and the specific cues that produce correct IAP generation most reliably have been refined through decades of coaching experience and the limited but growing coaching-language research that examines cue effectiveness directly. The most consistently effective breathing and bracing cues in strength coaching practice: “big belly breath” or “belly button out” — directs the diaphragmatic expansion rather than the chest elevation that “big breath” alone often produces; “push the belt out in all directions” — provides the multi-directional expansion cue that single-direction cues (push your belly forward) miss the lateral and posterior components of; “brace like you’re about to get punched in the stomach” — the most universally understood cue for the full 360-degree abdominal brace that IAP requires, producing the correct co-contraction pattern in athletes who have never received formal core stability instruction; “air in, chest up, and BRACE” — the sequence cue that chains the breath, postural, and brace components in the order they should occur; and “hold your breath through the hard part” — the timing cue for the sticking point breath maintenance that the exhale-at-the-bottom error specifically needs addressing with. The cues that consistently produce incorrect technique and should be avoided: “suck in your belly” produces the drawing-in maneuver that reduces IAP rather than increasing it by decreasing abdominal muscle activity; “breathe out as you push” as applied to heavy single repetitions removes the IAP at exactly the wrong moment; and “keep breathing normally” applied to maximal efforts removes the deliberate IAP generation entirely. Athletes who receive explicit instruction in IAP generation using the effective cues consistently produce greater abdominal EMG activity, higher IAP measurements, and more stable bar paths in the same training session compared to instructed or uninstructed athletes — confirming the coaching language dimension of breathing technique as a meaningful determinant of technical execution quality.
Breathing During Olympic Weightlifting and Explosive Movements
The Olympic lifts — the snatch and clean-and-jerk — and the derivative power movements (power clean, hang clean, power snatch) present specific breathing challenges because the explosive velocity that these movements require must be compatible with the IAP generation that the significant loads they involve demand. The timing constraint: the Olympic lifts occur in 0.8-1.2 seconds from floor to receiving position — the breath-hold duration that this represents is brief enough that CO2 management is not a limitation, but the synchronization of the brace establishment with the lift initiation requires the more precise timing practice than the slower grinding movements demand. The Olympic lift breathing protocol: breath-and-brace is established in the starting position before the first pull — identical to the deadlift setup sequence — and the brace is maintained through both the first pull (floor to knee), the transition, the second pull (explosive triple extension), and the receiving position where the catch requires the specific core stability that the receiving position’s compression demands. The rebrace in the receiving position (front squat catch for the clean, overhead squat catch for the snatch) requires a secondary IAP generation because the catch position’s stability demands are independent of the pull’s IAP needs — the experienced Olympic weightlifter develops the rapid rebracing skill that the catch position’s load redistribution requires before the recovery from the receiving position. For the strength athlete incorporating power cleans or hang power cleans into their program as supplementary work: the breath-and-brace for the hang starting position (from the mid-thigh, above the knee) follows the hip hinge setup breath sequence adapted for the standing rather than floor starting position, with the full brace established before the aggressive hip extension that the second pull’s power production requires.
Programming Breathing Practice Into Your Training Log
The most effective approach to internalizing lifting breathing technique is treating it as a trackable training variable alongside load, sets, and reps — logging breath quality observations during working sets the same way form notes are logged for technique assessment. The specific breathing-quality tracking protocol: for each main compound movement in the training log, add a one-line breathing note that records whether the setup breath was full (diaphragmatic) or partial (chest), whether the brace was maintained through the sticking point, and any specific deviations noted (exhale on descent, breath lost on rep 4 of 5, etc.). Reviewing these notes over 4-6 weeks reveals the specific conditions (fatigue level, load percentage, set number) where breathing technique most consistently degrades — the diagnostic information that directs the corrective practice toward the specific context where the technique needs strengthening rather than the uniform across-all-sets practice that misses the specific vulnerability points. Video review of lifting breathing is particularly revealing: the lateral video view of a squat or deadlift shows the chest rise vs belly rise distinction clearly, and the moment of visible brace release (visible as a subtle ribcage drop and shoulder rounding) during the sticking point identifies the timing error that the subjective experience of lifting does not reliably detect. Sharing these videos with a knowledgeable training partner or coach who specifically monitors breathing quality provides the external feedback that self-assessment from training log notes alone cannot fully supply. The progressive logging approach that works best: start by simply noting “good,” “partial,” or “lost” for the working set brace; after 4 weeks, refine to noting the specific phase where quality changes; after 8 weeks, add the specific correction applied and its effectiveness. This progressive refinement produces the self-coaching capability that eventually makes external coaching feedback less necessary as the athlete develops the internal proprioceptive awareness that discriminates good from partial brace quality in real time.
Common Questions From New Lifters: Demystifying Breathing Technique
New lifters encountering the breath-and-brace concept for the first time frequently have the same set of questions that experienced coaches have addressed hundreds of times — and addressing them directly removes the confusion that ambiguous online descriptions of the technique create. “Why does holding my breath feel dangerous?” — the instinct that breath-holding during exertion is risky is correct in many everyday contexts (holding breath during a medical procedure, during underwater swimming) but the brief breath-holds of individual lifting repetitions are physiologically safe for healthy individuals and represent the smallest possible deviation from normal breathing that the spinal support requirement can tolerate. “My coach says exhale on the way up — why does this article say to hold?” — the exhale-on-exertion cue is appropriate for light-to-moderate loads (below 70-75% of 1RM) where the spinal loading does not require maximum IAP support; for heavy loads above this threshold, the breath-hold technique is the evidence-supported approach for spinal safety. “I get dizzy when I hold my breath during squats — what am I doing wrong?” — the dizziness typically reflects one of three issues: holding the breath for too many consecutive repetitions without breath reset; performing a full Valsalva (against closed glottis) for moderate-rep sets that the stage-breathing approach would better serve; or standing up very rapidly from the bottom position while Valsalva-braced, causing the blood pressure fluctuation that fast position change combined with held breath amplifies. “How do I know if I need a belt?” — correct beltless breath-and-brace technique at sub-maximal training loads (below 80-85% of 1RM) does not require a belt for healthy trained athletes; a belt provides performance enhancement and additional IAP margin for near-maximal efforts rather than the safety necessity that athletes who have not developed beltless bracing capability sometimes treat it as.
Breathing for the Squat: Step-by-Step Technical Guide
The squat breathing sequence is the most analyzed and coached of the major lifting breathing patterns — the combination of the heavy axial loading, the thoracic pressure changes from the bar, and the extended range of motion that the squat involves make the breathing technique particularly consequential for both performance and safety.
The Complete Squat Breath Sequence
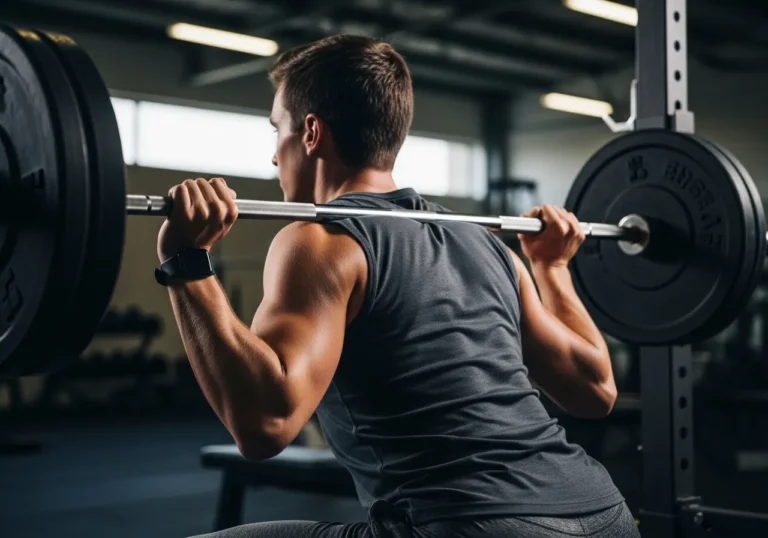
The optimal squat breathing sequence begins before the bar leaves the rack — the timing of breath initiation relative to the lift’s phases is as important as the breath technique itself. Step 1: At the top position with the bar on the back, take a large diaphragmatic breath into the abdomen (not the chest) — the “big belly breath” that visibly expands the circumference of the waist against the belt rather than elevating the ribcage. The inhalation should fill approximately 80% of lung capacity — a full enough breath to generate substantial IAP without the hyperinflation that causes ribcage elevation and reduces core stability. Step 2: Brace all core muscles simultaneously — the abdominals, obliques, transverse abdominis, and posterior core — against the held breath, creating the pressurized cylinder sensation described in the physiology section. This brace should feel like preparing to receive a punch to the stomach: all muscles contracting in all directions simultaneously, not just the “suck in your belly” cue that targets only the anterior musculature. Step 3: Descend into the squat with the full brace maintained throughout. The breath is held against the brace from the initiation of the descent through the bottom position and throughout the ascent — the full eccentric and concentric phase with unbroken internal pressure support. Step 4: At the top of the repetition, release the breath with a controlled exhalation — NOT a complete release that causes the torso to deflate before the next repetition, but a partial release that maintains some IAP while allowing enough CO2 clearance for the next full inhalation. For multiple repetition sets: a full breath and rebrace at the top of each repetition is the standard approach that most coaches teach for all working sets. The single-breath-for-multiple-reps approach (holding one breath through 2-3 repetitions) is used by powerlifters in maximal-effort competition singles and low-rep heavy working sets where the longer breath-hold duration is manageable, but requires significant experience and physiological tolerance that beginners should not attempt. From NSCA back squat biomechanics and technique evidence, deliberate breath-and-brace technique before squat descent consistently produces more stable bar paths, reduced lumbar flexion under load, and greater force production compared to uninstructed breathing patterns in controlled research protocols.
Common Squat Breathing Errors and How to Fix Them
The most frequently observed squat breathing errors in intermediate and beginner lifters, and the specific cues that address each: Error 1: Breathing into the chest rather than the abdomen — producing ribcage elevation rather than abdominal circumference increase, reducing the core stability benefit of the breath because the transverse abdominis and posterior core contribution requires abdominal expansion rather than thoracic elevation. The correction: practice diaphragmatic breathing supine (lying on back with a book on the abdomen that rises on inhale) before applying to the squat, and focus on pushing the belt out in all directions — front, sides, and back — rather than lifting the chest. Error 2: Beginning the descent before the brace is fully established — initiating the squat from the rack walk-out before the full breath-and-brace sequence is completed, reducing the spinal support that the initial descent requires most. The correction: establish the full breath-and-brace before the descent begins, making it a mandatory sequence step rather than a concurrent action. Error 3: Exhaling through the sticking point — the most dangerous breath error, releasing the brace at the moment of maximum mechanical disadvantage (the bottom third of the ascent where spinal flexion tendency is highest) rather than maintaining it through the sticking point completion. The correction: consciously maintain the brace through the sticking point using the verbal cue “stay braced through the hardest part” before the controlled exhale at lockout. Error 4: Over-bracing to the point of breath-holding at rest — carrying the bracing habit into rest periods and daily activities where normal breathing should occur, creating the diaphragmatic dysfunction that sustained breath-holding produces through pelvic floor and diaphragm coordination disruption. The correction: full inhalation and complete relaxation between sets; the breath-and-brace is a lift-initiation cue, not a sustained daily posture.
Breathing for Different Body Types and Anatomical Variations
The standard breathing technique description assumes the typical anatomical proportions and mobility characteristics that most athletes approximate — but the meaningful variation in torso length, rib cage shape, hip mobility, and abdominal geometry between individuals requires some personal calibration of the general technique principles to the specific anatomy that each lifter inhabits. Long-torso athletes (proportionally long lumbar spine relative to leg length) produce higher lumbar bending moments at equivalent forward lean angles in the squat and hip hinge — the IAP generation that this population requires per kilogram of external load is higher than shorter-torso equivalents, making the deliberate breath quality a higher priority for injury prevention. Short-torso athletes (proportionally short lumbar relative to long legs) may find that the abdominal breath produces more ribcage elevation than the cue suggests, requiring the specific emphasis on directing the breath into the lateral and posterior aspects of the torso rather than the anterior abdomen that the standard cue can inadvertently restrict to. Athletes with reduced thoracic mobility or significant thoracic kyphosis may find the diaphragmatic breath difficult to establish in full standing because the compressed anterior torso volume reduces the space that the diaphragm can descend into — for these athletes, practicing the breath in a slightly forward hip-hinged position (mimicking the squat start position) where the thoracic compression is reduced may allow better initial breath quality that gradually transfers to the fully upright position as thoracic mobility improves through concurrent mobility work. Athletes with previous abdominal surgery (hernia repair, appendectomy, cesarean section) should consult with a physiotherapist who specializes in functional core rehabilitation before applying standard IAP generation cues, as scar tissue and modified fascial structures in the abdominal wall may change the appropriate bracing approach from the standard guidance in ways that professional assessment should inform.
Connecting Breathing to Core Training: The Comprehensive Approach
Lifting breathing technique is most effective when supported by a core training program that directly develops the muscles — deep cervical flexors, transverse abdominis, multifidus, and pelvic floor — whose coordination produces the IAP generation that the breath-and-brace cue initiates. The core training exercises that most directly transfer to lifting breathing technique: dead bugs (the supine exercise that coordinates diaphragmatic breathing with contralateral limb extension while maintaining lumbar neutral) train the same diaphragm-TVA-pelvic floor synergy that lifting IAP requires in a context where the lower spinal load allows full technique focus; Pallof press variations develop the anti-rotation core stability that the lateral IAP component requires for rotational resistance; farmer’s carries build the sustained bracing endurance that multi-rep lifting sets require when the bracing effort must be maintained across the full set duration without degrading; and bird dog (quadruped contralateral arm-leg extension) develops the posterior core contribution to IAP that the multifidus and erector spinae provide alongside the anterior and lateral components. Programming these core exercises as the warm-up or finisher for the training sessions that include heavy compound lifts creates the direct transfer pathway between the isolated core development and the integrated IAP generation that the heavy lifts require — the core exercises make the lifting breathing technique more accessible by developing the raw muscular capacity that the technique deploys. From PubMed review on core training principles and transfer to resistance exercise performance, targeted core training that includes diaphragmatic breathing re-education and anti-rotation exercises consistently improves spinal stability measures and reduces lumbar injury rates in resistance training populations — confirming the core training foundation that makes lifting breathing technique most effective.
My Personal Lifting Breathing Journey: From Reflexive Breath-Holding to Deliberate IAP
The evolution of my own lifting breathing technique spans about four years from the reflexive approach I used in early training (holding my breath when it felt like I needed to, exhaling when the lift was hard) to the deliberately structured protocol I apply consistently today. The turning point was not a dramatic injury but a video review session where a coaching friend pointed out that my brace was visibly releasing at the sticking point of my squat — the exact moment of highest spinal loading — and that the bar drift I was experiencing on heavier sets was the directly observable consequence of this brace release rather than a strength limitation as I had assumed. Implementing the deliberate breath-and-brace sequence improved my working set consistency within four weeks of the correction and produced a 5% squat performance improvement over the following training block that I attribute primarily to the more consistent mechanical efficiency that the maintained brace enabled rather than to any strength increase in the same period. The most difficult element to internalize was the distinction between abdominal and thoracic breath — a distinction that the supine breathing drill made obvious within two sessions but that transferred to standing loaded exercise only after three weeks of deliberate practice before each working set. The belt change that the improved breathing technique produced: I previously wore a belt for all working sets above 80% of maximum; with better beltless bracing technique, I now train beltless for all sets at or below 85% and use a belt only for competition-intensity singles and the heaviest training sets — developing the muscular bracing capacity that beltless lifting requires while maintaining the belt-enhanced performance for the maximal efforts that performance lifting prioritizes. The lesson that four years of breathing technique development has consistently reinforced: the free physiological performance enhancement that correct IAP generation provides is available to every athlete from the first session they implement it deliberately, requires no equipment, and costs only the attention that consistent deliberate practice requires. It is among the highest-return technical investments available in strength training.
Breathing Technique for Power Lifting Competition: Pressure, Timing, and Consistency
Competitive powerlifters face a specific breathing technique challenge that training does not fully replicate: performing the breath-and-brace sequence under competition conditions — the elevated arousal, the unfamiliar environment, the timing constraints of the referee’s commands, and the psychological pressure of maximal attempts — in a way that maintains the technical quality that training sessions allow. The competition breathing protocol adaptations that experienced powerlifters develop: the practice of deliberate slow breathing in the waiting area before the attempt to counter the hyperventilation-inducing arousal that competition produces; the use of the command period (from the “rack” command to the “squat” signal) as the structured window for establishing the breath-and-brace without the time pressure that the internal self-timing of training creates; and the consistent pre-lift ritual — the specific sequence of steps from chalk application to bar approach to setup that anchors the breathing technique within a familiar procedural routine that arousal does not disrupt as easily as isolated technical cues. The competition-specific breath timing concern: some lifters under-inflate the setup breath in competition due to the fight-or-flight arousal that reduces the deliberate attention that the full inhalation requires — the solution is practicing the setup breath at competition simulation conditions (elevated arousal from maximal near-misses in training, video recording, small audience) to build the arousal-tolerant technique that competition performance requires. The final competition breathing advice: trust the technique practice that training has built. The athlete who has practiced the breath-and-brace 40,000 times in the training hall has built the motor program that competition arousal disrupts most when the conscious mind tries to override the automatic with last-minute technique reconsideration. Execute the familiar sequence. The IAP will follow the pattern that thousands of training repetitions have made the body’s default response to the load.
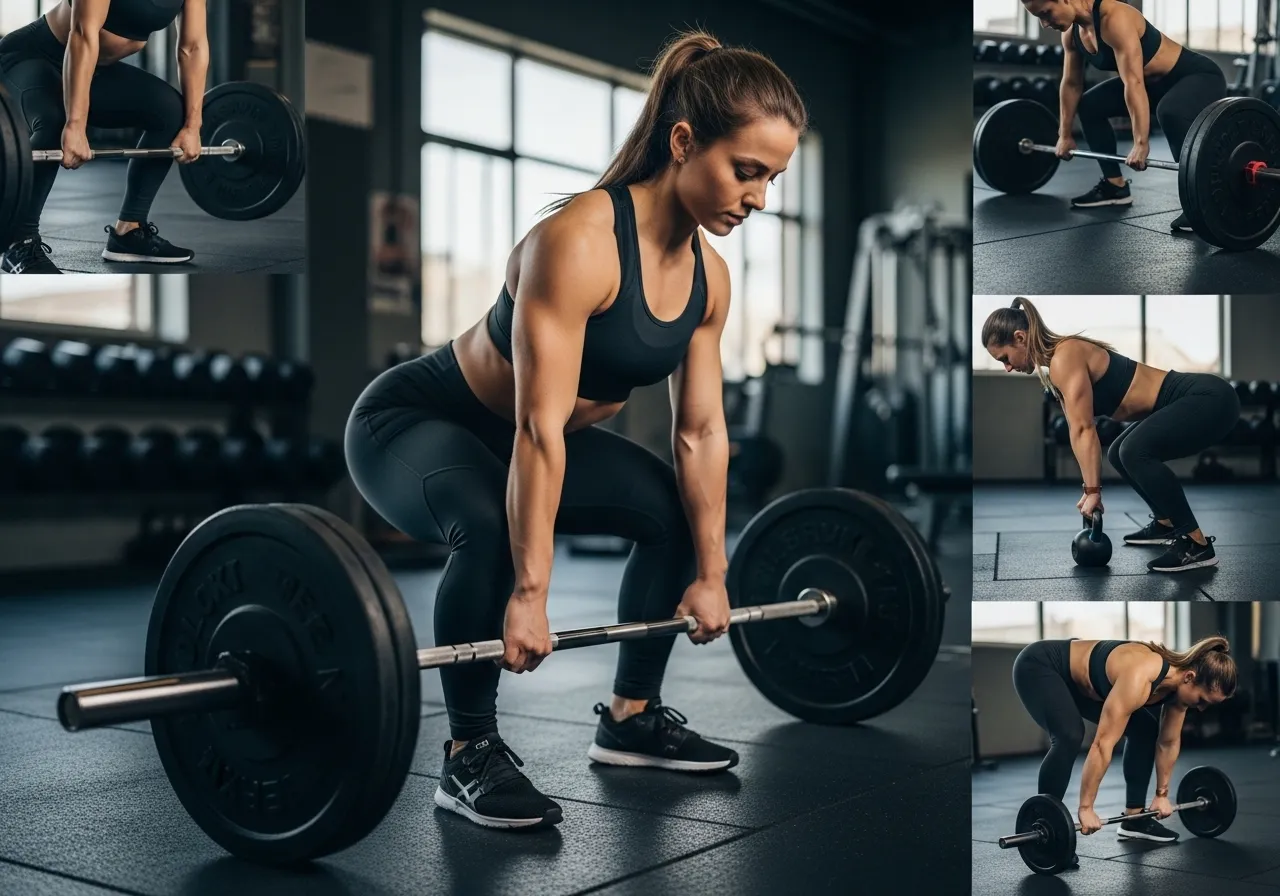
Breathing for the Deadlift: Setting Up from the Floor
The deadlift breathing technique differs from the squat in one critical respect: the lift begins from a static starting position rather than from a loaded standing position, and the breath-and-brace must be established at the bottom of the movement before the pull initiates rather than at the top before the descent. This reversed sequence requires specific setup habits that produce the correct IAP at the moment of maximum lumbar loading.
The Deadlift Setup Breath: Creating IAP Before the Pull
The conventional deadlift breathing protocol begins with approaching the bar and establishing the correct starting position: hip width stance, bar over mid-foot, grip at shoulder width (conventional) or inside the shins (sumo). Step 1: With the body in the standing position before bending to the bar, take the large abdominal breath and establish the initial brace — setting the internal pressure before the forward hinge that approach to the bar requires. This pre-approach breath-and-brace prevents the common error of bending toward the bar while breathing, which produces the sequential action of inhaling and then bracing separately rather than the simultaneous pressure-generation that optimal IAP requires. Step 2: Hinge at the hip to take the grip while maintaining the brace established in Step 1. If the brace is lost during the descent to the bar (visible as the lower back rounding in the approach or an audible exhale during the hinge), stand up, reset, and restart the sequence — pulling with the brace compromised is the specific injury mechanism that this sequence is designed to prevent. Step 3: From the grip position, perform the leg drive setup cue (pushing the floor away rather than pulling the bar up) and establish the final pre-pull brace — the full-body tension that the “air in, chest up, push the floor away” sequence produces before the bar breaks the floor. Step 4: The bar break occurs against the held, braced breath. The pull proceeds through the knee and hip extension to lockout with the brace maintained. The breath is held from the floor through the full extension — the 2-4 second exertion phase that the complete deadlift repetition occupies. Step 5: At lockout, exhale with control and hinge to lower the bar to the floor before the next repetition’s breath-and-brace reset. The touch-and-go deadlift variant (used for higher-rep conditioning sets) allows a rapid breath reset at the floor touch before the next pull, though the full pause-and-rebrace is recommended for all near-maximal efforts where IAP quality directly affects injury risk. From Physiopedia deadlift biomechanics and lumbar safety guidelines, establishing intra-abdominal pressure before the initial bar separation from the floor is the single most important technique element for lumbar injury prevention in the deadlift — with the majority of deadlift-related lumbar disc injuries occurring in lifters who either do not brace adequately or release the brace before the lift is completed.
Breathing for the Romanian Deadlift and Hip Hinge Variations
The hip hinge pattern variations — the Romanian deadlift, stiff-leg deadlift, good morning, and hip thrust — each require the breathing approach adapted to their specific range of motion and loading characteristics. The Romanian deadlift (RDL) presents a specific breathing challenge: the long-range eccentric hip hinge phase that the RDL emphasizes requires the maintained IAP through the full range of hamstring lengthening, which is a longer breath-hold duration than the conventional deadlift’s floor-to-lockout range. The RDL breathing protocol: full breath-and-brace at the standing position before the hinge; maintained brace through the full eccentric phase to the maximum hip hinge range; brief breath reset option at the bottom if the set is longer than 5 repetitions (the accumulated CO2 from longer sets makes the single-breath approach physiologically uncomfortable); and rebrace before the concentric return. The good morning — the barbell hip hinge where the bar is carried on the back in the squat position rather than in the hands — carries the additional cervical loading consideration that the squat-bar-position breathing section of this article addresses: the breath-and-brace must not involve chest elevation that shifts the bar pressure from the upper trap to the cervical spine. The hip thrust provides the highest direct glute loading of the hip hinge movements and requires the specific pelvic floor engagement component of IAP generation that the supine-loaded position makes both more important and more accessible — the hip thrust at full extension should involve the pelvic floor “lift” component of IAP alongside the abdominal brace, achieving the coordinated pelvic floor-transverse abdominis-diaphragm synergy that physical therapy literature identifies as optimal spinal stabilization.
Breathing Technique for Rehabilitation After Back Injury
Athletes returning to heavy lifting after lumbar disc injuries, facet joint irritation, or other spinal pathologies require the most careful application of breathing technique because the combination of inadequate IAP and premature loading during recovery is the most common mechanism of reinjury in this population. The rehabilitation breathing sequence for the post-lumbar-injury athlete: the first phase of rehabilitation focuses exclusively on breath-and-brace quality at zero load — the supine breathing drills and standing brace practice that re-establishes the IAP generation capability that pain-induced muscle inhibition reduces immediately following lumbar injury. Clinical research on lumbar injury consistently demonstrates that the deep stabilizing muscles — particularly the transverse abdominis and multifidus — show selective inhibition after lumbar pain that does not spontaneously resolve even when pain resolves, requiring specific rehabilitation that targets these muscles rather than relying on pain resolution to restore function. The second rehabilitation phase: partial load exercises (goblet squat with light weight, Romanian deadlift with resistance bands) using full breath-and-brace technique, with load increased only when each load level can be performed with the brace quality that the coach or physiotherapist confirms is maintained throughout. The third phase: return to barbell loading with a conservative 60-70% of pre-injury working weights and explicit video assessment of brace quality at each load increment. The athlete who rushes this sequence by loading to pre-injury levels before the IAP generation quality is confirmed at intermediate loads is the athlete who experiences the reinjury that the rehabilitation’s load-progression purpose was specifically designed to prevent. Working with a physiotherapist who specializes in musculoskeletal sports rehabilitation for the return-to-loading phase provides the external assessment of brace quality and technique safety that self-assessment cannot reliably provide in the early loading phases of lumbar rehabilitation.
Advanced Breathing: Combining Nasal vs Mouth Breathing with IAP
The nasal vs mouth breathing question in the context of lifting technique is simpler than the nasal breathing research in endurance sport suggests: for the heavy lifting breath-and-brace, mouth breathing during the inhalation phase is generally preferable because the airflow rate that a large diaphragmatic breath requires exceeds what the narrower nasal passage can comfortably accommodate within the brief setup window of a heavy lift. The nasal breathing advantages that endurance research identifies — better air filtration, improved nitric oxide production, reduced hyperventilation — are most relevant during sustained aerobic exercise rather than the brief intense breaths of lifting technique. The practical guidance: breathe however allows the fullest and most comfortable diaphragmatic breath during the setup. For most lifters, this means a mouth inhalation for the working breath-and-brace and nasal breathing during rest periods and the controlled exhalations between sets. The hyperventilation risk in lifting breathing deserves brief mention: some athletes, on the advice of other gym members, deliberately hyperventilate before maximal lifts to reduce the CO2-driven urge to breathe that the Valsalva produces — this practice is dangerous because the hypocapnia (reduced CO2) that hyperventilation produces causes cerebral vasoconstriction that reduces the brain’s blood supply, increasing the risk of loss of consciousness under the combined heavy load and Valsalva cardiovascular effects that the near-maximal squat or deadlift produces. Normal breathing between sets — not deliberate hyperventilation — is the safe preparation that maintains the CO2 balance that the brief lift’s breath-hold safely interrupts rather than the already-disrupted CO2 balance that hyperventilation extends into the danger zone.
Breathing Across the Training Week: Periodizing Technique Emphasis
The emphasis on breathing technique quality should be periodized alongside training intensity and volume — the technical demands of maximum-effort lifting require the highest-quality breath-and-brace, while lighter recovery and technique sessions provide the opportunity for focused breathing drill practice at loads where technique attention is undivided. The weekly breathing technique emphasis structure that supports both performance and technique development simultaneously: on maximum-effort days (the 85-95% of 1RM sessions that test the full expression of current strength), the breathing technique is applied at its highest quality with explicit pre-set mental rehearsal of the breath-and-brace sequence; on moderate-load hypertrophy days (65-80% of 1RM for 8-12 repetitions), the stage-breathing protocol described in the advanced breathing section is the primary technique, with specific attention to maintaining the brace through the eccentric phase where the exhalation on descent can cause premature brace release; on light technique days (50-65% of 1RM for technique and warm-up work), deliberate exaggerated breathing — the full diaphragmatic breath taken with more time and intention than the working sets allow, practiced through each repetition with specific attention to each phase of the breath-brace cycle — provides the concentrated technique practice that lighter loads make safe and productive. This periodized attention ensures that the breathing technique is being actively developed on the lighter technique days, reliably applied on the moderate hypertrophy days, and reflexively executed on the maximum intensity days where cognitive capacity for technique monitoring is most limited by the performance demand. Athletes who only think about breathing on their heaviest days miss the deliberate practice opportunity that moderate and light days provide — building the technique automaticity that heavy days need to rely on without dedicating light day sessions to developing it.
Breathing for Accessory Exercises: Is Technique Required for Everything?
The breath-and-brace technique is most critical for the primary compound movements — squat, deadlift, bench, and overhead press — where the spinal loading magnitudes justify the full IAP generation sequence. For the accessory exercises that most training programs include alongside the main lifts, the appropriate breathing approach scales with load magnitude and spinal loading involvement: heavy accessory compound movements (barbell rows, heavy dumbbell shoulder press, trap bar deadlift) warrant the same full breath-and-brace sequence as the primary lifts; moderate-load accessory work (cable exercises, dumbbell work at 70-80% of capacity) benefits from the maintained brace with cyclic breathing that the stage-breathing protocol provides; and light isolation exercises (bicep curls, tricep pushdowns, lateral raises) at typical training weights do not require deliberate IAP generation beyond the normal postural bracing that upright exercise naturally includes. This scaling approach prevents the over-application of maximal IAP technique to every exercise in a training session — an approach that produces the diaphragmatic fatigue and the performance degradation on subsequent heavy work that unnecessary maximal bracing causes when applied indiscriminately. The practical rule of thumb: if the exercise involves a free-weight load above approximately 60% of your body weight in a spinal-loading position, apply the full breath-and-brace; if the exercise is machine-based, cable, or isolation work regardless of load, maintain general postural core activation without the full Valsalva-level IAP generation that maximum compound work warrants.
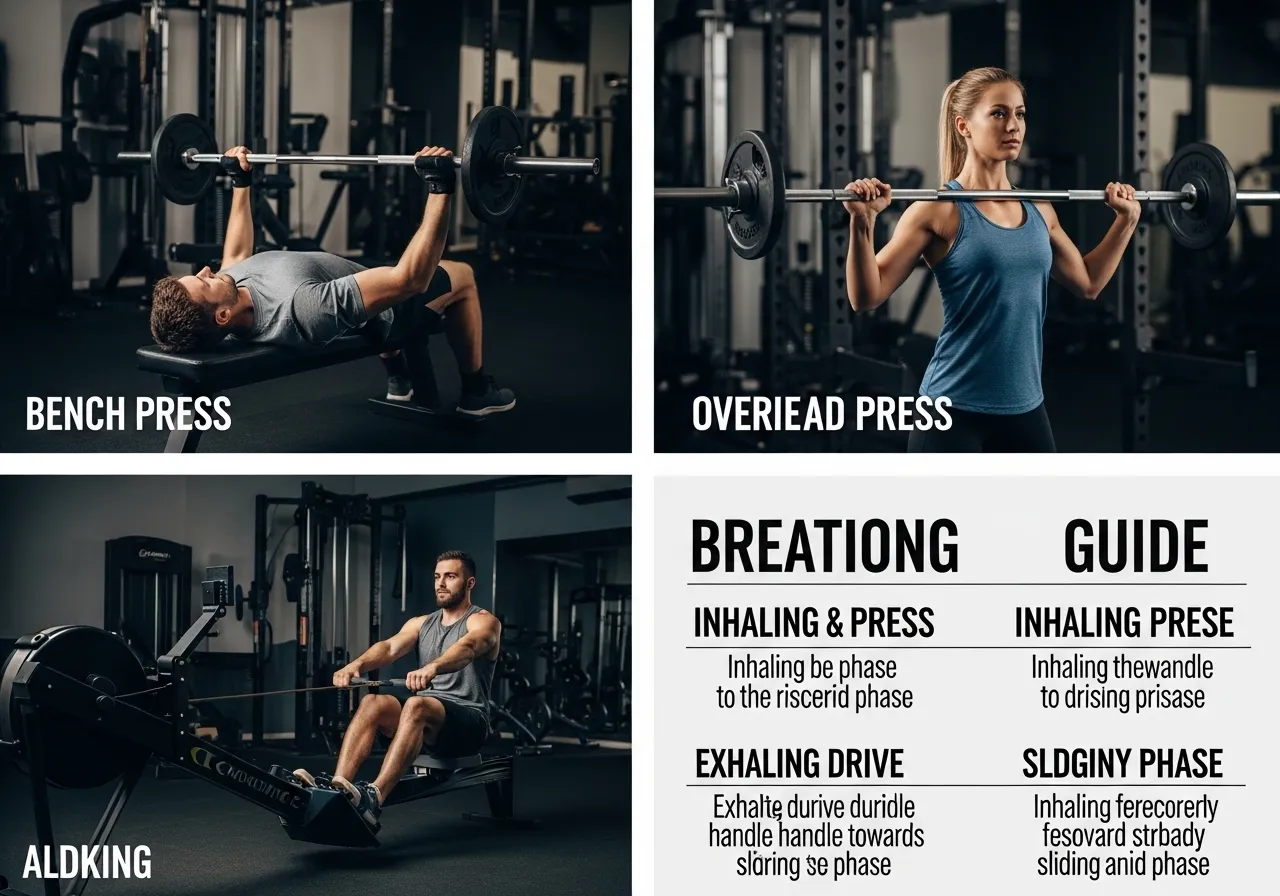
Breathing for Pressing Movements: Bench, Overhead, and Row
The pressing movements — bench press, overhead press, and the bilateral and unilateral rowing patterns that balance them — each present specific breathing considerations that the axial loading focus of the squat and deadlift does not fully address.
Bench Press Breathing: The Arched Position Challenge
The bench press breathing protocol requires adaptation for the supine position and the thoracic arch that powerlifting technique and performance optimization create. In the flat bench press without significant arch: the diaphragmatic breathing mechanics are undisturbed by position, and the breath-and-brace before the unrack, maintained through descent and the sticking point, with controlled exhalation at lockout follows the same sequence as the squat. In the arched bench press (whether powerlifting arch or moderate performance arch): the ribcage elevation that arch creates reduces the diaphragmatic breathing space available and shifts more of the breathing volume toward the upper chest — the technical constraint that elite powerlifters manage through years of practice but that beginners find produces partial bracing at best. The practical guidance for athletes performing moderate arch bench press: prioritize the brace quality over the arch magnitude — a slightly reduced arch that allows full diaphragmatic breath generation produces better performance and safety than the maximum arch that compromises the brace. The breathing sequence for bench press: breath-and-brace taken at arm extension before the bar is removed from the rack (not during the unrack, which requires the breath to have already been established); maintained through the descent, the pause (if used), and through the sticking point at approximately 1/3 of the press height; controlled exhale at or near lockout. For touch-and-go repetitions without pause: the single breath held through the full repetition as described; for paused bench press (the competitive powerlifting standard): the held breath maintained through the pause and the complete ascent, with the longer breath-hold duration making CO2 management particularly relevant for the advanced competitor who pauses at heavy weights. From PubMed review on core stability and performance in upper body resistance exercise, deliberate core bracing during bench press produces measurably greater leg drive contribution and peak force production compared to uninstructed breathing — confirming the full-body bracing benefit that bench press breathing technique provides beyond the spinal stability function it shares with lower body pressing.
Overhead Press and Row Breathing: The Upper Body Patterns
The overhead press breathing technique introduces the specific challenge of the full overhead reach position — the shoulder elevation to lockout that requires thoracic extension at the completion of the press, and the breath management that this thoracic extension position involves. The overhead press breath-and-brace sequence: standing overhead press begins with the same full abdominal breath and 360-degree brace as the squat — the standing position provides the full diaphragmatic space for the abdominal breath that the seated or arched positions reduce. The breath is taken and brace established before the press initiation from the rack position or from the clean catch. The press proceeds through the full range — from the front rack position at the upper chest, through the sticking point at ear height, to the full lockout overhead — against the held brace. The breath release option at lockout (between repetitions) or the maintained single breath for single repetitions both remain appropriate; for multi-repetition sets, the controlled breath reset at the top position maintains CO2 management while re-establishing the brace for each repetition. The ceiling height consideration for the overhead press breathing cue: “push your head through the window between your arms” at the lockout position (the ear-forward, head-through technique that prevents cervical hyperextension under load) should be practiced first without load before combining the head-position cue with the IAP breath-and-brace technique, as the simultaneous management of both cues requires the automaticity that separate practice establishes. Rowing movements (barbell row, dumbbell row, cable row) require the breath-and-brace in the same hip-hinge position that the deadlift setup produces for the barbell row variants — the same forward hinge with the maintained abdominal brace that prevents the lower back loading that uninstructed rowing often exposes through spinal flexion under repeated moderate loads across high-repetition sets.
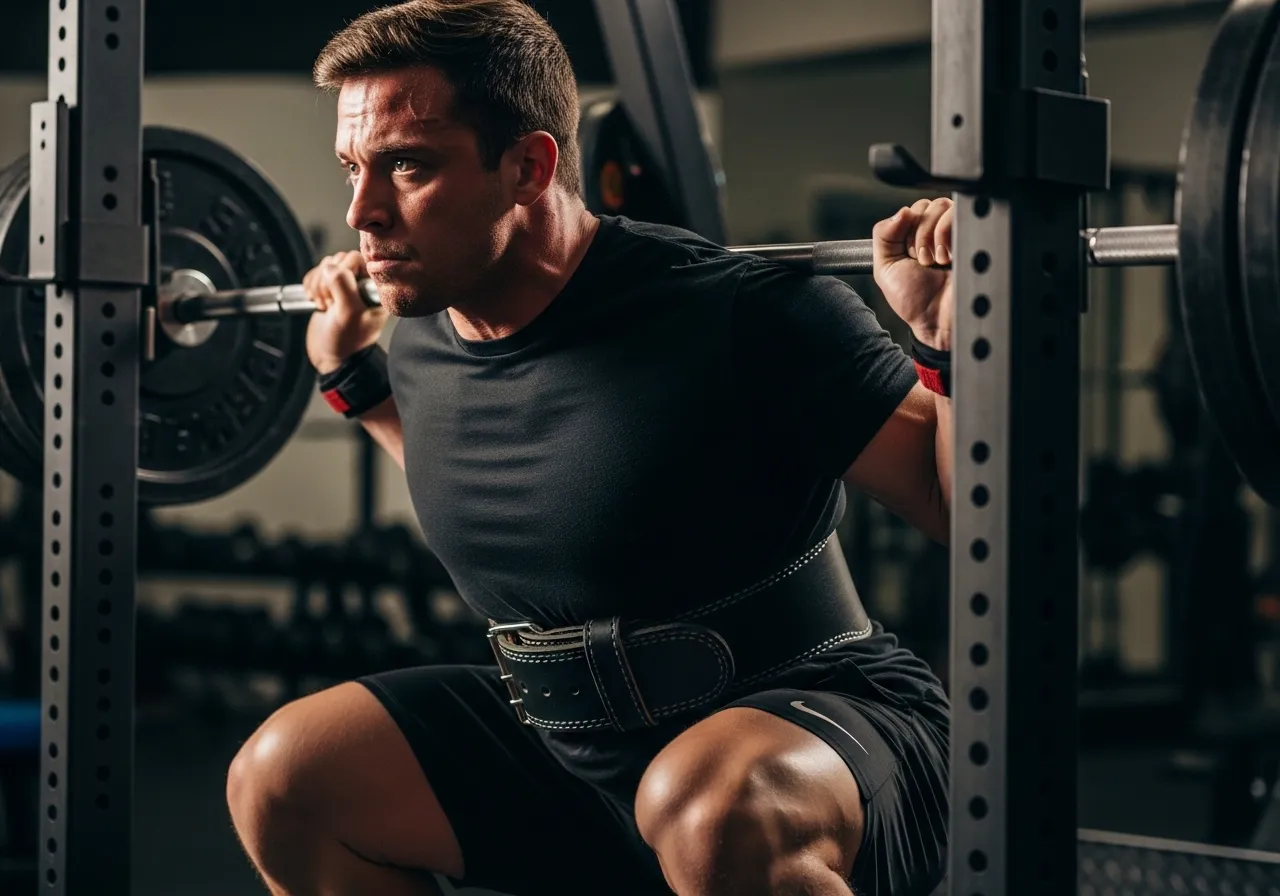
Lifting Belts, Advanced Breathing, and Stage-Rep Protocols
The lifting belt transforms the IAP generation mechanism from a purely muscular effort into a muscle-against-rigid-resistance effort — changing the technique requirements and the performance potential of the breath-and-brace in ways that belt use needs specific guidance on to be employed effectively rather than as a crutch that substitutes for the muscular bracing development.
How to Use a Belt Correctly: Breathing Into the Belt
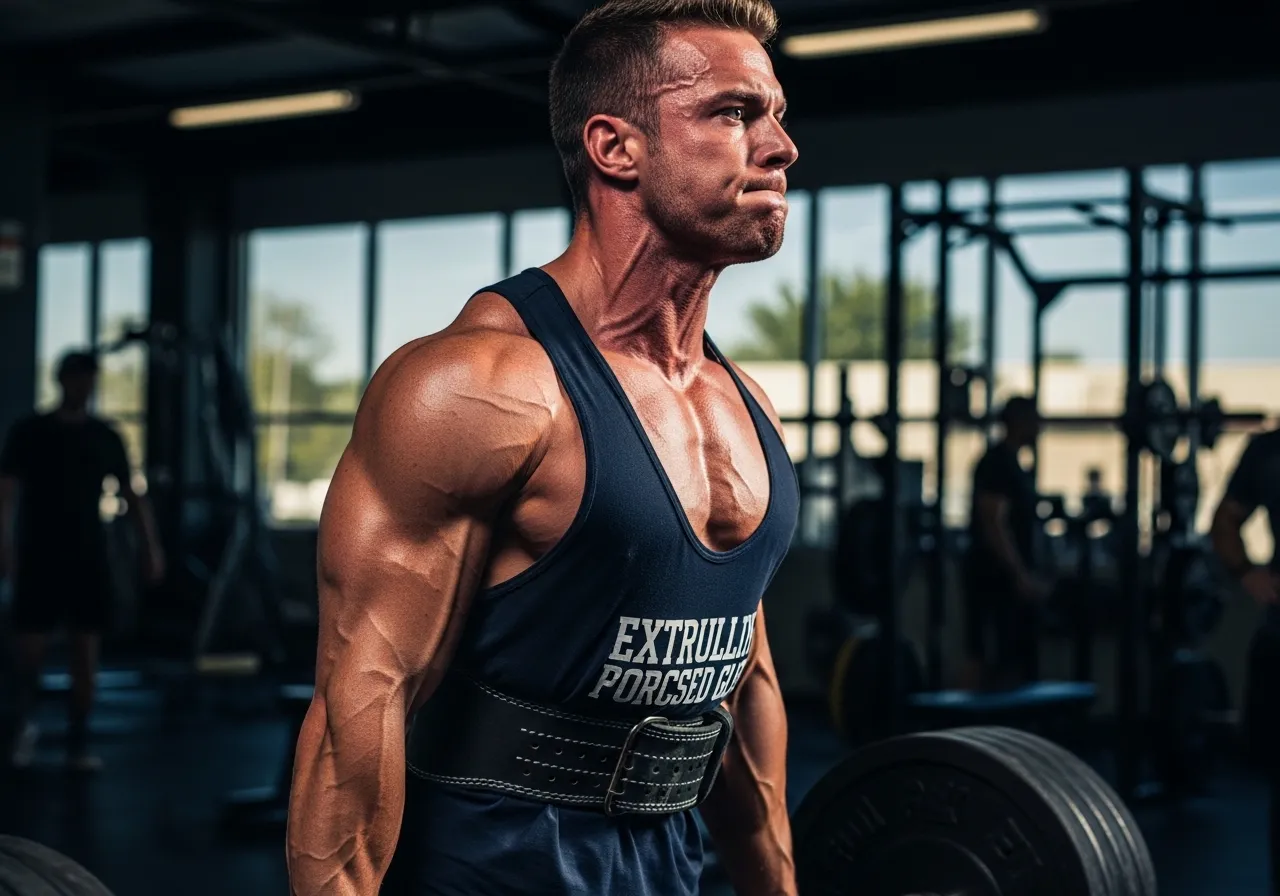
The most common belt use error — wearing the belt and tightening it so firmly that the abdominal expansion of the IAP breath is restricted by the belt’s outer resistance — converts the belt from an IAP enhancement tool into a corset that substitutes the belt’s rigidity for the muscular bracing that the brace should be providing internally. The correct belt use technique: the belt should be tight enough to provide resistance to the expanding abdomen (the “push into the belt” instruction that correctly describes the direction of abdominal pressure generation) but loose enough that the full abdominal expansion of the inhalation is not prevented. The practical test: at the breath-and-brace setup, the belt should be pressed against from inside — the “belly pushing the belt out in all directions” sensation that confirms the diaphragmatic breath is filling the abdominal space that the belt surrounds. If the belt prevents any abdominal expansion at all, it is too tight and should be loosened by one notch. Belt positioning: the belt should sit at the natural waist (or slightly below) for lower body movements — centered over the lumbar-abdominal junction that the IAP support specifically protects. For the overhead press and upper body pressing where a belt is sometimes worn, the slightly higher positioning that keeps the belt below the ribcage while covering the lumbar provides the pressure feedback for the abdominal brace without restricting the thoracic mobility that pressing requires. The belt as training aid rather than dependency: performing some training sessions without a belt, using it only for the heaviest sets of the main compound movements, develops the muscular bracing capability that belt-only training atrophies — the foundation bracing strength that makes the belted IAP generation maximally effective is built through regular beltless work rather than through belt use alone. From NSCA evidence-based lifting belt use guidelines, lifting belts increase intra-abdominal pressure and reduce lumbar compressive forces during heavy compound lifts — but only when combined with correct breathing and bracing technique that the belt assists rather than replaces.
Multi-Rep Breathing Protocols for Higher-Rep Sets
The single-rep breath-and-brace protocol described throughout this article is most appropriate for near-maximal loads (above 85% of one-rep maximum) where the maximum IAP that each repetition generates justifies the CO2 accumulation that the held breath creates. For the moderate-to-high repetition sets (6-15 reps at 65-80% of 1RM) that most hypertrophy training involves, the stage-breathing approach provides the IAP benefit with better CO2 management that the longer sets require. The stage-breathing protocol for moderate-rep sets: exhale during the concentric phase (the exertion direction of the lift — the press up, the pull up, the squat ascent), and inhale during the eccentric phase (the loading direction — the bench press descent, the squat descent, the deadlift lowering). This breathing pattern provides partial IAP maintenance on both phases because the brace component of the sequence (the core muscle contraction) is maintained throughout the set even as the breath cycles — the dissociation of the breath-cycle from the brace that the experienced lifter achieves through practice is the key skill that makes stage-breathing work without full breath holding. The modified stage-breath for heavier moderate-rep sets (4-6 reps at 80-85% of 1RM): brief held brace at the most mechanically disadvantaged point of each repetition (the bottom of the squat, the bar break of the deadlift, the sticking point of the press) with controlled breath cycling between repetitions — a hybrid approach that maintains IAP specifically where it matters most while allowing the breath reset that CO2 management requires at this rep range. From PubMed breathing strategy and core stability research during resistance exercise, the bracing component of IAP generation contributes to spinal stability independently of the breath-hold component — confirming that the stage-breathing approach that maintains bracing with cycled breathing provides meaningful spinal stability even when the full Valsalva breath-hold is not used.

Breathing Practice, Common Questions, and Building the Habit
The theoretical understanding of lifting breathing technique is straightforwardly acquired; the automatic application of correct breathing under load requires weeks of deliberate practice before it becomes the reflex that the distraction of heavy lifting does not disrupt. This section provides the practice protocols that accelerate the technique’s internalization and addresses the most common questions about breathing technique implementation.
How to Practice Breathing Technique Before Applying It to Heavy Loads
The most effective way to build lifting breathing technique is through isolated practice at low or zero load before incorporating it into heavy lifting — following the motor learning principle that complex movement patterns are best learned in their component parts before being integrated at the full performance level that heavy loading introduces. The breathing drill sequence for developing the breath-and-brace technique: Drill 1 — supine diaphragmatic breathing (lying on back, one hand on chest and one on abdomen, practicing the abdomen-rise-chest-still breath pattern that diaphragmatic breathing produces) — 5 minutes daily until the pattern is automatic. Drill 2 — standing abdominal breath with brace against a 10 kg plate (pressing the loaded plate against the abdomen while taking the diaphragmatic breath and bracing against it, feeling the plate pressed outward) — 10 repetitions, producing the correct “pressure against resistance” sensation that the belt and heavy load should produce during actual lifting. Drill 3 — Valsalva practice without load (take the full breath, establish the brace, hold for 3-4 seconds, release) — developing the breath-timing and brace-quality that heavy lifts require at zero risk and full focus on technique. Drill 4 — bodyweight squat with full breath-and-brace — applying the technique to the movement pattern at bodyweight before any loading. Each drill phase should be practiced until automatic (typically 2-4 weeks of daily practice) before progressing to the next. The technique that is automatic at bodyweight will hold under moderate loads and eventually under heavy loads — the automaticity development that deliberate low-load practice produces is the prerequisite for reliable execution when the cognitive demand of heavy lifting competes for the attention that technique requires.
Cardiovascular Considerations: Blood Pressure and the Valsalva
The cardiovascular effects of the Valsalva maneuver during heavy lifting warrant clear guidance that neither dismisses the concern as irrelevant nor applies clinical caution to healthy athletes without cardiovascular risk factors. The blood pressure response during a heavy Valsalva squat in a healthy trained individual: systolic blood pressure can reach 300-400 mmHg during the effort phase of a maximal squat — a value that is far above the clinical definition of hypertension (140/90 mmHg) but that the cardiovascular system of a trained, healthy individual manages safely because the duration is extremely brief (3-6 seconds per repetition), the vascular walls of a trained individual have superior distensibility and endothelial function that reduces the structural risk of transient pressure spikes, and the heart rate and cardiac output adaptations of training improve the cardiac function that manages the Valsalva’s venous return reduction. The contraindications that remain appropriate: diagnosed hypertension (particularly systolic above 160 mmHg at rest), history of cardiovascular disease, stroke or TIA, aortic aneurysm, glaucoma, and pregnancy are the clinical conditions where the modified power-breathing technique (partial glottis restriction rather than full Valsalva) should replace the full Valsalva as a safety accommodation. Athletes with any of these conditions should discuss their training breathing strategy with their treating physician or cardiologist before performing heavy compound lifts regardless of the general population guidance that healthy athlete data supports. From American Heart Association resistance training and cardiovascular health guidelines, properly executed resistance training including heavy compound movements with appropriate breathing technique is safe and beneficial for cardiovascular health in individuals without underlying cardiovascular disease — with medical clearance and modified breathing technique recommended for those with cardiovascular risk factors.
Frequently Asked Questions About Lifting Breathing
Q: Should I always hold my breath during heavy lifts? A: For near-maximal loads (above 85% of 1RM) and all single-rep maximal efforts, yes — the Valsalva or power-breath provides the IAP that maximum load safety requires. For moderate loads in higher-rep sets (8-15 reps), the stage-breathing or braced cyclic breathing described above is more appropriate for CO2 management. Q: How do I know if I’m bracing correctly? A: Press your hands firmly against your sides at the waist while bracing — you should feel the lateral musculature push outward against your hands. An alternative test: have a training partner press their fingers into your sides at the natural waist while you brace — the abdominal hardness against the fingers confirms core activation. Q: Can breathing technique replace a lifting belt? A: Correct breathing and bracing technique provides the IAP foundation that the belt enhances — it cannot fully replicate the magnitude of IAP that a belt allows the same technique to generate, but it provides the complete IAP benefit that beltless lifting requires and develops the muscular bracing capacity that makes belted lifting more effective. For recreational athletes, beltless lifting with proper breathing technique is sufficient for the loading ranges that most training involves. Q: What happens if I exhale during the hardest part of a lift? A: The brace releases as the breath escapes, reducing IAP at the most mechanically disadvantaged position of the lift — the moment of highest spinal loading coincides with the lowest spinal support. This is the mechanism of most non-traumatic lifting-related spinal injuries. The “don’t exhale at the bottom” principle is one of the most important safety rules in lifting. Q: Is there any risk to holding my breath during heavy lifts? A: For healthy individuals without cardiovascular contraindications, the brief breath-holds during individual repetitions present minimal risk. The risk scenarios to be aware of: prolonged Valsalva across multiple consecutive repetitions without breath reset (producing progressive venous return impairment); performing high-rep sets with continuous breath-hold rather than stage-breathing; and the specific contraindicated populations described above. Q: How long does it take to develop automatic good breathing technique? A: The isolated drills described take 4-6 weeks of daily practice to become automatic at low loads; reliable application under heavy loading typically requires 3-6 months of consistent practice because the cognitive demand of heavy lifting temporarily disrupts technique automaticity that lighter loads preserve. From PubMed motor learning principles applied to strength training technique development, 6-12 weeks of deliberate practice at progressive loads produces measurable improvements in technique consistency and automatic execution of complex movement patterns — confirming that the 4-8 week isolated breathing drill timeline this article recommends is appropriate for the technique automaticity that heavy loading eventually needs to rely on.
Breathing Technique as the Foundation of Long-Term Lifting Safety
The athlete who masters lifting breathing technique does not experience a dramatic overnight performance transformation — the improvement is gradual, expressed in the consistency of bar paths that improved bracing produces, the absence of the “back tweak” incidents that poor IAP exposes, and the decade-over-decade training continuity that avoiding the cumulative spinal loading that uninstructed breathing allows across thousands of heavy sets eventually prevents. The calculation of breathing technique’s value over a training career: assume 4 heavy training sessions per week, 20 heavy sets per session, 50 training weeks per year — 4,000 heavy sets annually, accumulating to 40,000 sets per decade. Each of these sets either loads the lumbar spine with or without the IAP protection that correct breathing technique provides. The structural difference in cumulative lumbar loading between the 40,000-set training decade with correct breathing and the same decade with uninstructed breathing is the mathematical basis for why the coaches who emphasize breathing technique as the first and most important technical priority in heavy lifting are not being pedantic — they are protecting the physical infrastructure that 30-40 years of training requires maintaining. Learn the technique. Practice it deliberately at low loads. Make it automatic before applying it at maximal loads. And let the spinal health and consistent performance that reliable IAP generation produces be the quiet, consistent return on the attention that this fundamental lifting skill deserves.