
How to Protect Your Wrists During Push-Ups and Planks
⚠️ Disclaimer: The information in this article is for general educational purposes only and does not constitute medical, nutritional, or professional fitness advice. Individual results may vary. Always consult a qualified healthcare professional or certified fitness trainer before starting any new exercise program, changing your diet, or making decisions about injury treatment or recovery. If you experience pain, discomfort, or any unusual symptoms during exercise, stop immediately and seek professional guidance.
Why Wrists Are So Vulnerable During Pushing Exercises
Wrist pain during push-ups, bench press, overhead press, and other pushing exercises is among the most common complaints from both beginner and experienced gym-goers — affecting an estimated 30–40% of regular practitioners of these movements at some point in their training career. The vulnerability of the wrist during pushing exercises is not accidental: it reflects a specific combination of anatomical characteristics, biomechanical demands, and training errors that make the wrist one of the most stress-concentrated joints in the upper body exercise toolkit. Understanding why the wrist is vulnerable is the prerequisite to understanding how to protect it effectively — and the anatomy and mechanics of this vulnerability are both fascinating and directly actionable. I experienced significant wrist pain during push-ups for over a year before understanding the specific alignment and loading error that was producing my symptoms — a correction that took seconds to learn and immediately resolved the pain that had persisted through months of rest and ice.
The Wrist’s Structural Vulnerability: Why It Wasn’t Designed for Load-Bearing
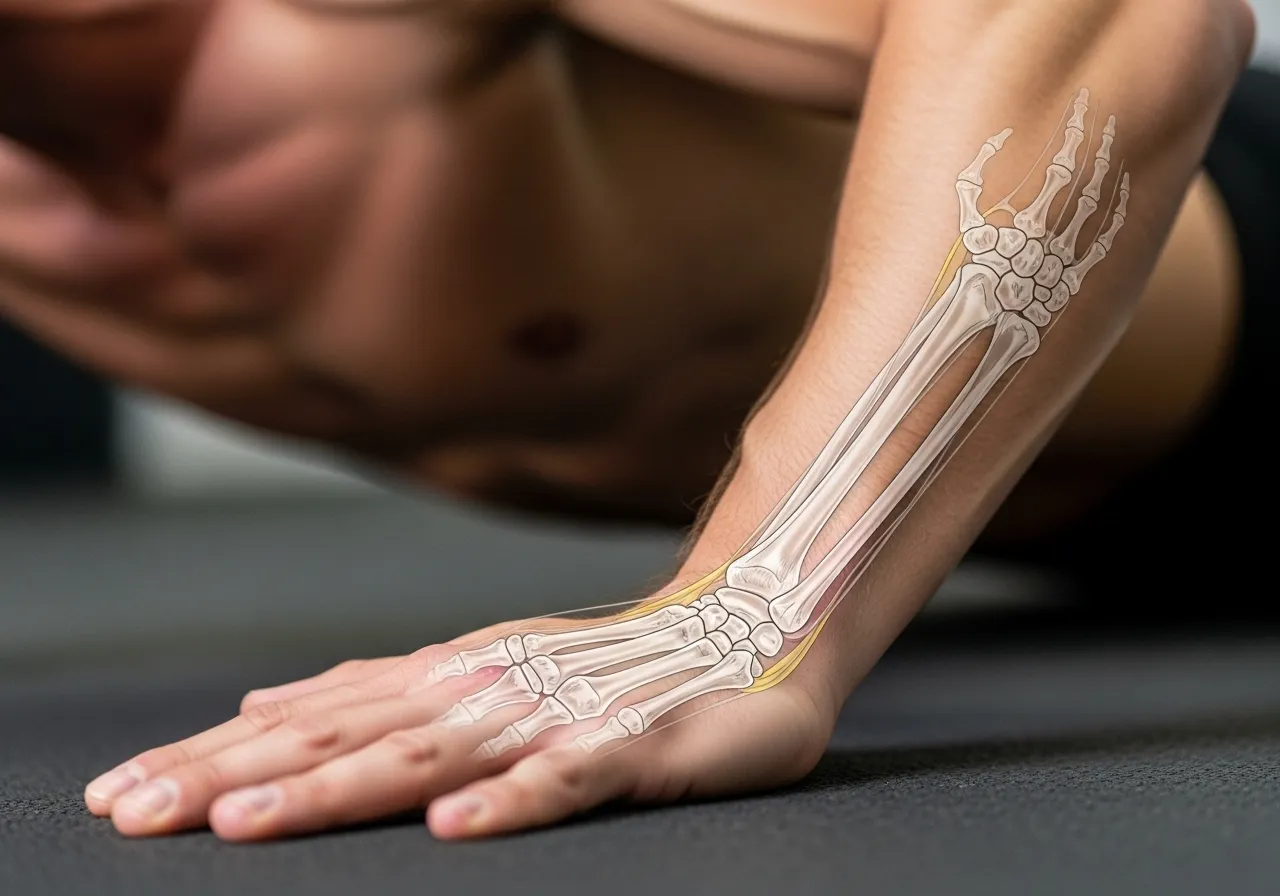
The human wrist evolved primarily as a precision grasping and manipulation joint — the complex of 8 carpal bones, 15 joints, 20+ ligaments, multiple tendons, and the intricate carpal tunnel containing the median nerve and nine flexor tendons was shaped by millions of years of selection for fine motor control, not for supporting body weight or pressing heavy loads overhead. Compare the wrist to the hip or knee — weight-bearing joints with large, congruent articular surfaces, thick cartilage, strong capsular ligaments, and powerful surrounding musculature developed specifically for load bearing. The wrist’s articular surfaces are smaller, its ligaments comparatively thin, and its surrounding musculature (the wrist flexors and extensors) primarily functions for wrist movement rather than for joint stabilization under load. When we place the wrist in a push-up position — bearing a significant fraction of body weight through the extended wrist with the hand flat on the floor — we are loading a joint in a position (full extension) where its passive stabilizers are maximally stressed and the mechanical advantage of its dynamic stabilizers is at its worst. This fundamental mismatch between the wrist’s evolved function (precision manipulation) and the demands we place on it (load bearing in extension) explains why wrist protection strategies are necessary for sustainable pushing exercise rather than optional accessories.
The Extension Loading Problem: What Happens in Your Wrist During a Push-Up
The standard push-up hand position — flat palms on the floor with wrists in approximately 90 degrees of extension — places the wrist in the position of maximum carpal compression and maximum stress on the dorsal wrist ligaments and capsule. At 90 degrees of wrist extension, the carpal bones are maximally compressed against each other (the proximal row — scaphoid, lunate, triquetrum — loading against the radius and ulna), the ligaments on the back of the wrist (dorsal radiocarpal and intercarpal ligaments) are fully stretched, and the tendons of the finger flexors are acutely angled over the distal carpal row — creating the friction and impingement that produce the aching, hot pain of wrist extensor tendinopathy. Research from the Journal of Orthopaedic & Sports Physical Therapy on wrist biomechanics confirms that wrist joint loading during a standard push-up position reaches peak compressive forces of 1.0–1.2 times body weight — applied to a joint surface area approximately one-fifth the size of the hip’s articular surface. The force concentration is 5–6 times greater per unit area in the wrist than in the hip during comparable loading activities, explaining the disproportionate wrist vulnerability despite the lower absolute loads involved in pushing exercises compared to lower body training.
Why Wrist Problems Compound Over Time Without Intervention
Wrist pain from pushing exercises frequently follows a characteristic progression pattern: initial mild discomfort during the first few sets (the warming-up sensation that many athletes mistakenly dismiss as normal), progressing to more persistent pain during training that resolves within hours, then progressing to pain that persists between training sessions, and eventually to pain during daily activities that announces the chronic injury that inadequately addressed early symptoms eventually produce. The progressive nature of wrist injuries from pushing exercises reflects the cumulative microtrauma mechanism: each session of inadequately protected wrist loading deposits a small increment of tissue damage (micro-tears in the dorsal capsule, micro-fractures in the carpal cartilage, micro-tears in the extensor tendons) that the body’s repair processes can manage when the damage increment is small and recovery is adequate. When the damage rate exceeds the repair rate — from training frequency that doesn’t allow sufficient recovery, progressive load increases that continually elevate the damage dose, or technique errors that concentrate stress — the cumulative damage accumulates into the symptomatic injury that requires extended rest to resolve. The critical intervention window is the early mild discomfort stage: addressing the biomechanical errors, building wrist-specific strength, and implementing protection strategies when symptoms are mild prevents the injury progression that makes wrist problems significantly more disruptive and time-consuming to resolve.
Risk Factors That Increase Wrist Vulnerability
Not all athletes experience equal wrist vulnerability during pushing exercises — specific anatomical, training, and lifestyle factors significantly modulate injury risk. Wrist mobility restriction: limited wrist extension range of motion (from prolonged keyboard use, previous injury, or insufficient wrist mobility training) forces compensation in the standard push-up position — either placing the wrist in a more acutely stressful partial extension (loading the ligaments at a mechanically disadvantaged angle) or altering body position in ways that redistribute stress to the shoulders and lower back. Athletes with less than 70–80 degrees of pain-free wrist extension are at elevated risk for wrist symptoms in standard push-up positions and benefit most from the modified positions and equipment solutions described later. Previous wrist injury: the scar tissue from previous wrist sprains, fractures, or surgery reduces the compliance of the capsule and ligaments — concentrating stress in the less compliant repaired tissue rather than distributing it across the normal tissue. Athletes with previous wrist injuries need more aggressive protective strategies from the beginning of pushing exercise training, not from the point of re-injury. Rapid training volume escalation: beginners who rapidly increase push-up volume (from 0 to 100 push-ups per session in weeks) do not allow the progressive adaptation of wrist connective tissue that the bone, cartilage, and ligament require — these structures adapt to loading far more slowly than muscle (12–24 weeks versus 4–6 weeks for muscle adaptation) — producing the connective tissue stress injuries that muscle performance outpacing connective tissue capacity creates. High keyboard and phone use: prolonged wrist flexion (typing, texting) followed by maximal wrist extension (push-up position) creates the tissue transition stress that compresses acutely tight wrist flexor tendons against the carpal bones in the extended position — explaining why office workers and heavy phone users frequently experience more wrist discomfort in push-up positions than athletes without prolonged wrist flexion occupations.
The Difference Between Wrist Pain Types: What Yours Is Telling You
Different wrist pain presentations during pushing exercises indicate different underlying problems — and correctly interpreting the pain signal guides the appropriate intervention rather than the generic rest-and-ice response that addresses symptoms without causes. Dorsal (back of wrist) pain during or after push-ups: the most common presentation, typically indicating capsular and ligamentous stress from excessive extension loading. This is the “push-up wrist” pain that technique modifications and strength training most directly address. Volar (palm side) pain: less common in pushing exercises, more often associated with carpal tunnel pressure from the extended wrist compressing the carpal tunnel contents. Requires the hand angle and wrist position modifications that reduce carpal tunnel compression. Radial (thumb side) pain: often indicates de Quervain’s tenosynovitis (irritation of the abductor pollicis longus and extensor pollicis brevis tendons) or scaphoid stress — require clinical evaluation to distinguish between these conditions, both of which alter the hand position recommendations during training. Sharp, sudden onset pain: potential ligament tear or fracture — requires immediate cessation of loading and clinical evaluation before returning to pushing exercises. Understanding which pain type is present allows the appropriate conservative management strategy to be selected, and identifies the presentations that require clinical evaluation rather than self-managed training modification.
When to See a Professional vs. Self-Manage
The boundary between self-manageable wrist discomfort and clinical evaluation-requiring wrist injury is important to recognize — pushing through clinically significant wrist injuries with only technique modifications and bracing risks the chronic injury development that appropriate early clinical intervention prevents. Self-management is appropriate for: mild, symmetrical dorsal wrist discomfort that resolves within 24 hours of training and does not limit daily activities; discomfort that improves with the technique and position modifications described in this article; and gradually improving symptoms with appropriate training modification and wrist strengthening. Clinical evaluation is indicated for: any acute, sudden-onset pain during exercise; pain that persists more than 48–72 hours after training; pain during daily activities that do not involve pushing exercises; swelling, bruising, or visible deformity; pain associated with clicking, catching, or instability sensations in the wrist; or symptoms that do not improve after 2–3 weeks of appropriate conservative management. The sports medicine or orthopedic evaluation for wrist pain typically includes physical examination, range of motion testing, stress testing of the specific ligaments, and imaging (X-ray at minimum, MRI if soft tissue injury is suspected) — providing the specific diagnosis that guides targeted treatment rather than the generic wrist care that undirected self-management provides.

Wrist Anatomy and the Mechanics of Push-Up and Bench Press Strain
A functional understanding of wrist anatomy — beyond the superficial “it hurts when I do push-ups” level — provides the mechanistic insight that makes technique corrections intuitive rather than arbitrary rules to memorize. The wrist is not a single joint but a complex of multiple articulations whose coordinated function determines whether pushing exercises load the joint safely or stressfully.
The Carpal Architecture: 8 Bones, 15 Joints, and One Complex System
The wrist proper consists of 8 carpal bones arranged in two rows: the proximal row (scaphoid, lunate, triquetrum, and pisiform) articulates with the radius and ulna above; the distal row (trapezium, trapezoid, capitate, and hamate) articulates with the metacarpals (hand bones) below. The radiocarpal joint (radius-to-proximal-carpal-row) is the primary wrist articulation — providing most of flexion, extension, radial deviation, and ulnar deviation. The midcarpal joint (proximal-to-distal-row) contributes additional range of motion and is critical for the force transmission pathway during weight bearing. In the push-up extended position, compressive force travels from the hand through the metacarpals to the distal carpal row, through the midcarpal joint to the proximal carpal row, and then to the radius and ulna — a chain of small bones and cartilaginous surfaces transmitting the full body weight load through a series of small joint surfaces. The scaphoid is the most frequently fractured carpal bone and one of the most stress-concentrated structures in this force pathway — it bridges both carpal rows and bears disproportionate compressive and shear stress during wrist extension loading, explaining its elevated fracture risk in falls on outstretched hands and its specific vulnerability in high-volume push-up training without adequate preparation.
Ligament System: The Passive Stabilizers Under Stress
The wrist’s ligament system — the passive stabilizers that maintain carpal alignment and limit excessive range of motion — consists of intrinsic ligaments (connecting carpal bones to each other) and extrinsic ligaments (connecting the forearm bones to the carpals). In the push-up extended position, the dorsal (back of wrist) extrinsic ligaments — particularly the dorsal radiocarpal ligament and the dorsal scapholunate ligament — are fully tensioned as they resist the extension moment that the body weight loading creates. These ligaments in full tension are more vulnerable to the micro-tear accumulation that repetitive loading produces — and the dorsal radiocarpal ligament’s specific anatomy (relatively thin, with less vascular supply than other wrist ligaments) makes it particularly susceptible to the chronic repetitive strain that high-volume push-up training without wrist preparation imposes. The scapholunate ligament — arguably the most clinically important wrist ligament — connects the scaphoid and lunate (two proximal carpal bones) and is the primary restraint against the dissociation of these bones that creates the painful and functionally limiting scapholunate dissociation injury. Repetitive stress to the scapholunate ligament from improperly loaded pushing exercises is a recognized contributor to the ligament laxity that eventually produces symptomatic scapholunate instability in some athletes — making the scapholunate ligament a specific protection target in wrist care for pushing exercise practitioners.
The Tendon Complex: Flexors, Extensors, and the Carpal Tunnel
The finger and wrist flexor tendons (9 tendons total) pass through the carpal tunnel — a narrow bony and ligamentous canal on the palm side of the wrist — before attaching to the finger bones. In wrist extension, the carpal tunnel narrows and the flexor tendons are acutely angled against the proximal edge of the carpal tunnel (the proximal wrist crease), increasing friction between the tendons and their sheaths and elevating pressure on the median nerve that shares the tunnel. Extended-wrist positions sustained during push-ups and plank variations can raise carpal tunnel pressure significantly — explaining why individuals with pre-existing or emerging carpal tunnel syndrome experience wrist and finger symptoms during pushing exercises that might not otherwise cause pain. The extensor tendons (finger and wrist extensors) are under tension during the push-up extended position as they resist the passive wrist flexion that body weight would produce without their active engagement — a sustained tension that produces the dorsal wrist fatigue and aching that high-volume push-up training generates in the extensor mechanism. Understanding that both the flexor and extensor tendon systems are stressed during extended-wrist pushing exercises — in different ways and through different mechanisms — explains why wrist symptoms in this context can present on either the dorsal or volar surface and why both sides of the wrist benefit from the preparatory mobility and strengthening work that comprehensive wrist care provides.
How Bench Press Differs From Push-Ups Biomechanically
While both push-ups and bench press involve horizontal pushing with wrist extension loading, their biomechanical wrist demands differ in ways that affect injury risk profiles and protective strategies. Bench press wrist mechanics: the grip on a barbell allows the hand to position in a wrist-neutral or slightly extended position (depending on grip width and hand orientation) — but many athletes allow the barbell to roll into the fingers with the wrist extending beyond the neutral position, creating the “broken wrist” alignment that concentrates dorsal wrist stress without the benefit of the floor contact feedback that push-up hand position provides. The load in bench press is typically much higher absolute weight than body weight in push-ups — the compressive forces through the wrist are proportionally higher, making the alignment errors in bench press potentially more acutely injurious than equivalent errors in push-up performance. Push-up wrist mechanics: the fixed hand position on the floor provides a stable base but constrains the wrist in extension throughout the movement — there is no equivalent of the barbell grip adjustment that allows wrist position modification during bench press. However, the lower absolute load (body weight versus potential 1.5–2× body weight in bench press) reduces the acute injury risk per repetition, while the high-repetition nature of push-up training (push-ups are often performed for high reps) increases the cumulative exposure. The protective strategy emphasis differs accordingly: bench press wrist protection focuses primarily on grip position and wrist alignment in the barbell grip; push-up wrist protection focuses on hand position, modified push-up variations, and wrist preparation for the extended-position loading.
Overhead Press Wrist Mechanics: The Most Demanding Orientation
The overhead press — pressing weight from shoulder height to full arm extension overhead — creates a unique wrist loading challenge that differs from both the horizontal push-up and bench press orientations. In the overhead press, the wrist must support the load with the forearm approximately vertical and the hand oriented to balance the weight directly above the wrist — any deviation from this stacked alignment creates a bending moment at the wrist that the wrist stabilizers must resist in addition to the vertical compressive load. The most common overhead press wrist error: allowing the wrist to flex (the weight drifts in front of the wrist rather than balanced directly over it), creating the anterior bending moment that stresses the volar wrist ligaments and concentrates load on the anterior carpals. The barbell grip position matters enormously: a false grip (thumb over bar rather than wrapped around) with the bar balanced across the proximal palm and wrist in neutral is the standard strength training recommendation for overhead press wrist safety — but many athletes grip too low in the fingers with excessive wrist extension, duplicating the bench press alignment error in a more challenging overhead orientation. Research from British Journal of Sports Medicine on upper extremity injury prevention identifies overhead pressing with poor wrist alignment as a significant contributor to both wrist and elbow injuries in strength training — confirming the overhead press as a priority target for wrist technique education alongside the horizontal pushing movements.
The Role of Forearm Muscles in Wrist Protection During Pushing
The dynamic stabilizers of the wrist during pushing exercises — the muscles that actively control wrist position, resist the extension moment from load, and protect the passive ligamentous structures from excessive strain — are the forearm flexors and extensors whose strength and endurance directly determine how well the wrist is protected during pushing exercise. The wrist extensors (primarily extensor carpi radialis longus and brevis, and extensor carpi ulnaris) must maintain the desired wrist position against the flexion tendency that body weight creates in the push-up extended position — and when these muscles fatigue, the wrist sags into greater extension, increasing ligamentous stress and carpal compression as the dynamic support of the extensor mechanism fails. This fatigue-related protection loss explains why wrist symptoms are often worst at the end of training sessions or during the final reps of high-rep sets — the forearm extensors have accumulated sufficient fatigue that their stabilization contribution is reduced, leaving the passive ligamentous structures to manage more of the load than they are designed to sustain. Building forearm extensor strength and endurance through the specific exercises described in the strengthening section directly addresses this protection deficit — developing the dynamic stability that protects the wrist’s passive structures through the highest-demand portions of training when fatigue-related protection loss would otherwise occur.
7 Proven Techniques to Protect Your Wrists During Pushing Movements
The technique modifications and positioning adjustments that protect the wrist during pushing exercises are specific, evidence-informed, and immediately effective — many athletes experience significant pain reduction on their very first session after implementing these changes. Each technique targets a distinct mechanism of wrist stress, and combining multiple techniques provides greater protection than any single modification alone.
Technique 1: Neutral Wrist Alignment in Push-Ups
The most impactful single technique change for push-up wrist pain is modifying hand position to reduce wrist extension from the standard 90 degrees to a more wrist-neutral 45–60 degrees. This is achieved by rotating the hands outward (fingers pointing toward 10 and 2 o’clock rather than 12 o’clock) — the external rotation of the hand reduces the required wrist extension for the same forearm-to-floor angle by changing the relationship between the wrist joint axis and the direction of the load. The specific instruction: place the hands slightly wider than shoulder-width with the fingers angled outward at approximately 30–45 degrees from straight ahead, feel the load shift into the base of the palm (the thenar eminence and hypothenar eminence — the muscular pads at the base of the thumb and little finger) rather than concentrated at the central wrist. This hand position also engages the shoulder external rotators more effectively — improving overall upper body mechanics and reducing the shoulder impingement risk that internally rotated push-up positions create alongside the wrist stress. Practice the hand position with body weight on hands-and-knees before attempting full push-ups, confirming that the load distribution feels comfortable in the new position before adding the demand of the full movement.
Technique 2: Knuckle Push-Ups for Severe Wrist Extension Intolerance
Knuckle push-ups — performed with closed fists resting on the knuckles rather than open palms — bring the wrist to approximately neutral alignment by elevating the hand from the floor while maintaining the push-up body position. The neutral wrist position eliminates the dorsal capsule and ligament stress that extension imposes, allowing athletes with significant wrist extension intolerance to perform push-up volume without wrist symptoms. The technique: make a fist with each hand (thumb outside fingers, not tucked inside), place the knuckles on the floor with the flat knuckle surface providing the contact base, and perform the push-up with the same body mechanics as standard push-ups but with wrists in neutral rather than extension. The surfaces where knuckle push-ups are comfortable: exercise mats, carpet, and gym flooring with some cushioning are appropriate; hard tile or concrete is uncomfortable for the knuckles without gloves or additional padding. For athletes building toward standard push-ups without wrist symptoms, knuckle push-ups allow training volume maintenance while wrist mobility and strength are developed through the specific exercises that improve extended-position tolerance over time.
Technique 3: Push-Up Handle Usage
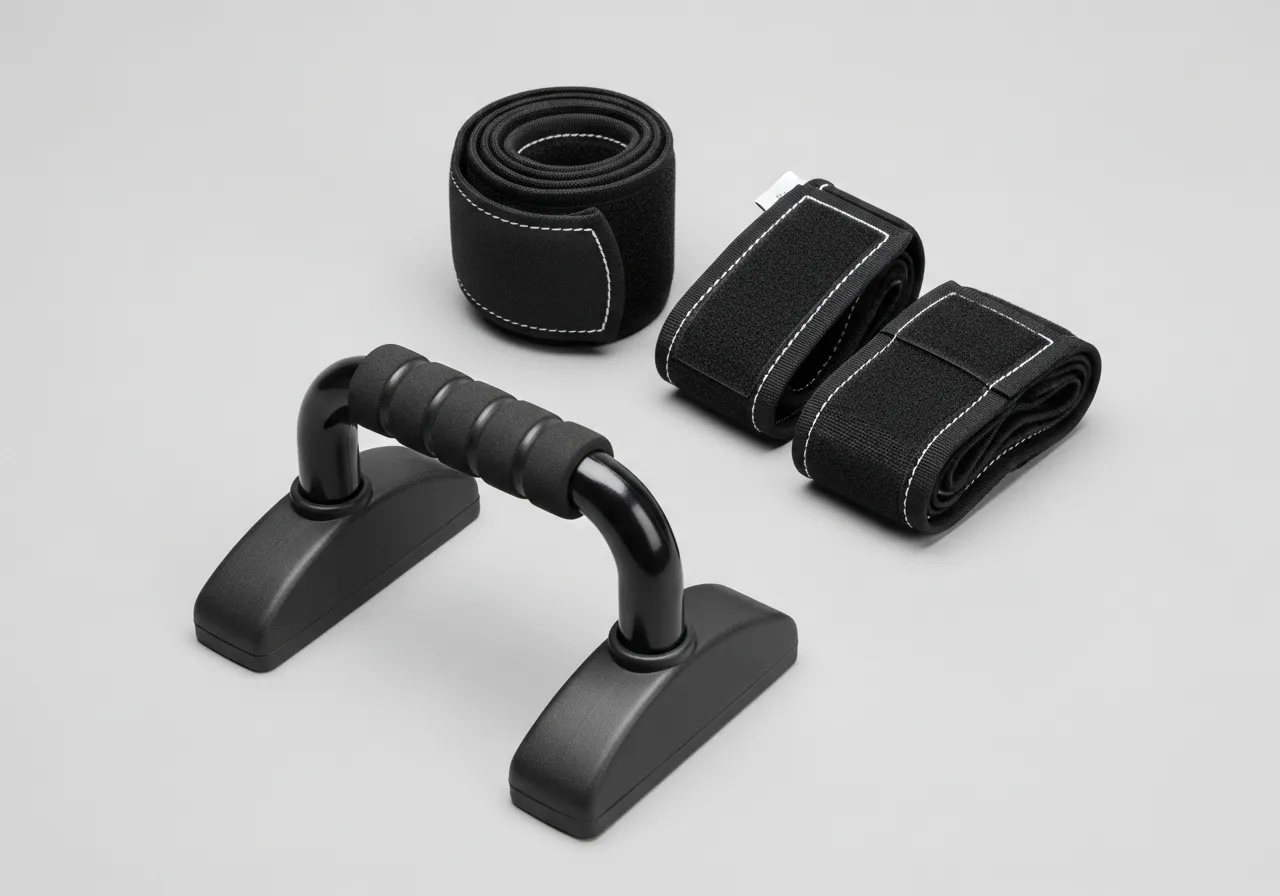
Push-up handles — small portable platforms with handles that elevate the hand from the floor while providing a grip surface — allow push-ups in a neutral or even slightly flexed wrist position that completely eliminates the wrist extension load of floor-based push-ups. Available in both parallel (handles oriented in the direction of the push-up) and rotating (handles that rotate during the push-up, reducing shoulder internal rotation) configurations, push-up handles are inexpensive (typically $15–40), highly portable, and immediately effective for athletes whose wrist symptoms are directly caused by extension loading rather than structural wrist pathology. The parallel handle configuration provides the wrist protection benefit; the rotating configuration adds the shoulder health benefit that rotation during pressing produces. The biomechanical advantage beyond wrist position: elevated handles also increase push-up range of motion at the bottom position (the chest can descend below the hands), potentially increasing pectoral stretch and the hypertrophic stimulus of the movement while simultaneously protecting the wrist.
Technique 4: Bench Press Grip Position and Bar Alignment
The most common bench press wrist error — and the one most amenable to immediate correction — is allowing the barbell to roll toward the fingers rather than maintaining it in the proximal palm. The correct bench press grip: the bar rests across the base of the palm (just distal to the wrist crease) and the mid-palm, with the heel of the hand bearing the primary load and the fingers wrapped around the bar for security rather than support. The thumb should be wrapped around the bar (not in a false/thumbless grip) for safety and to activate the forearm muscles that contribute to wrist stability. From this proximal palm position, the wrist can maintain a neutral or very slightly extended position (5–15 degrees) throughout the lift — dramatically reducing the dorsal capsule stress that the 30–45 degree extension of the finger-based grip creates. The grip width also affects wrist stress: a wider grip brings the wrist into greater ulnar deviation (tilting toward the little finger side) under load; a narrower grip reduces ulnar deviation. Experimenting with grip width within the range of 1–2× shoulder width while attending to wrist comfort during the lift identifies the individual’s optimal position.
Technique 5: Wrist Warm-Up Before Every Pushing Session
Cold, stiff wrists entering a pushing session are significantly more injury-prone than warmed, mobile wrists — the viscoelastic properties of the ligaments and capsule that make them more compliant and less injury-vulnerable require 5–8 minutes of progressive loading to develop. The standard wrist warm-up sequence before any pushing session: wrist circles (10 rotations in each direction, starting small and progressively increasing amplitude), prayer position stretches (palms together, fingers up, elbows out — gently push hands down to produce wrist extension stretch, holding 20–30 seconds), reverse prayer position (backs of hands together, fingers down — gently push hands up for wrist flexion stretch, 20–30 seconds), wrist extension progressive loading (hands on floor, on knees, progressive weight shift forward to gradually load the extended position before bearing full body weight), and finger-spread tendon glides (spreading fingers wide then closing into a fist, 10 repetitions — mobilizing the flexor tendons through their full range before the load they will bear in the pushing exercises). Total warm-up time: 5–7 minutes. This investment prevents the cold-tissue micro-trauma that abrupt loading of unprepared wrist structures produces — and athletes who implement consistent wrist warm-ups before pushing sessions report dramatically reduced session-by-session discomfort compared to those who begin pushing exercises without preparation.
Technique 6: Progressive Volume Management
The connective tissue adaptation timeline for the wrist (12–24 weeks for ligament and cartilage adaptation) is significantly slower than the muscular adaptation that allows push-up performance to improve quickly — and the discrepancy between muscle strength gains and connective tissue adaptation is a primary driver of wrist injury in progressing athletes. The safe progression principle: increase pushing exercise volume (sets × reps) by no more than 10% per week, and reduce volume by 30–40% every 4th week (the deload week that allows connective tissue recovery). For beginning push-up practitioners: start with as few as 3 sets of 5–8 push-ups per session (3× per week), progressing by 1–2 reps per set per week rather than the rapid volume escalation that muscle capacity might allow. The deload is particularly important in the first 6 months of pushing exercise training, when the connective tissue is accumulating the largest relative adaptation stimulus relative to its current capacity. Athletes who have been performing push-ups comfortably for years need less conservative progression management — their wrist connective tissue has adapted to the loading and can tolerate faster volume increases — but even experienced athletes benefit from periodic volume reduction to allow the connective tissue recovery that prevents chronic overuse from accumulating.
Technique 7: Load Distribution Cueing — The “Spread the Floor” Cue
The “spread the floor” or “screw the hands into the floor” cue — actively attempting to externally rotate the hands while they remain stationary on the floor — engages the shoulder external rotators and modifies the internal distribution of forces within the wrist joint in a way that reduces stress on the most vulnerable structures. The mechanism: actively attempting to externally rotate the hands (while they remain stationary) creates an internal torque through the forearm that subtly supinates the radius relative to the ulna, modifying the radiocarpal joint contact pattern from the more stressful dorsal-concentrated contact of passive extension to a more distributed contact pattern that reduces peak stress on any single carpal or ligamentous structure. This cue is widely used in both physical therapy for wrist rehabilitation and in strength coaching for push-up and bench press technique — its effectiveness is clinically well-supported even if the specific biomechanical mechanism continues to be refined in research. Implementation: before each push-up set, set the hands in the desired position, then actively attempt to rotate them outward (like unscrewing two jar lids) while maintaining their position — feel the increased tension in the shoulder external rotators and the subtle change in forearm and wrist muscle activation that the cue produces. Maintain this active external rotation torque throughout the entire push-up set.

Wrist Strengthening Exercises: Building the Foundation for Pain-Free Pushing
Wrist protection during pushing exercises requires not only technique modifications and equipment solutions, but the underlying wrist and forearm strength that provides the dynamic stability the passive structures cannot adequately supply alone. A systematic 8–12 week wrist strengthening program — performed consistently alongside pushing exercise training — builds the forearm muscle capacity that turns the wrist from a chronic vulnerability into a durable, load-tolerant joint.
Wrist Flexion and Extension Strengthening: The Core Exercises
The fundamental wrist strengthening exercises — wrist curls (flexion) and wrist extensions — develop the forearm flexors and extensors that are the primary dynamic stabilizers of the wrist during pushing exercise. Wrist extension strengthening (the priority for push-up wrist protection, targeting the muscles that must resist the wrist-flexion tendency of push-up loading): seated or kneeling with the forearm resting on the thigh or a table with the hand hanging off the edge, hold a light dumbbell (1–3kg to start) with the palm facing down (pronated). Extend the wrist (lifting the back of the hand toward the ceiling), hold for 1–2 seconds, and return slowly to the neutral or slightly flexed starting position. The eccentric (lowering) phase is as important as the concentric — perform the lowering phase over 3–4 seconds to build the eccentric strength that must resist the sudden loading of the extended position during weight-bearing. Start with 3 sets of 15–20 repetitions, 3× per week, using a weight that allows completion of all reps with controlled technique. Progress to heavier weight when 20 repetitions are achievable with full range and control. Wrist flexion strengthening (providing the balance between flexor and extensor strength that joint health requires): same setup but with palm facing up (supinated), curl the wrist toward the forearm, hold, and lower slowly. Balance the volume between flexion and extension exercises to prevent the strength imbalance that exclusive extension training would create.
Radial and Ulnar Deviation Strengthening
Radial deviation (tilting the wrist toward the thumb side) and ulnar deviation (tilting toward the little finger side) are movements that the standard wrist curl exercises do not address — but that are stressed during both push-ups (the laterally distributed hand position creates radial and ulnar deviation loading) and bench press (grip width and hand position create the deviation forces that require the radial and ulnar deviators to actively stabilize). The hammer exercise: hold a dumbbell or a weighted hammer (a dowel with a weight attached at one end is the classic tool) with the elbow bent 90 degrees and the forearm in neutral (thumb up). Move the wrist through radial deviation (hammer head toward ceiling) and ulnar deviation (hammer head toward floor) in a controlled, slow arc. The longer the lever arm (the heavier the dumbbell end relative to the handle end), the greater the wrist deviation demand — allowing progressive load increase by increasing lever length rather than absolute weight. Perform 3 sets of 12–15 repetitions in both radial and ulnar directions, 2–3× per week. The combined wrist flexion, extension, radial, and ulnar deviation strengthening program develops the full 360-degree wrist dynamic stability that protection in varied pushing exercise orientations requires — ensuring that no direction of loading catches the wrist’s dynamic stabilizers unprepared.
Wrist Circles and Controlled Articular Rotations
Controlled articular rotations (CARs) of the wrist — slowly rotating the wrist through its full available range under maximal muscular tension and control — develop both the passive range of motion and the active neuromuscular control through that range that functional wrist stability requires. The wrist CAR: standing with the elbow fixed at 90 degrees of flexion and the forearm horizontal, slowly rotate the wrist through flexion, ulnar deviation, extension, and radial deviation in a continuous circle — maintaining maximum muscular tension throughout the rotation to load the full circumference of the wrist’s soft tissue. Perform 5–8 slow, maximally controlled rotations in each direction daily, taking 5–8 seconds for each complete rotation. The therapeutic and performance value of CARs for wrist health is supported by the Functional Range Conditioning research base and widely adopted in sports medicine rehabilitation — providing the active mobility and neuromuscular awareness through the full wrist range that passive stretching alone does not develop. Daily wrist CARs (incorporated into the pushing exercise warm-up described earlier) take 2–3 minutes and produce the joint health, proprioceptive awareness, and active range control that protect the wrist through the demanding positions that pushing exercises require.
Grip Strength Training and Its Wrist Protection Role
Grip strength — the force production of the finger flexors and hand intrinsic muscles — contributes to wrist stability during pushing exercises through the co-contraction mechanism: strong grip engagement during pushing exercises stiffens the wrist through increased muscle activity in the forearm flexors, providing additional dynamic stability that supplements the passive ligamentous restraints. Research on grip strength and wrist injury risk from PubMed wrist injury prevention research finds that higher grip strength is associated with lower wrist injury incidence in activities that involve wrist loading — supporting grip training as a wrist injury prevention tool rather than purely a performance variable. The most effective grip training methods for wrist protection: heavy deadlifts and rows with double overhand grip (the full-effort grip required for heavy pulls develops grip strength most effectively as a training byproduct); farmer’s carries (walking while holding heavy dumbbells or kettlebells — the sustained grip under load develops grip endurance as well as strength); and plate pinches (pinching a weight plate between thumb and fingers for time — developing the finger flexor endurance that sustained gripping during pushing exercises requires). Supplement grip training with rubber band finger extension exercises (the antagonist to the finger flexors) to maintain the flexor-extensor balance that joint health requires — 3 sets of 25 repetitions with rubber bands or a purpose-built hand exerciser, 3× per week.
The Push-Up Negative for Wrist Eccentricity Conditioning
The push-up negative — lowering from the top of a push-up over 5–8 seconds under full eccentric control — specifically trains the eccentric wrist extensor strength that must resist the sudden wrist loading of the push-up descent phase. Eccentric strength (the ability to control force while the muscle lengthens) is the most injury-protective form of strength for tendons and ligaments — the eccentric demand of resisting load during lengthening is the primary stress that tendon injuries involve, and building eccentric capacity through slow, controlled loading reduces tendon injury risk more effectively than concentric (lifting) strength training alone. The push-up negative protocol: from the top push-up position (arms extended), lower the body over 5 seconds, focusing on actively controlling the wrist extension angle throughout the descent — do not allow the wrist to sag into greater extension as the demand increases at the bottom of the range. At the bottom, step the knees to the floor (or use a bench) and reset to the top position for the next repetition. Perform 3–5 negatives per set, 2–3 sets per session, 2–3× per week. As eccentric strength builds (typically over 4–8 weeks of consistent practice), the controlled descent of normal push-ups improves significantly — and the wrist discomfort during the bottom of the push-up range (the most extended position and the highest-demand moment for the wrist extensors) decreases as the eccentric capacity that prevents passive ligament loading increases.
Loaded Wrist Extension Position Holds
Specific loaded stretching of the wrist in the extended position — gradually conditioning the tissues to tolerate the loading position that pushing exercises require — is the most direct training intervention for athletes who experience wrist discomfort specifically at the extended position. The progressive loaded extension sequence: begin on hands and knees (approximately 25% body weight through hands), with hands flat and wrists in the natural extended position. Hold for 30–60 seconds, attending to any wrist discomfort and noting the specific location and character. If comfortable, slowly shift more body weight forward (increasing the load through the extended wrist) by moving the knees slightly backward. Progress each week by shifting slightly more weight forward and increasing the hold duration — over 8–12 weeks, this systematic loaded extension conditioning adapts the dorsal capsule, extrinsic wrist ligaments, and carpal joint surfaces to the extended-position loading that push-ups require, dramatically improving comfort and tolerance in this position. The loading progression follows the connective tissue adaptation timeline — the 12–24 week period required for ligament and capsule adaptation explains why this conditioning must be maintained consistently for months rather than weeks to produce the structural changes that lasting wrist extension tolerance requires.
Equipment Solutions: Wraps, Handles, and Training Tools for Wrist Safety
Equipment solutions for wrist protection during pushing exercises range from the simple and inexpensive (wrist wraps, push-up handles) to the specialized and high-tech (accommodating resistance tools, specialized bars). Each equipment solution addresses specific wrist loading mechanisms — and selecting the appropriate tool requires understanding which mechanism is causing the specific athlete’s wrist symptoms.
Wrist Wraps: Compression, Support, and Proprioception
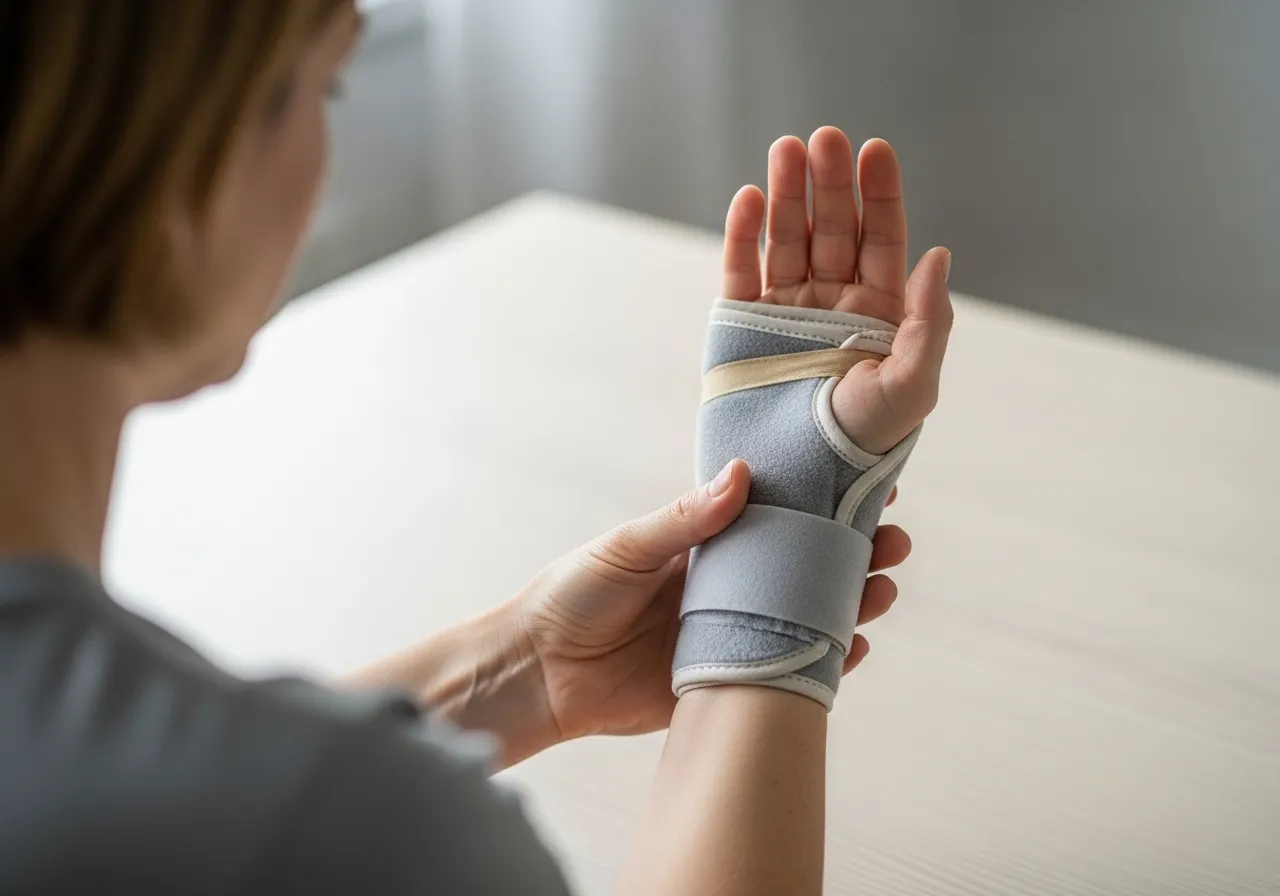
Wrist wraps — elastic or non-elastic bands wrapped around the wrist joint before pushing exercise — provide three distinct protective benefits: external compression that supports the wrist capsule and reduces swelling from microtrauma; passive restriction of the extreme extension that creates peak wrist stress; and proprioceptive enhancement through the tactile feedback that wrap pressure provides, improving the athlete’s awareness of wrist position during exercise. The two primary wrist wrap types serve different purposes: elastic cloth wraps (typically 45–60cm long) are the standard for athletic use — they provide moderate support while maintaining the movement freedom that training requires, and they are appropriate for the majority of athletes seeking wrist protection during pushing exercises. Stiff powerlifting wraps (typically 60–100cm long, with significant rigidity) restrict wrist extension more aggressively and are designed for near-maximal pressing — they are appropriate for heavy bench press sessions but may restrict the natural wrist movement that moderate-intensity training benefits from. Wrist wrapping technique: start the wrap at the base of the hand, wrap around the wrist joint 2–3 times, then extend slightly onto the forearm for the final wraps to provide the forearm anchor that prevents migration during exercise. The wrap should be firm enough to feel supported but not tight enough to restrict circulation — the hand should not feel numb or turn discolored during use. A key usage principle: wraps are a supportive tool during training, not a substitute for the wrist strength and mobility development that provides permanent protection. Relying on wraps as the only protective strategy without the complementary strengthening program perpetuates the underlying weakness that creates wrap dependency rather than resolving it.
Push-Up Handles: The Most Effective Single Tool for Push-Up Wrist Pain
Push-up handles — elevated handles that allow push-ups with the wrist in neutral or slightly flexed position — are the most effective single equipment solution for athletes whose wrist symptoms are specifically caused by the extended-wrist position of floor-based push-ups. The handle elevation (typically 10–15cm) converts the extended-wrist position to a neutral or slightly flexed position — eliminating the dorsal capsule and ligament stress that extension loading creates and allowing full push-up volume without wrist symptoms for athletes who cannot tolerate floor-based push-ups even with technique modifications. The rotating push-up handles provide the additional benefit of allowing the wrists to rotate naturally during the push-up — the supination at the bottom and pronation at the top that rotating handles allow match the shoulder’s natural internal rotation preference during the pressing movement and reduce the shoulder impingement risk that fixed-handle or floor-based push-ups can create alongside wrist stress. Push-up handles are compatible with all push-up progressions (decline, incline, wide, narrow, single-leg) and travel well — a complete push-up training toolkit for athletes with wrist limitations that doesn’t require gym membership or specialized equipment beyond the handles themselves. Cost: parallel fixed handles typically $15–25; rotating handles $25–40 — one of the highest value-to-cost ratios in gym equipment.
Cambered Bars and Specialty Bars for Bench Press Wrist Safety
For athletes who bench press with wrist discomfort that technique modifications and wraps do not adequately address, specialty barbells provide the modified wrist loading that resolves symptoms. The Swiss bar (multi-grip bar) — a barbell with multiple grip options at neutral (parallel grip) and supinated orientations — allows the bench press with the wrist in neutral alignment rather than the pronated alignment of standard barbell bench press. The neutral grip reduces both wrist extension stress and shoulder internal rotation, making it the preferred bar choice for athletes with combined wrist and shoulder issues during bench press. The hex bar (trap bar) — primarily a lower body tool — has been adapted for floor press variations that allow neutral grip horizontal pushing with reduced wrist and shoulder stress. Dumbbells for bench press: switching from barbell to dumbbell bench press allows each wrist to find its natural orientation during the press rather than being locked into the fixed pronated position of the barbell — many athletes find that dumbbell bench pressing with a semi-supinated (neutral/angled) grip eliminates the wrist discomfort they experience with barbell pressing while providing similar pectoral training stimulus.
Gymnastics Grips and Yoga Props for Wrist Assistance
Gymnastics grips — leather or synthetic hand protection designed for high-bar and ring work — provide both the palm padding that reduces pressure pain and the wrist strap that offers mild support for gymnastics athletes who perform high-volume pushing and bearing weight on hands. While primarily designed for bar friction management, the wrist strap component provides proprioceptive feedback and mild support that some athletes find helpful during floor-based pushing exercises. Yoga blocks for push-up modification: placing the hands on elevated yoga blocks (at heights of 10–15cm) replicates the benefit of push-up handles with equipment that many athletes already own from yoga practice — the elevation converts the extended-wrist floor contact to a more neutral angle, reducing wrist extension load while maintaining the push-up movement pattern. Resistance bands for wrist distraction during mobility: a resistance band looped around the wrist and anchored provides a distracting force on the wrist joint that can temporarily reduce the compressive pain of push-up loading — useful as an immediate intervention during training when wrist discomfort emerges, and as a mobility aid during the wrist extension conditioning work that builds long-term tolerance.
Finger Extension Bands and Rehabilitation Tools
Finger extension resistance bands — small rubber bands or purpose-built hand rehabilitation tools that resist finger extension — are the antagonist training tool for the grip and finger flexor strength development that grip training builds. The importance of finger extensor training for wrist health: chronically overworked finger and wrist flexors (from grip training, keyboard use, and phone use) develop tightness and relative overstrength compared to the extensors — creating the flexor-dominant imbalance that reduces wrist joint centration and increases injury risk from repetitive loading. Corrective exercises: place a rubber band around all five fingers, then spread the fingers against the band resistance (full hand open against the rubber band) for 25 repetitions, 3 sets, 3× per week. The individual finger variant: loop the band around each finger and the thumb separately to isolate individual flexor-extensor pairs. Commercial finger strengthening tools (Powerfingers, PROHANDS) provide the engineered resistance progression that improvised rubber bands cannot — allowing precise resistance specification and independent digit training that comprehensive hand rehabilitation and injury prevention programs benefit from. Including 5 minutes of finger extensor training after pushing exercise sessions addresses the flexor-dominant imbalance that pushing exercises themselves reinforce, providing the muscular balance that long-term wrist health requires.

Recovering From Wrist Pain: What to Do When Damage Is Already Done
Athletes who are already experiencing wrist pain during pushing exercises require a specific recovery approach that allows the injured tissues to heal while maintaining as much fitness as possible and systematically rebuilding the wrist capacity that injury has compromised. The recovery framework differs from the prevention framework — the injured wrist requires load management, not just load optimization.
The Acute Phase: Days 1–7 After Wrist Pain Onset
The acute management of a new wrist injury from pushing exercises follows the PEACE and LOVE framework — the evidence-based update to the RICE (rest, ice, compression, elevation) protocol that more accurately captures the physiological management that promotes healing. PEACE: Protection (avoid the aggravating loading for 1–3 days, not prolonged rest), Elevation (elevate the wrist above heart level for the first 24–72 hours to reduce swelling), Avoid anti-inflammatories (NSAIDs may inhibit the early inflammatory healing response — consult a physician before using them for sports injuries), Compression (mild wrist compression reduces swelling without restricting circulation), Education (understand the injury nature and realistic recovery timeline). LOVE (begins after the initial 1–3 day protection phase): Load (gradually reintroduce light load through pain-free range), Optimism (positive recovery expectations improve functional outcomes), Vascularization (light cardiovascular exercise that doesn’t load the wrist promotes blood flow and healing without irritating the injury), Exercise (active rehabilitation exercises through pain-free range from days 3–7). The specific acute phase wrist rehabilitation: gentle wrist circles through pain-free range beginning day 2–3, light grip squeeze with a soft ball (pain-free), and light forearm muscle activation without wrist joint loading (isometric finger flexion and extension without wrist movement). Complete avoidance of pushing exercises during the acute phase — the inflammatory healing process requires the absence of further mechanical irritation to proceed efficiently.
The Subacute Phase: Weeks 2–6
The subacute phase begins when acute inflammation has resolved (typically 5–14 days after injury onset) and the tissue repair processes are actively depositing new collagen to restore the structural integrity of the injured ligament, tendon, or capsule. This phase requires progressive loading — providing the mechanical stimulus that guides collagen organization and cross-linking into the aligned, strong scar tissue that functions well under pushing exercise loads, rather than the disorganized scar tissue that forms without loading stimulus. The subacute rehabilitation progression: begin with the loaded wrist extension conditioning exercise (hands and knees, body weight shifted forward progressively) as described in the strengthening section, starting at the weight that produces 3–4/10 discomfort (mild, tolerable) and progressing each session toward increasing load within this tolerance level. The 3–4/10 rule: loading that produces more than 4/10 pain is excessive and risks re-irritating the healing tissue; loading below 3/10 is insufficient to stimulate the mechanotransduction that guides healthy scar tissue formation. Navigating the 3–4/10 loading window throughout the subacute phase requires daily reassessment and adjustment — beginning each session conservatively and progressing within the session based on actual tissue response rather than predetermined load targets. Begin wrist strengthening exercises (flexion, extension, radial and ulnar deviation with light resistance) at 2–3 weeks post-injury, again within the 3–4/10 pain tolerance window.
Returning to Pushing Exercises After Wrist Injury
The return to pushing exercises after wrist injury follows a specific graduated progression that prevents the premature return that re-injures healing tissue and extends the recovery timeline far beyond what patient, progressive return would require. The return-to-pushing progression: wall push-ups (standing, hands on wall — minimal wrist load and the most forgiving starting position); incline push-ups (hands elevated on a bench or table at 30–45 degrees — progressive body weight increase as angle decreases toward horizontal); push-ups on push-up handles (full body weight through neutral wrist position); push-ups on knuckles (full body weight in neutral wrist); and finally standard floor push-ups with the protective technique modifications (external hand rotation, “screw the floor” cue) that prevent recurrence. Each stage requires 2–3 sessions of comfortable, pain-free performance (no more than 2/10 discomfort) before advancing to the next stage — typically meaning 1–2 weeks at each stage for a total return timeline of 6–10 weeks from injury to full push-up capability for uncomplicated injuries. The rush-to-return impulse — resuming normal training before the progression is complete — is the primary cause of re-injury and extended recovery timelines: the tissues that felt ready at week 4 were not yet adapted to full loading demands, and the re-injury at week 5 resets the recovery clock to near zero. Patience with the progression is the fastest route to durable return.
Taping Techniques for Wrist Support During Recovery Training
Therapeutic taping during the return-to-pushing phase provides support, proprioceptive feedback, and mild loading restriction that allows training to resume at earlier stages of recovery than untaped training would permit. Rigid athletic tape (zinc oxide tape, 38mm width) applied in a fan or figure-8 pattern around the wrist joint provides the external support that injured wrist structures benefit from during the progressive return phase — the rigid tape acts as a passive reinforcement of the capsule and ligaments that are healing and not yet at full strength. Kinesiology tape (KT Tape, RockTape) applied with light tension along the line of the dorsal extensor tendons provides proprioceptive feedback (the tension on the skin enhances wrist position awareness) and mild structural support that is less restrictive than rigid tape — appropriate for athletes who have progressed to moderate-load pushing exercise but still benefit from the proprioceptive enhancement that taping provides. Important taping limitation: tape provides support but does not substitute for the underlying tissue healing that the recovery progression requires — tape over significantly damaged tissue allows pain-free function at the cost of re-traumatizing tissue that requires unloaded healing rather than supported loading. Use taping as a facilitator of progressive loading within appropriate recovery windows, not as a bypass for the recovery timeline that the tissue’s healing biology dictates.
When Surgery Is Considered: Advanced Wrist Pathology
The majority of wrist injuries from pushing exercises respond to the conservative management described in this article — technique modification, progressive strengthening, appropriate load management, and patient return to sport. However, specific wrist injuries may require surgical consideration when conservative management over 3–6 months fails to produce functional recovery. The conditions most commonly requiring surgical evaluation: complete scapholunate ligament rupture (producing the carpal instability that non-surgical management cannot restore to functional stability); triangular fibrocartilage complex (TFCC) tears that produce persistent ulnar-sided wrist pain and clicking unresponsive to conservative management; ganglion cysts that produce persistent dorsal wrist pain and pressure from their position; and intra-articular fractures or displaced fractures that require surgical reduction for acceptable alignment. The decision to proceed to surgery involves the athlete, orthopedic surgeon, and consideration of the functional limitations of the injury, the likelihood of successful conservative outcome, the surgical risks, and the athlete’s performance goals — a clinical decision that this article cannot guide beyond acknowledging that it exists for a minority of wrist injuries when conservative approaches are exhausted.